Personal email configuration, as the name suggests, is configured for personal use by the employees of your organization. Email is an essential communication tool for every business. It facilitates receiving or sending notifications and interacting or engaging with your customers.
LeadCenter houses the Email Configuration section to configure your email account and send emails to your prospects.
By default, emails will be sent from no-reply@leadcenter.ai.
However, if you require interacting with your prospects via your email account, you can do so easily with LeadCenter.
Before you configure your email ID in LeadCenter.ai, you need to get the SMTP settings from your email provider. We have listed the configurations to be done for Gmail, Hotmail & Outlook, and Yahoo.
The Hotmail & Outlook SMTP information is provided in the table below:
| Full Name or Display Name | Your Name |
|---|---|
| Account Name, User name, or Email address | Your full email address |
| Password | Your Hotmail or outlook password (*or App password if two-step verification is enabled in your account) |
| SMTP Server | smtp-mail.outlook.com or smtp.office365.com |
| Port (for TLS/STARTTLS) | 587 |
* If two-step verification is enabled for your office 365 account, you will need to create an app password. Follow the following steps to create an app password. You can create and delete app passwords from the Additional security verification page for your work or school account.
For information about SMTP settings for Hotmail and Outlook, click here.
To get the SNMP settings from Gmail, do the following:
| Full Name or Display Name | Your Name |
|---|---|
| Account Name, User name, or Email address | Your full email address |
| Password | Use the password generated from step 2 above. This is not your Gmail password This is not your Gmail password |
| SMTP Server | smtp.gmail.com |
| Port (for TLS/STARTTLS) | 587 |
4. If you are still getting an error, you may need to enable Less secure app access. Click here to enable it.
The Yahoo SMTP information is provided in the table below:
| Full Name or Display Name | Your Name |
|---|---|
| Account Name, User name, or Email address | Your full email address |
| Password | Use the generated App Password.This is not your yahoo password To set up an App Password, click here. |
| SMTP Server | smtp.mail.yahoo.com |
| Port (for TLS/STARTTLS) | 587 |
To configure personal email in your LeadCenter account, follow these steps:
With advanced integration, you can easily connect your Outlook or Office 365 account with LeadCenter.
To manually set up the personal email configuration, follow the steps 1-4 from the above section and see below for more information:
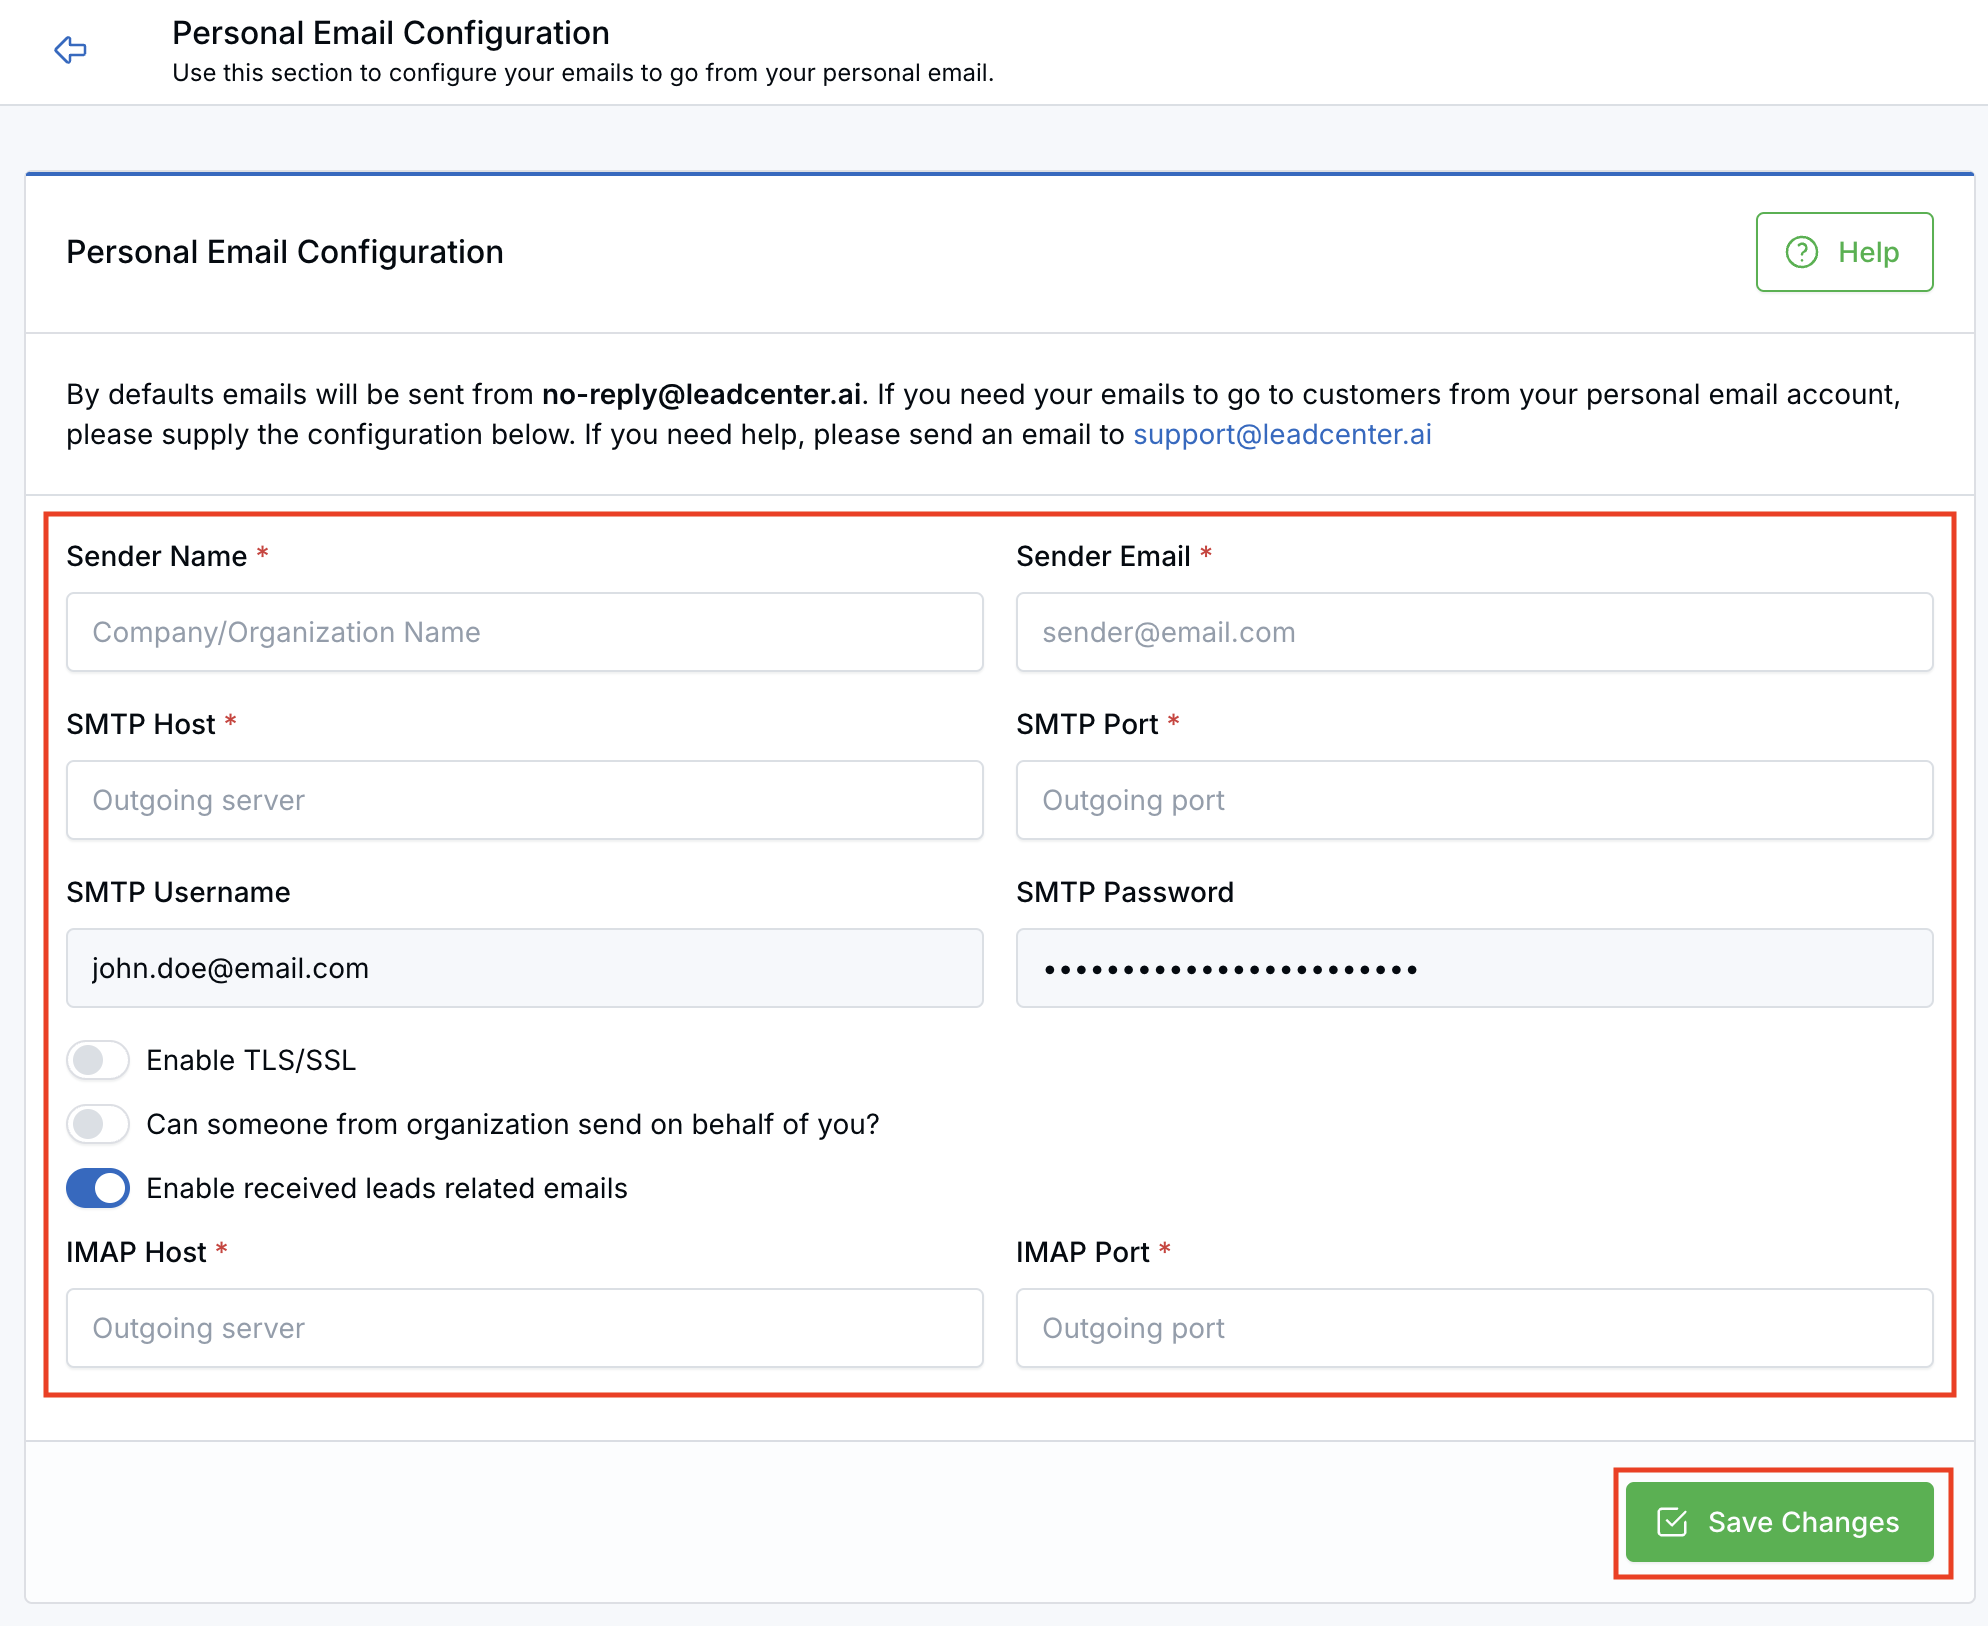
The E-mail Configuration page is displayed.
| Field Name | Description |
|---|---|
| Sender Name | Add the name of the sender. The sender name is always a part of the business email address and reflects in the “From” part of an email so that the recipient can identify the sender of the email. |
| Sender Email | Add the sender's email ID. This is your email ID, from which the email will be sent to your customer. Once you configure this email ID, it will replace the default LeadCenter.ai no-reply@leadcenter.ai email ID. |
| SMTP Host | Add the SMTP Host based on your email provider. Refer to the Prerequisites for E-mail Configuration and follow the steps provided for your email provider. |
| SMTP Port | Add the SMTP Port based on your email provider. Refer to the Prerequisites for E-mail Configuration and follow the steps provided for your email provider. |
| SMTP Username | Add the SMTP Username. |
| SMTP Password | Add the SMTP Password. Refer to the Prerequisites for E-mail Configuration and follow the steps provided for your email provider. |
| Enable TLS/SSL | To enable the TLS/SSL toggle the button to the right.This should always be enabled to send any email. |
| Can someone from organisation send it on behalf of you? | If a user wants to send emails on your behalf this toggle button is used. Enable: When the toggle button is enabled, someone from your organisation will be able to send emails on your behalf of you. Disable: When the toggle button is disabled, someone from your organisation will not be able to send emails on your behalf of you. |
| Enable received leads related emails | If a user wants to receive lead-related emails from your personal email ID to LeadCentre.AI ID. Enable: To receive lead-related emails from their personal mail ID (like @gmail.com, @outlook.com). Disable: If a user does not want lead-related emails from their mail ID (like @gmail.com, @outlook.com) |
After entering the information click on
Example for Gmail email provider
You have successfully configured your email ID.
You can send a test email to verify that your configuration information and email ID are correct.
In the Test Configuration section, enter an email ID and click Send Test Mail.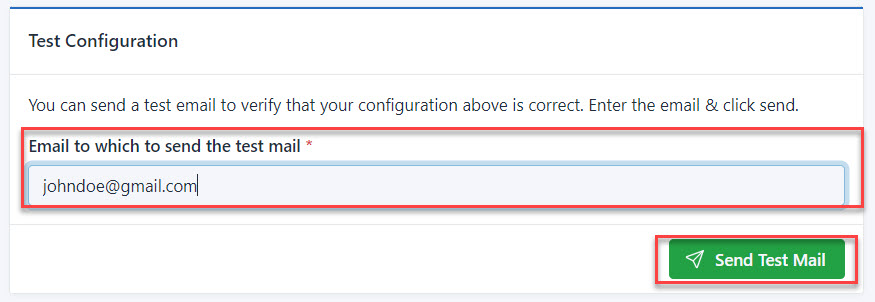
You can delete the configuration from this section. Once the configuration is deleted, mail will be sent from the default LeadCenter.ai no-reply@leadcenter.ai mail ID. This will delete your SMTP settings. Keep in mind that this action is irreversible. In the E-mail Configuration page, go to the Delete Configuration section, type "CONFIRM" and click the Delete Configuration button.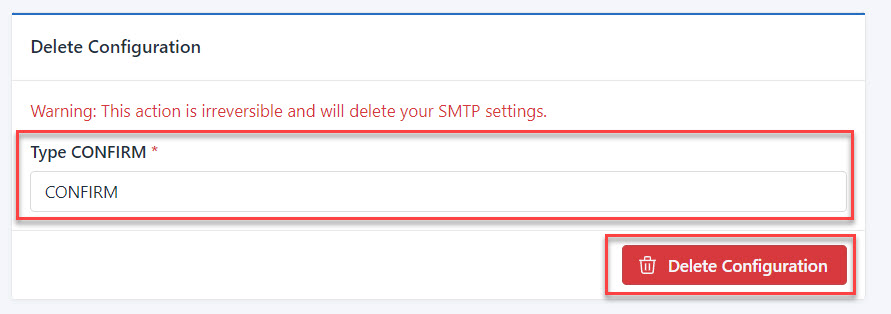
Email is an important part of any business, from receiving or sending notifications to communicating with your customer. The E-mail Configuration section shows how to configure your mail ID to send e-mails. By default, emails will be sent from no-reply@leadcenter.ai. If you need to send emails to your customer from your email account, you need to configure your email ID with other related information.
General email configuration is used to configure a general email account. For Example, sales@company.com to send emails to all your customers.
This account can be used by all members of your organisation. For example: if you have a store, then this configured general email will be common to everyone in your organisation and can be used by all your employees to send emails to your customers.
Before you configure your email ID in LeadCenter.ai, you need to get the SMTP settings from your email provider. We have listed the configurations to be done for Gmail, Hotmail & Outlook, and Yahoo.
To get the SNMP settings from Gmail, do the following:
| Full Name or Display Name | Your Name |
|---|---|
| Account Name, User name, or Email address | Your full email address |
| Password | Use the password generated from step 2 above.This is not your Gmail password |
| SMTP Server | smtp.gmail.com |
| Port (for TLS/STARTTLS) | 587 |
4. If you are still getting an error, you may need to enable Less secure app access. Click here to enable it.
The Hotmail & Outlook SMTP information is provided in the table below:
| Full Name or Display Name | Your Name |
|---|---|
| Account Name, User name, or Email address | Your full email address |
| Password | Your Hotmail or outlook password (*or App password if two-step verification is enabled in your account) |
| SMTP Server | smtp-mail.outlook.com or smtp.office365.com |
| Port (for TLS/STARTTLS) | 587 |
* If two-step verification is enabled for your office 365 account, you will need to create an app password. Follow the following steps to create an app password. You can create and delete app passwords from the Additional security verification page for your work or school account.
For information about SMTP settings for Hotmail and Outlook, click here.
The Yahoo SMTP information is provided in the table below:
| Full Name or Display Name | Your Name |
|---|---|
| Account Name, User name, or Email address | Your full email address |
| Password | Use the generated App Password.This is not your yahoo password To set up an App Password, click here. |
| SMTP Server | smtp.mail.yahoo.com |
| Port (for TLS/STARTTLS) | 587 |
To do the email configuration, do the following;
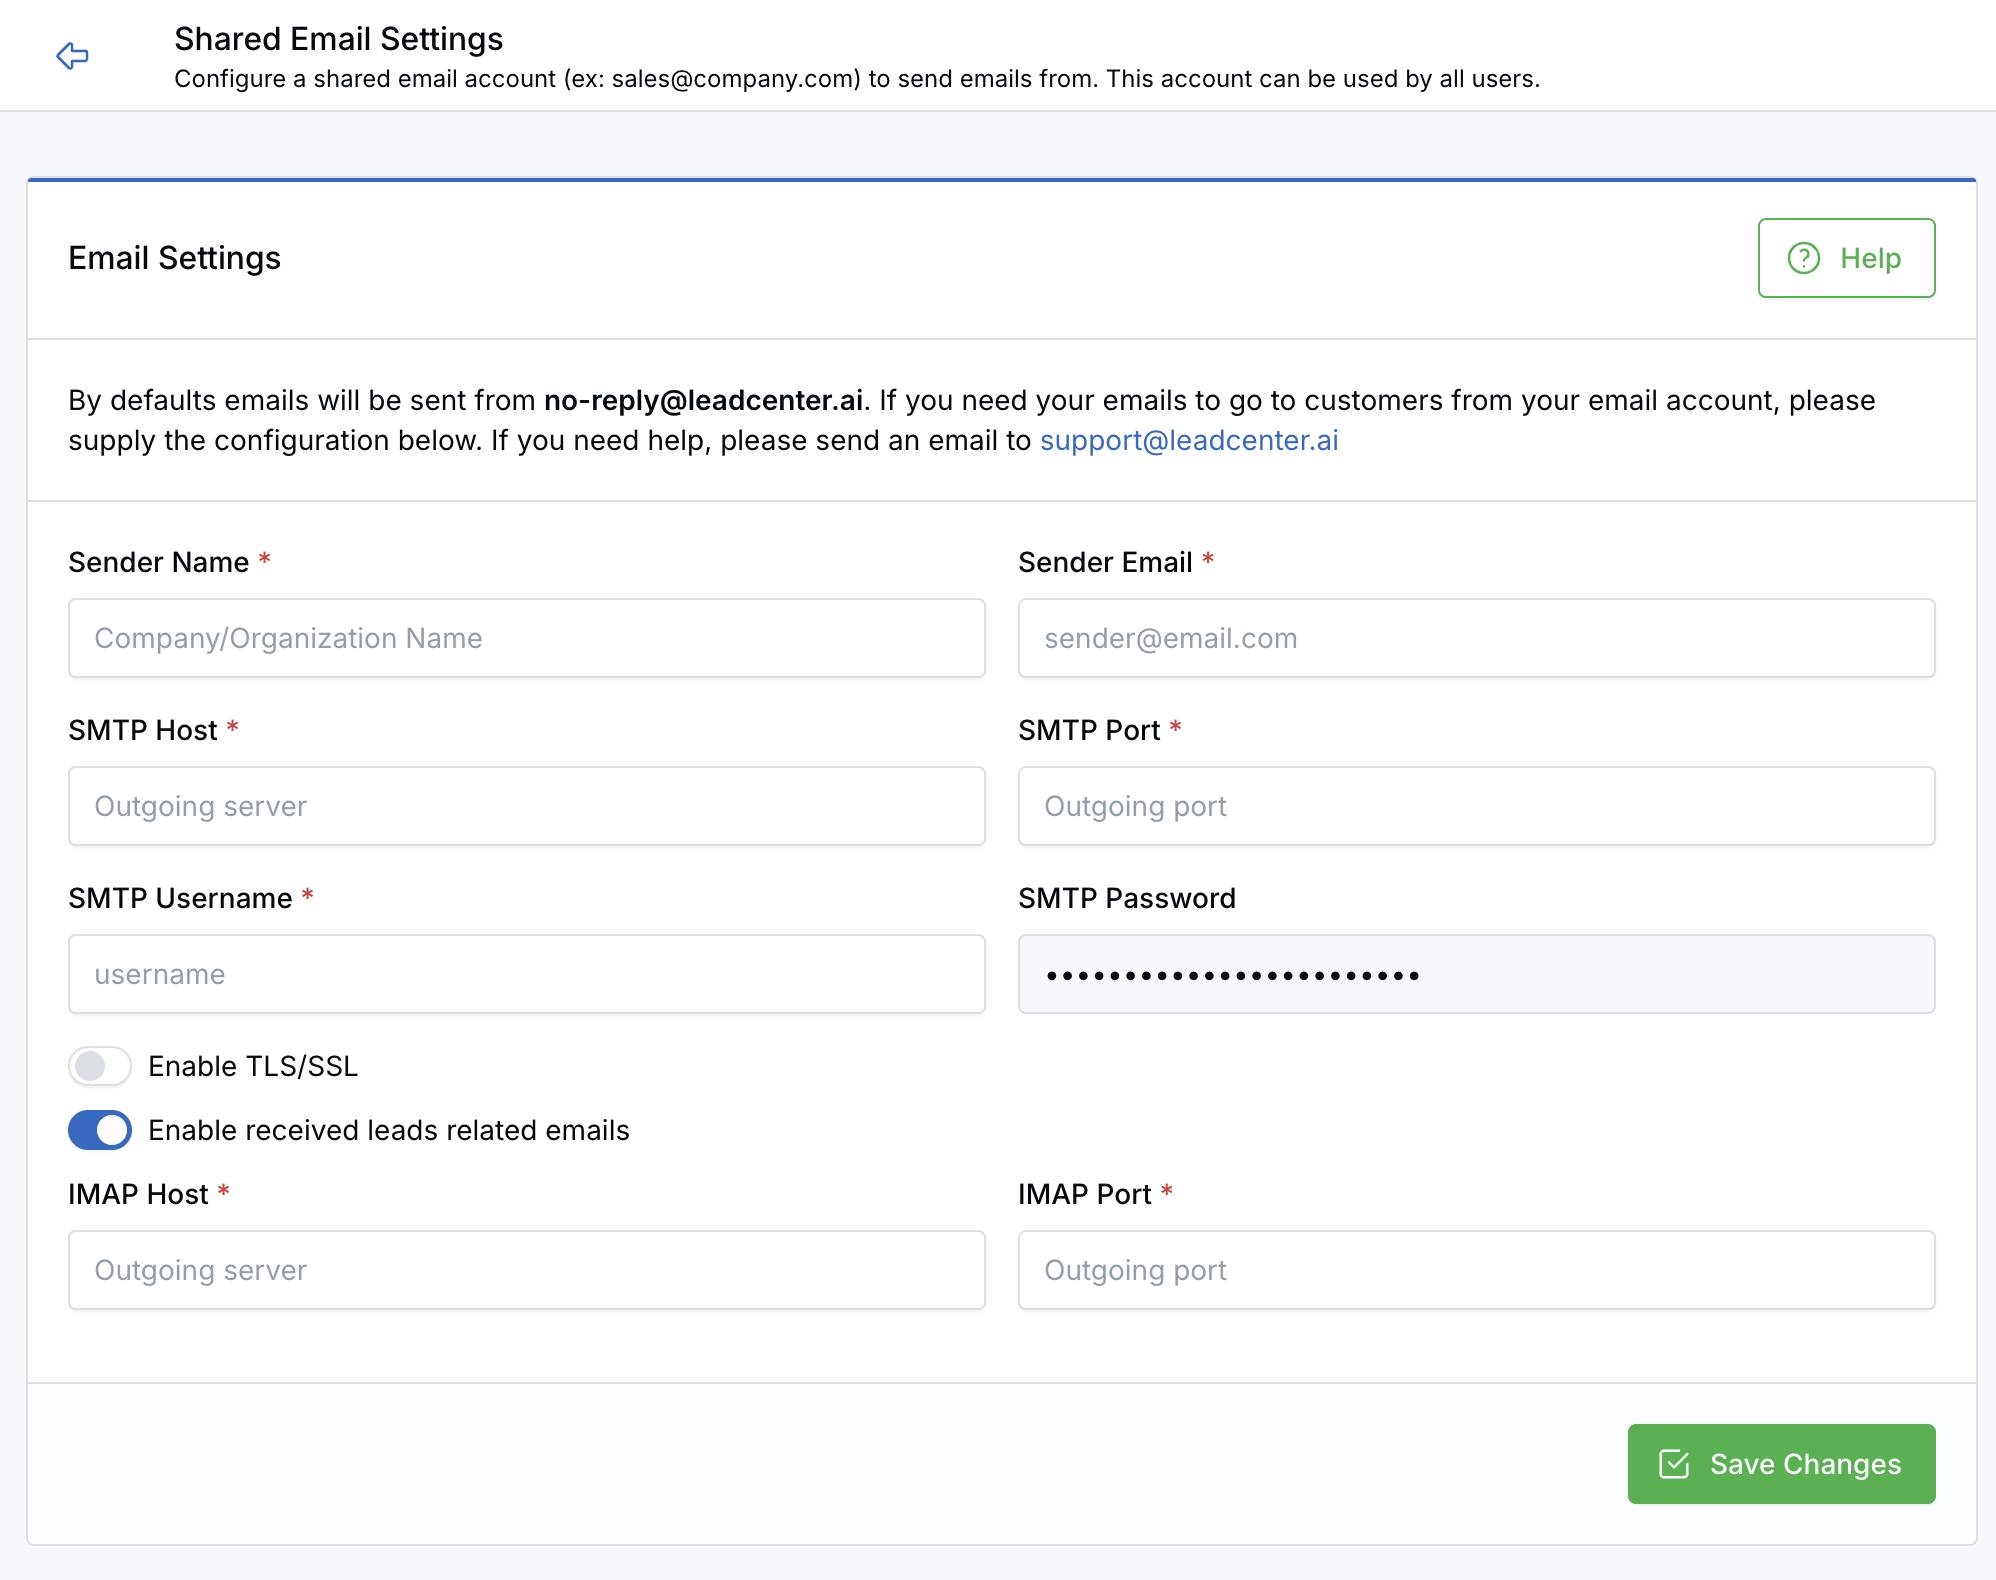
| Field Name | Description |
|---|---|
| Sender Name | Add the name of the sender. The sender name is always a part of the business email address and reflects in the “From” part of an email so that the recipient can identify the sender of the email. |
| Sender Email | Add the sender's email ID. This is your email ID, from which the email will be sent to your customer. Once you configure this email ID, it will replace the default LeadCenter.ai no-reply@leadcenter.ai email ID. |
| SMTP Host | Add the SMTP Host based on your email provider. Refer to the Prerequisites for E-mail Configuration and follow the steps provided for your email provider. |
| SMTP Port | Add the SMTP Port based on your email provider. Refer to the Prerequisites for E-mail Configuration and follow the steps provided for your email provider. |
| SMTP Username | Add the SMTP Username. |
| SMTP Password | Add the SMTP Password. Refer to the Prerequisites for E-mail Configuration and follow the steps provided for your email provider. |
| Enable TLS/SSL | To enable the TLS/SSL toggle the button to the right.This should always be enabled to send any email. |
| Enable received leads related emails | If a user wants to receive lead-related emails from your personal email ID to LeadCentre.AI ID. Enable: To receive lead-related emails from their personal mail ID (like @gmail.com, @outlook.com). Disable: If a user does not want lead-related emails from their mail ID (like @gmail.com, @outlook.com) |
4. After entering the information click on
Example for Gmail email provider
You have successfully configured your email ID.
You can send a test email to verify that your configuration information and email ID are correct.
In the Test Configuration section, enter an email ID and click Send Test Mail.
You can delete the configuration from this section. Once the configuration is deleted, mail will be sent from the default LeadCenter.ai no-reply@leadcenter.ai mail ID. This will delete your SMTP settings. Keep in mind that this action is irreversible. In the E-mail Configuration page, go to the Delete Configuration section, type "CONFIRM" and click the Delete Configuration button.
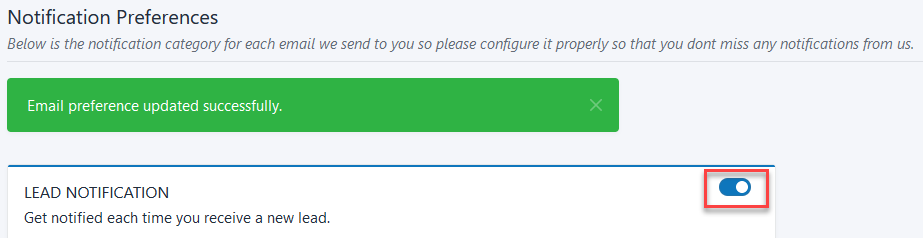
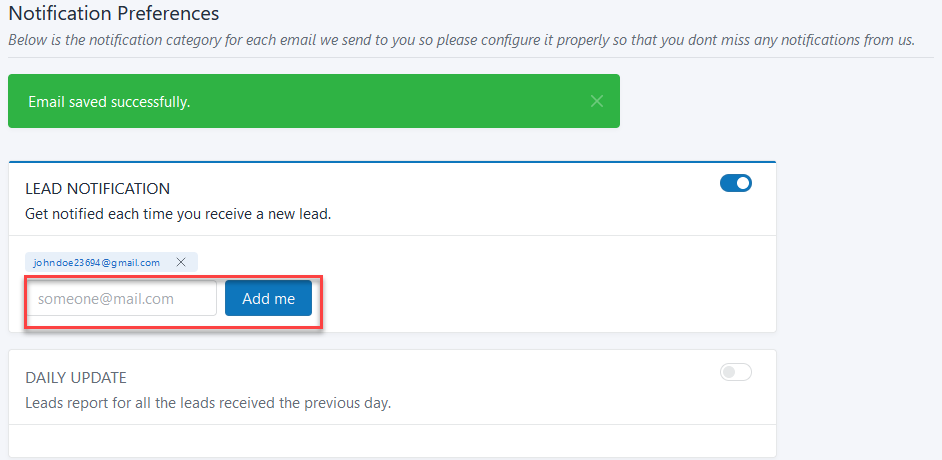
LeadCenter.AI allows users to set notifications from the Notification Preferences page. Notifications are generally used to get timely information, for example when a new lead has arrived, when you want updates (daily, weekly, and monthly), when a transcription for a lead has been generated, or when you want to receive an email for your incoming SMS.

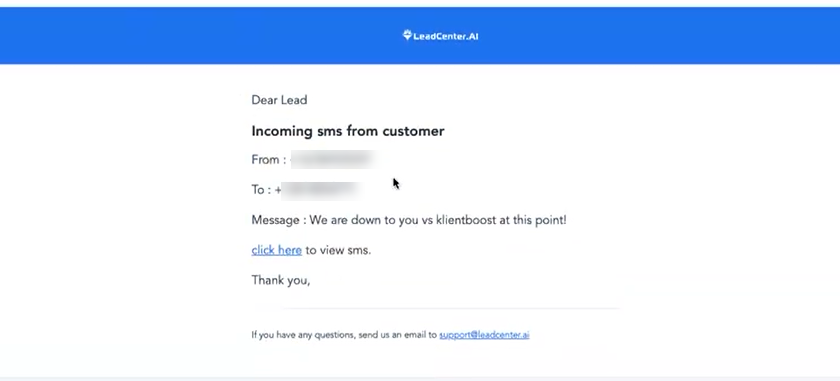
To set the Email notification, do the following:
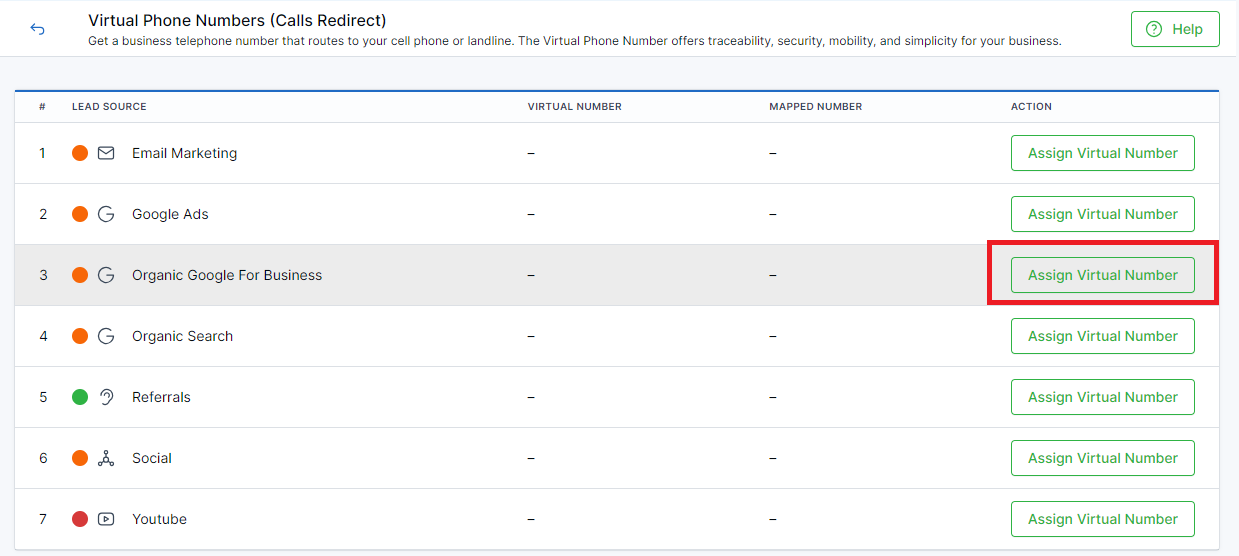
A virtual phone number is used to redirect calls to your cell phone or landline from a particular landing page through a source which for example can be Google Ads, Facebook Ads, etc. A virtual phone number is useful in terms of trackability, security, mobility, and simplicity for your business.
Let's see how you can set up a virtual phone number for a source in your LeadCenter account.
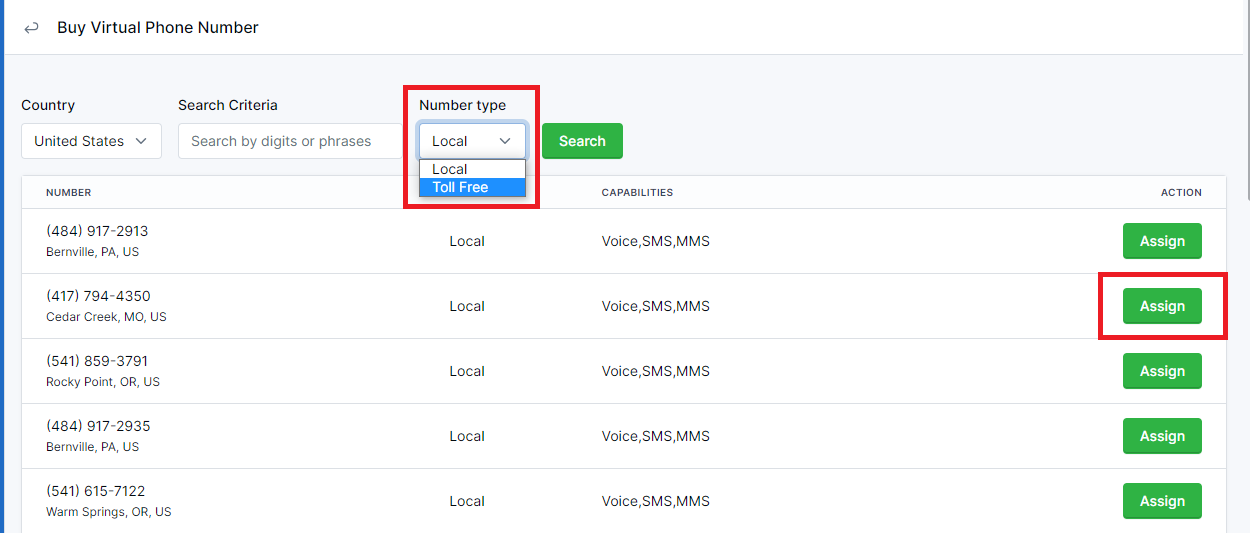
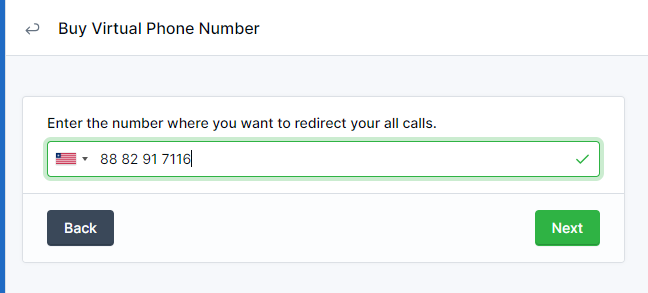
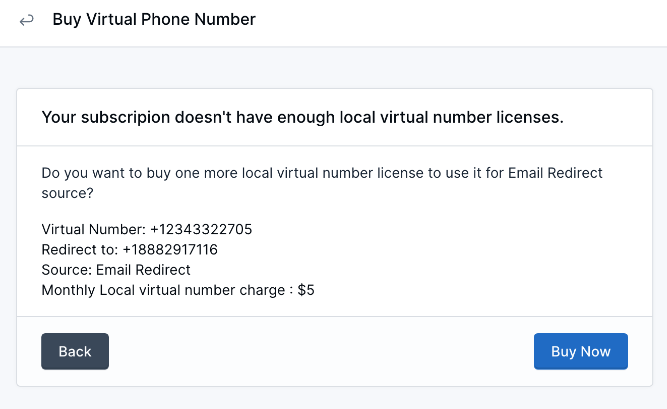
To configure virtual phone number(s), follow the step-by-step instructions given below:
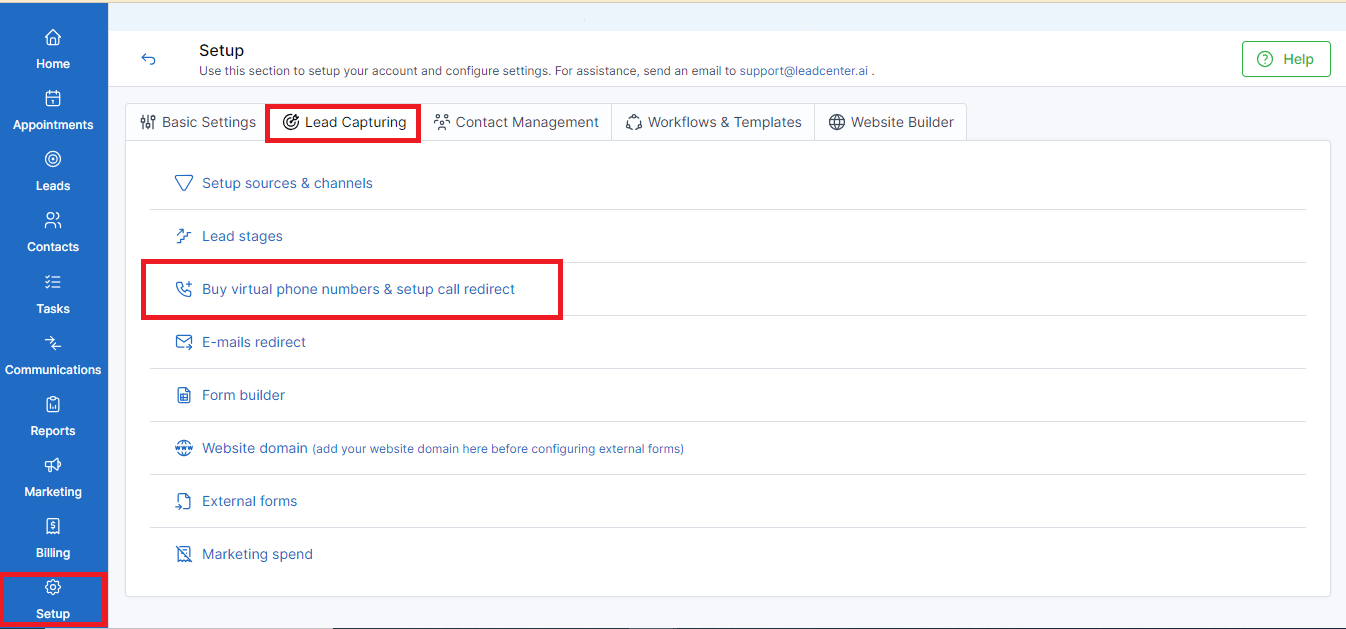

An Email Redirect (Leads by Email) is used to forward leads to your lead management dashboard automatically using your lead source's unique Email ID.
The Email Redirect (Leads by Email) page displays the Lead Source, Assigned Email, and Action column. From this page, you can request for an Email ID to be generated for forwarding emails.
To configure an Email Redirect do the following:
This section describes setting the lead sources.
There are various platforms like email marketing, campaigning, social media platforms, calls, etc, through which lead sources can be generated.
A lead source can best be defined as the original point at which a customer first hears about you. It’s the first step in your lead funnel and ground zero for your relationship with your customers.
By default From Website Forms and Generated Offline are displayed.
To add a new source, do the following;
To modify a source, do the following;
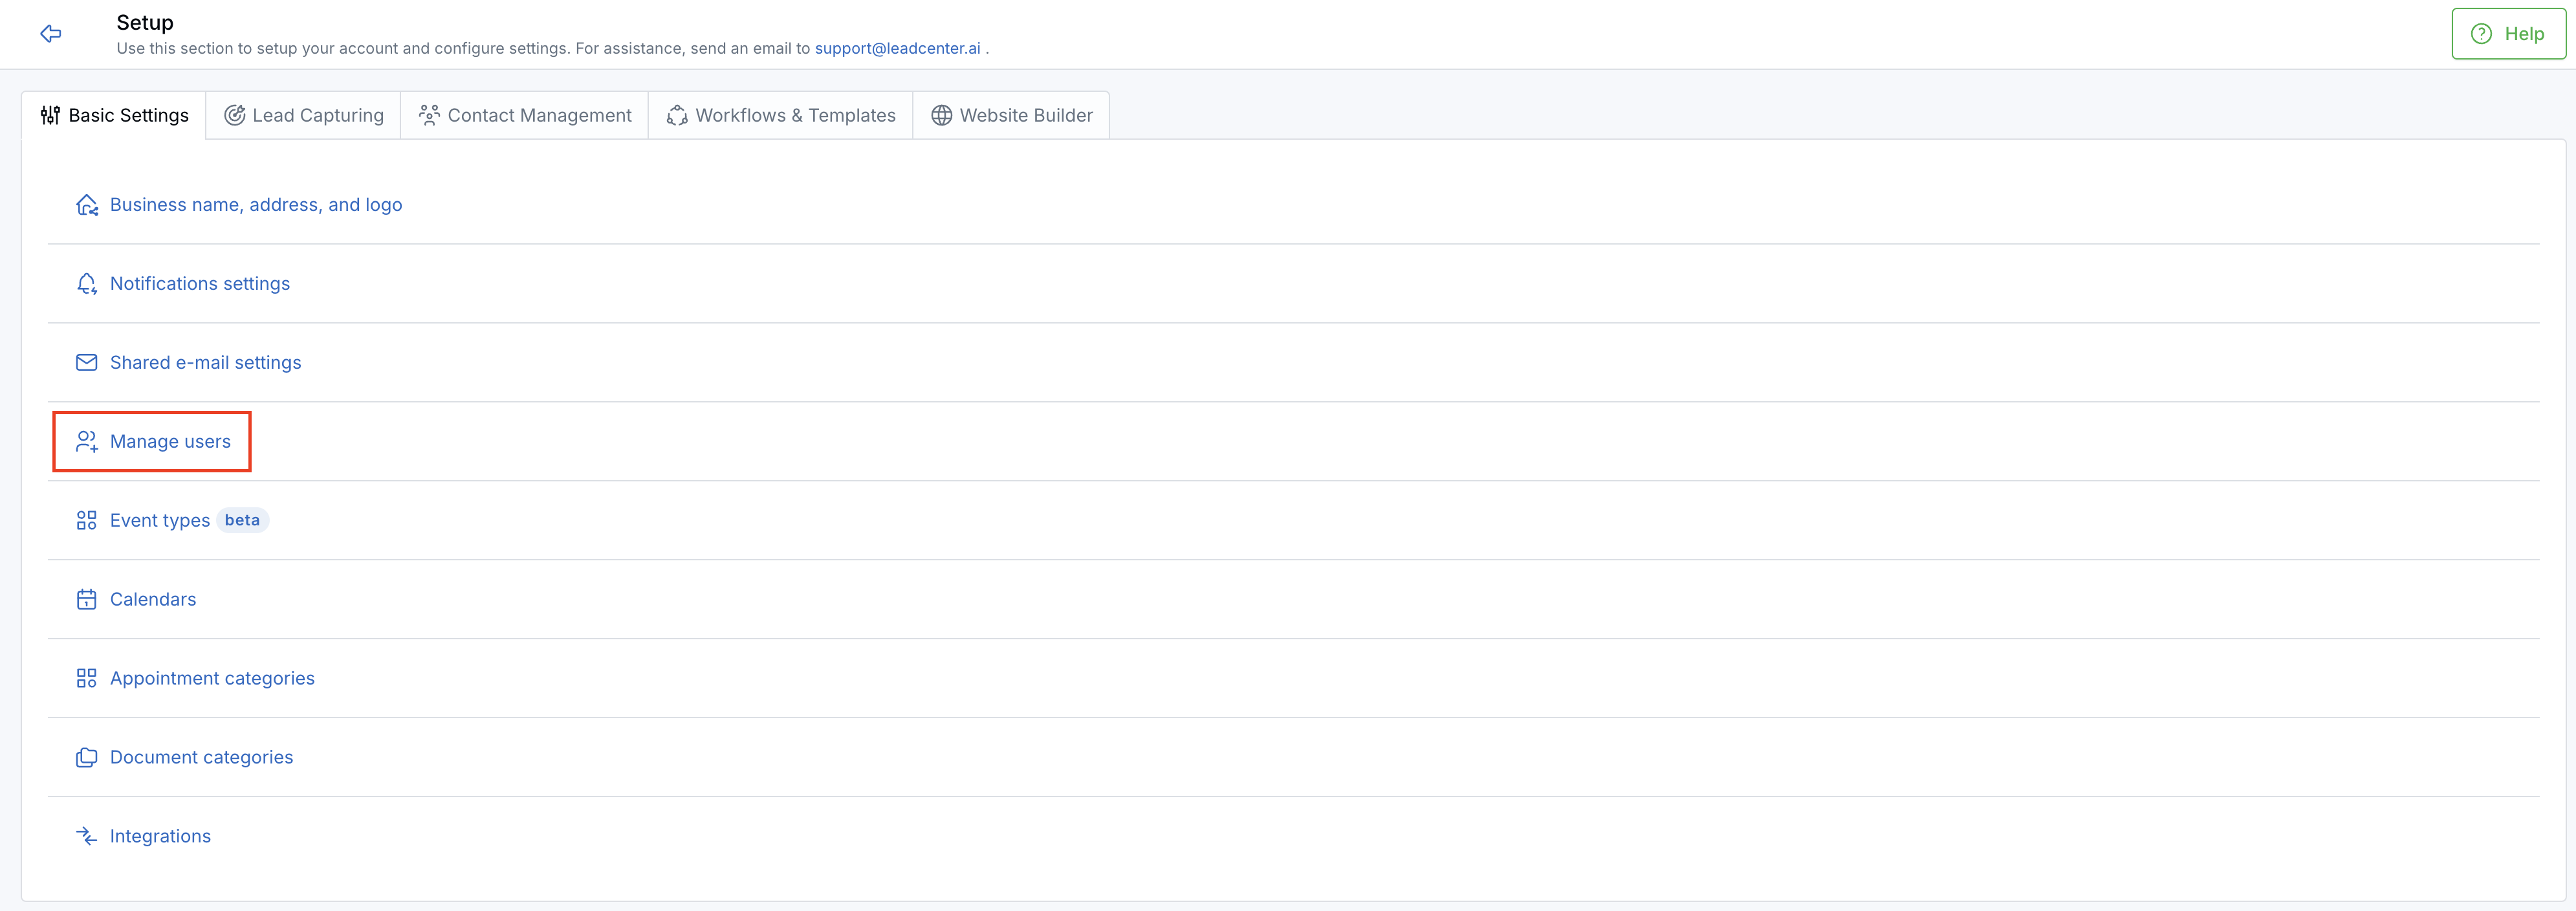
Each user who will be using LeadCenter.ai services needs to register an account on LeadCenter.AI. After a user registers an account, you may like to add users to manage your Dashboard and website. If you haven't already added users to your Users page, you can do that now from the Setup page.
New users can manage your store from their personal dashboard under the Manage Stores tab.
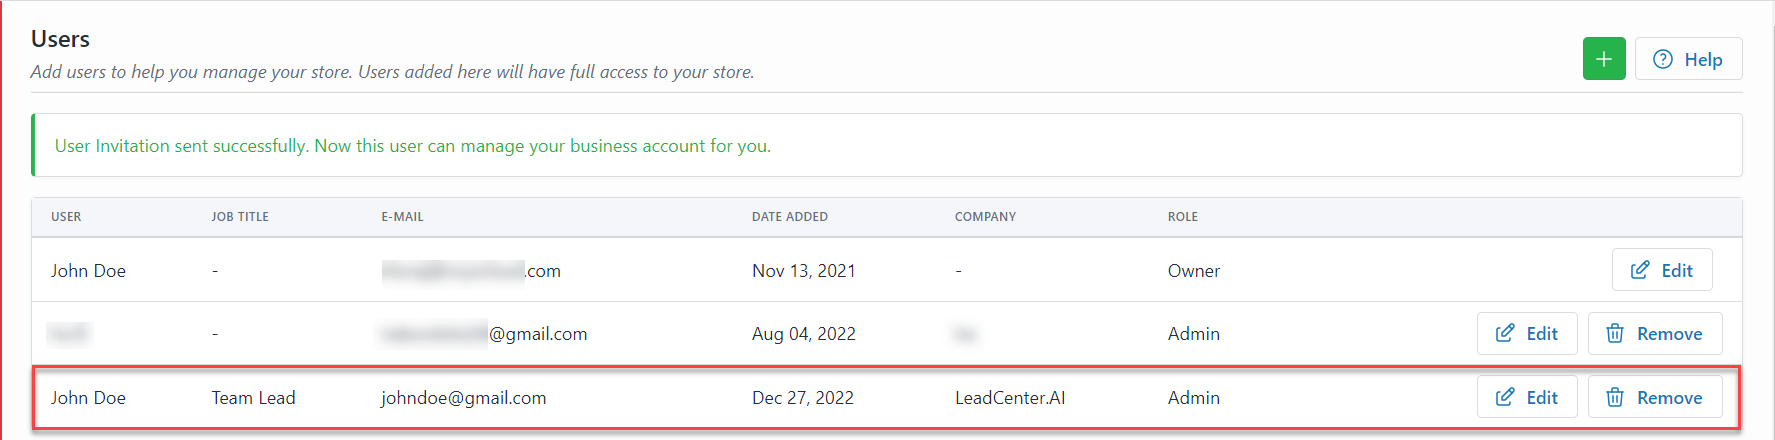
To add a user, do the following;


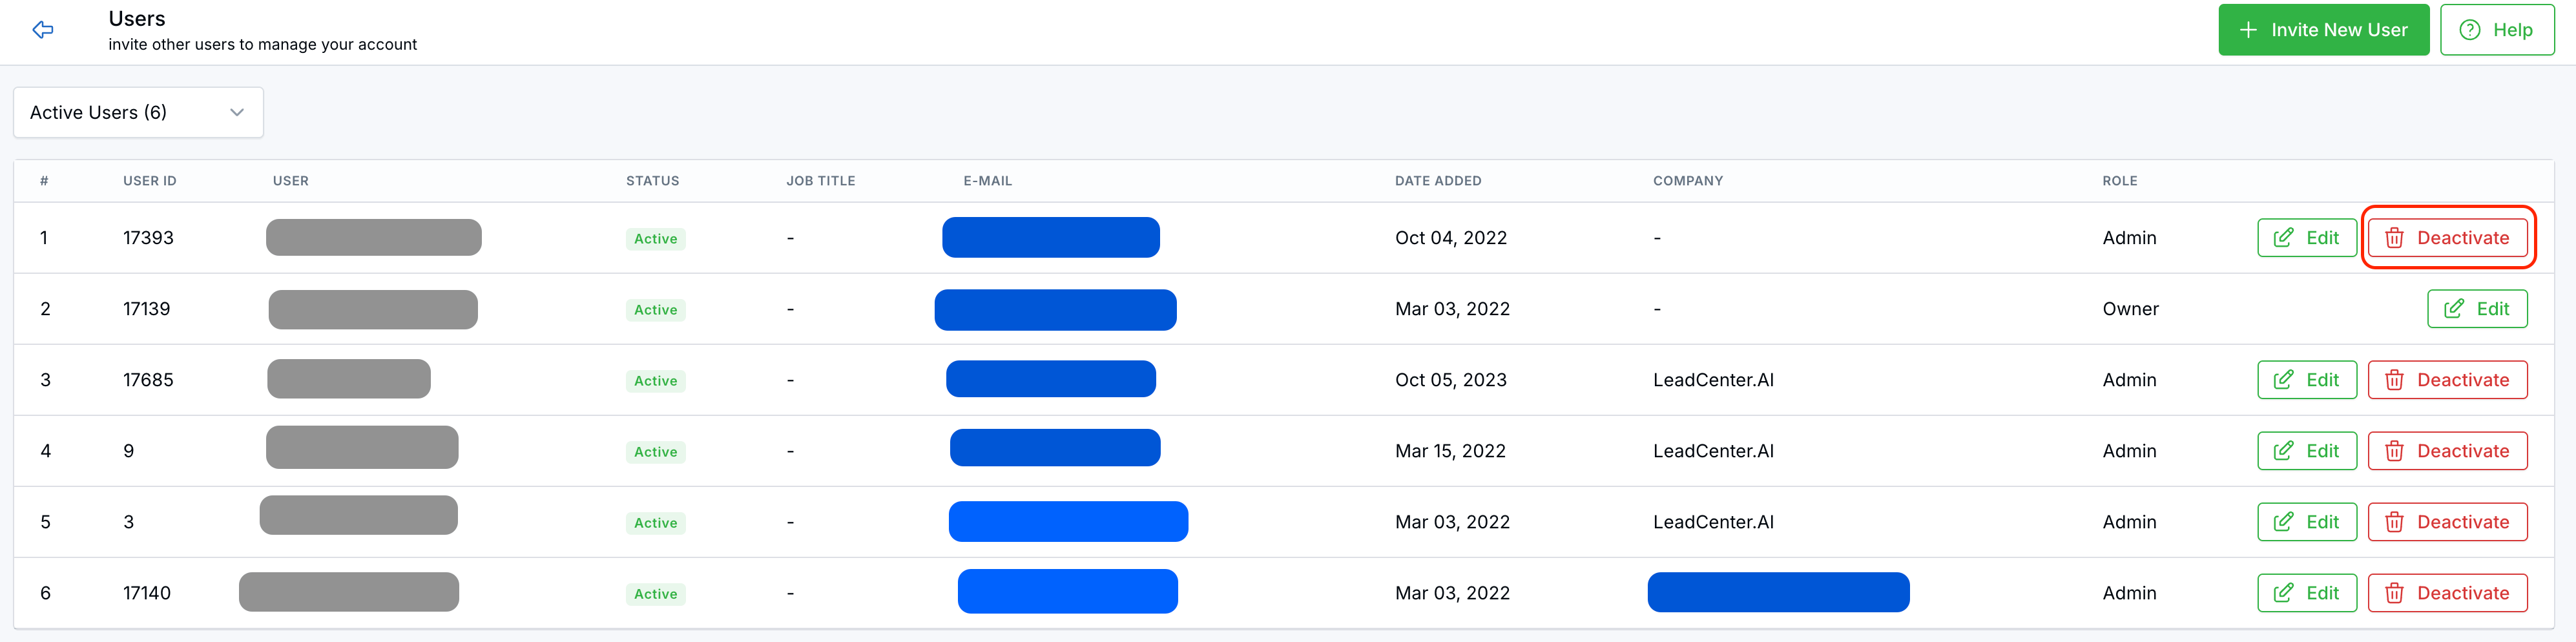
To delete a user, do the following;
To update a user, do the following;
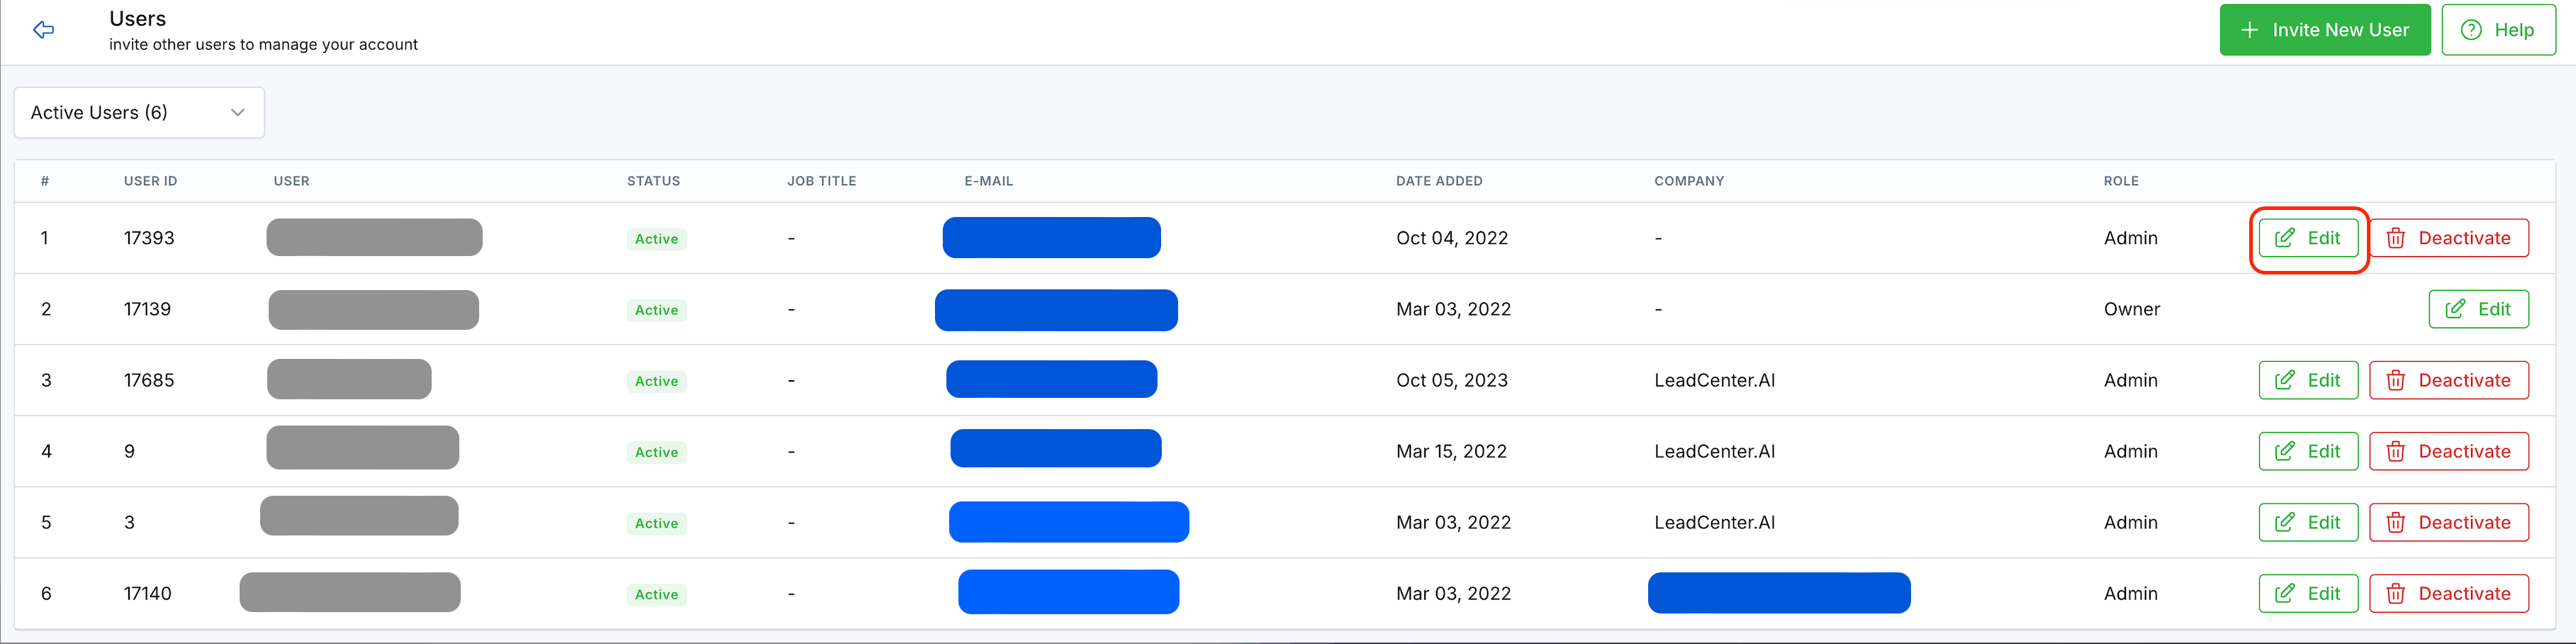
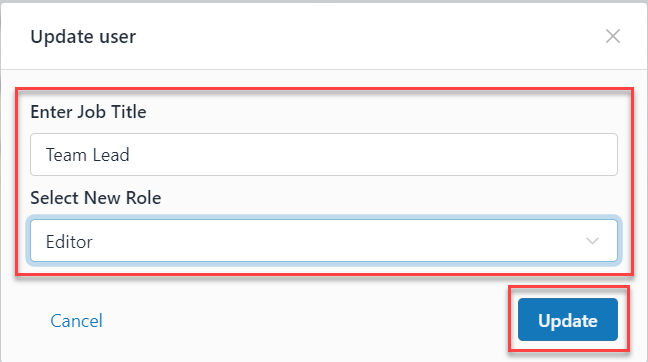
The user details are updated.
LeadCenter.AI basic settings section allows users to update their business details and related information.
To add the business details information, do the following;
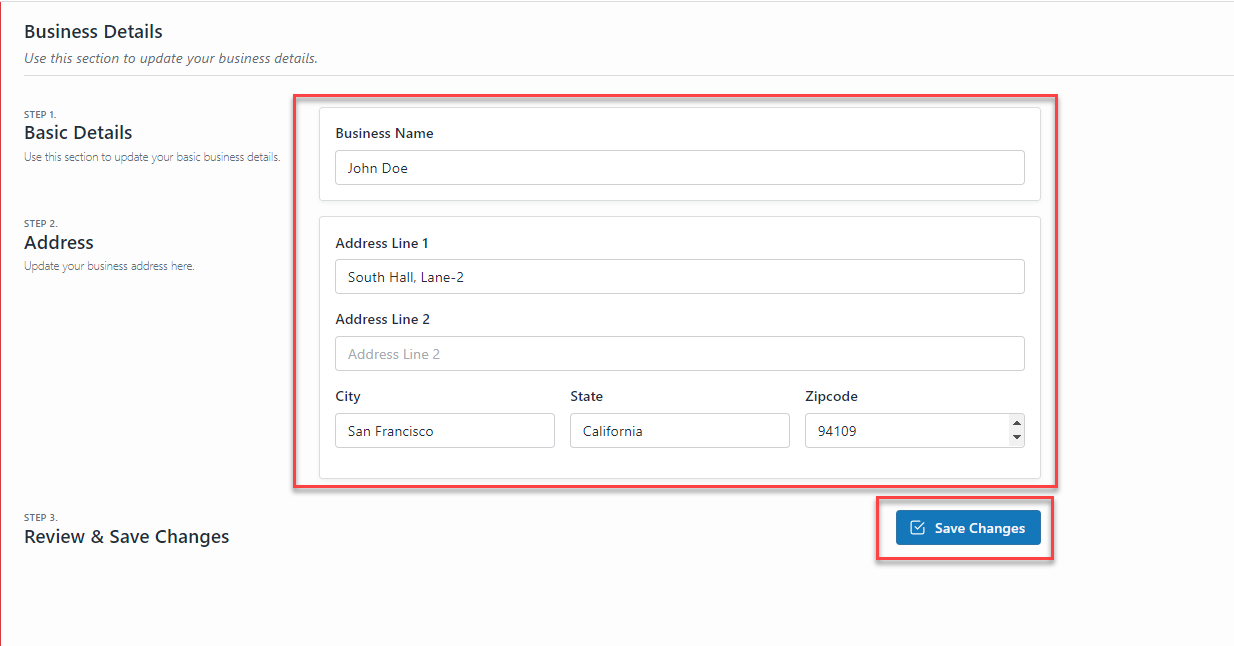
| Field | Description |
| Business Name | Enter the name of your business for example; LeadCenter.AI |
| Type | Select the type of Business ; Individual or Business( where there is multiple partners involved in the business) |
| Line of Business | Select the line of business from the drop-down list. |
| Your Website | Enter your business website for example; https://www.example.com |
To set up an account with LeadCenter.AI, do the following;


6. You have successfully set up your account.
LeadCenter.ai is an Integrated Sales and Marketing platform to help medium and small service businesses build a website, generate and manage leads, book appointments, sell and receive orders online at an affordable price.
Did you know that LeadCenter.ai helps you to measure and analyze your business data by giving you graphical analytics reports about your business functions? The LeadCenter.ai Analytics feature analyses your data for website visits, lead generation, orders, and appointments that help you to stay ahead of the crowd, by streamlining your operational processes. LeadCenter.ai provides further assistance for website development and digital marketing services.
As any entrepreneur already knows for a fact that there is a lot more involved in a business than just the idea. To get started on your new venture as an entrepreneur the first thing you need to do is build your own website. Once you have made your presence online, the next step is marketing and in today's digital world Digital Marketing is what you need to grow your business online across the world. There are all other challenges attached to Online business like advertising, managing leads, communicating, selling online, and analyzing business data.
But as you know there are too many complex and expensive tools in the market to Build and Manage an Effective Business Online. LeadCenter.ai System gives you the solution by connecting your Marketing, Sales, and Services tools to a unified Lead Management(CRM) Database system.
LeadCenter.AI helps you to set up your business online by helping you build your website on your own without coding or design. You can also generate and capture leads and convert them, get paid for your online services and get insight and control.

