LeadCenter enables you to create and automate events to send to your contacts. These events and seminars serve as one of the main channels for client interaction. To utilize these events to their fullest, you need to balance the cost of an event with the number of attendees. This also helps you monitor the conversion rate and is a great marketing tracking tool for your financial advisory firm.
Let’s explore the Events & Seminars feature:
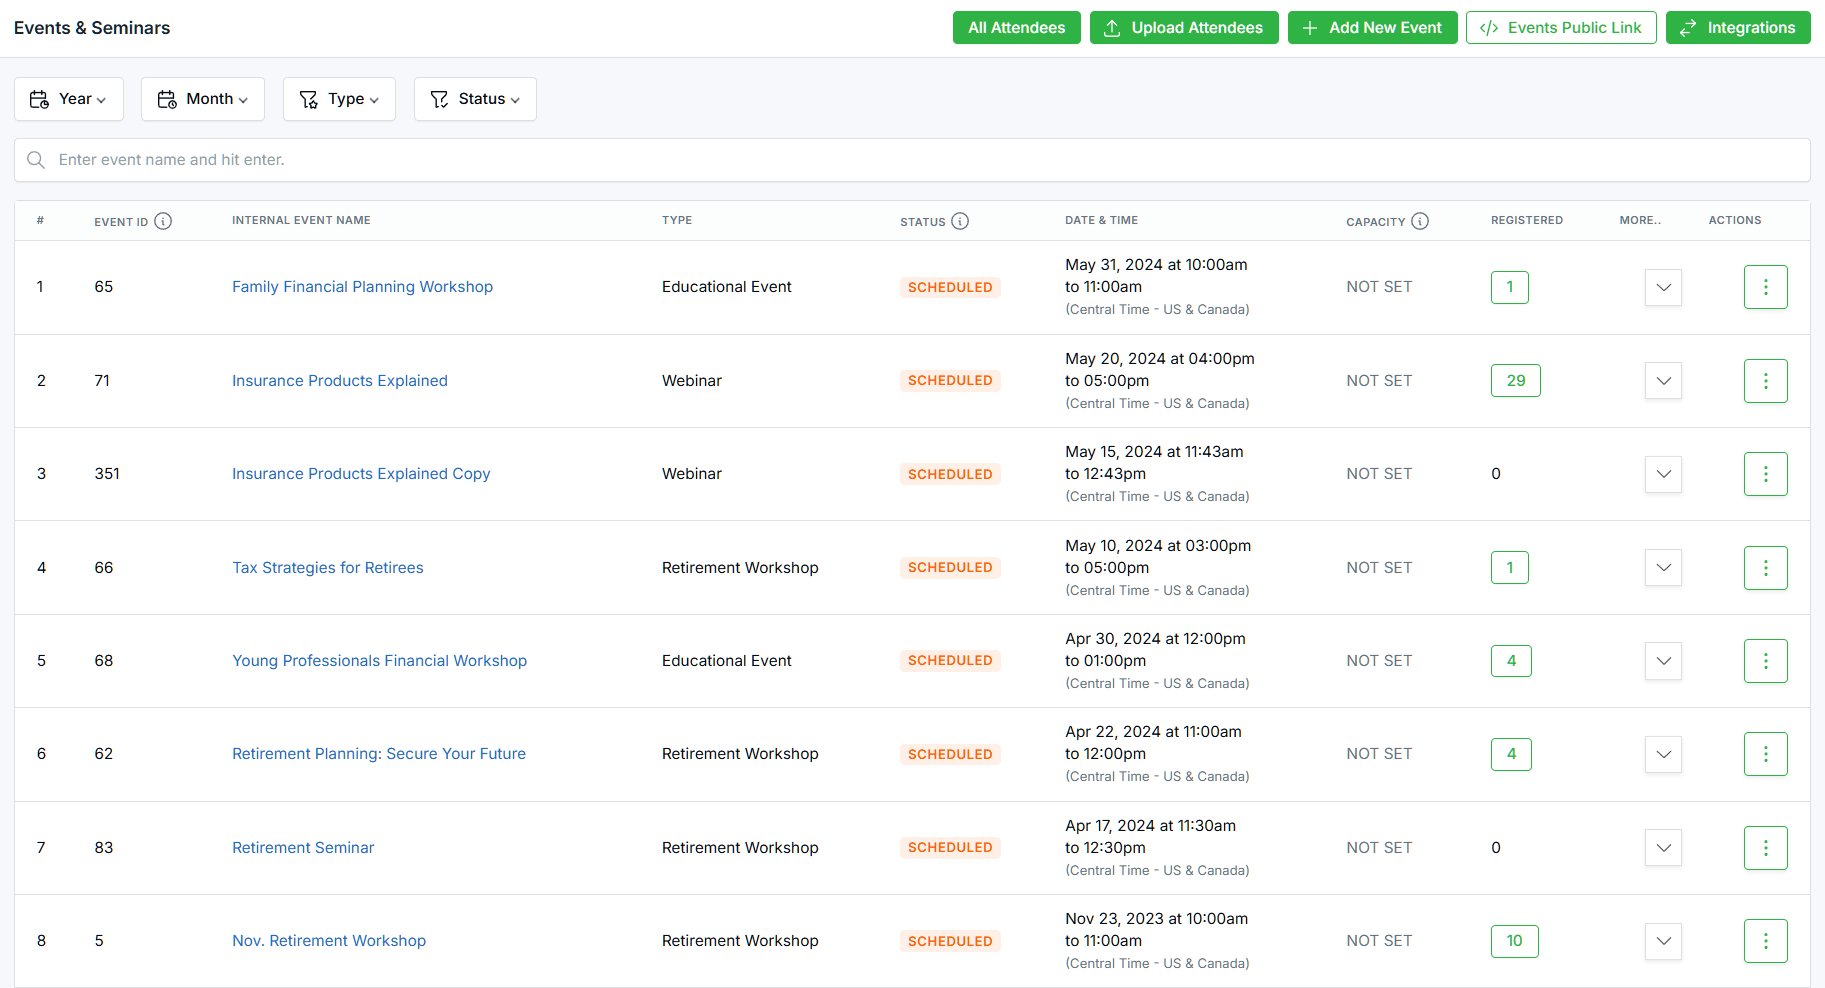
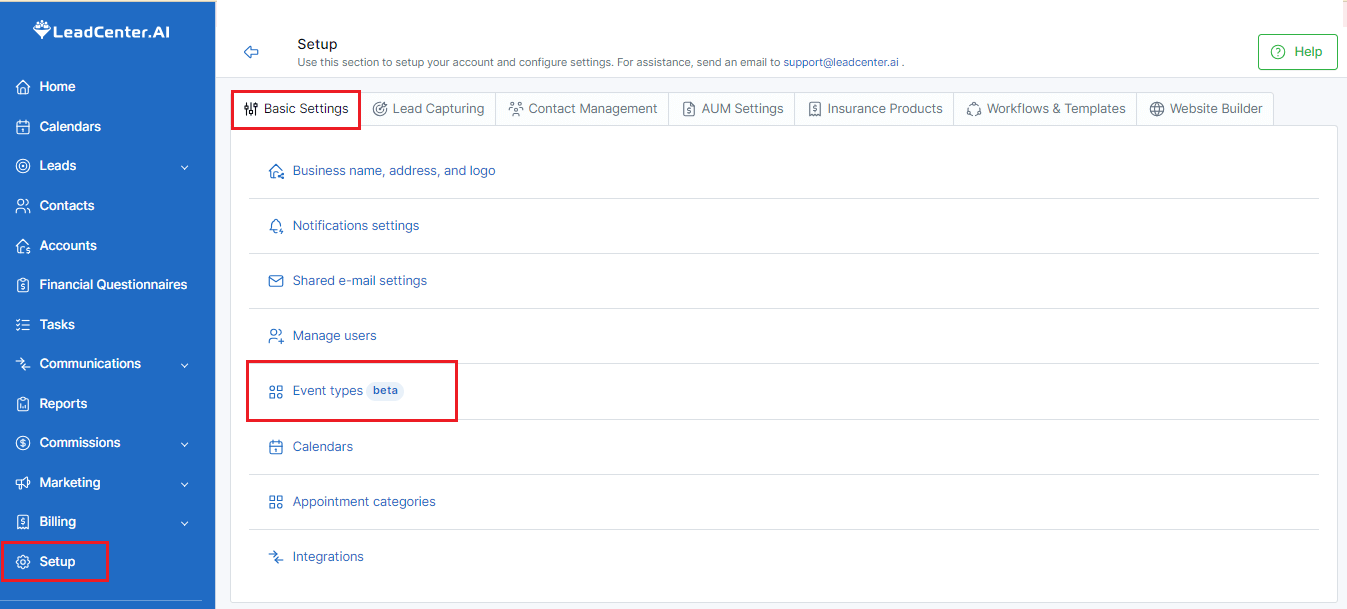
Follow the steps given below to access Events & Seminars:


Refer to the article Creating Email Templates to create customizable email templates.
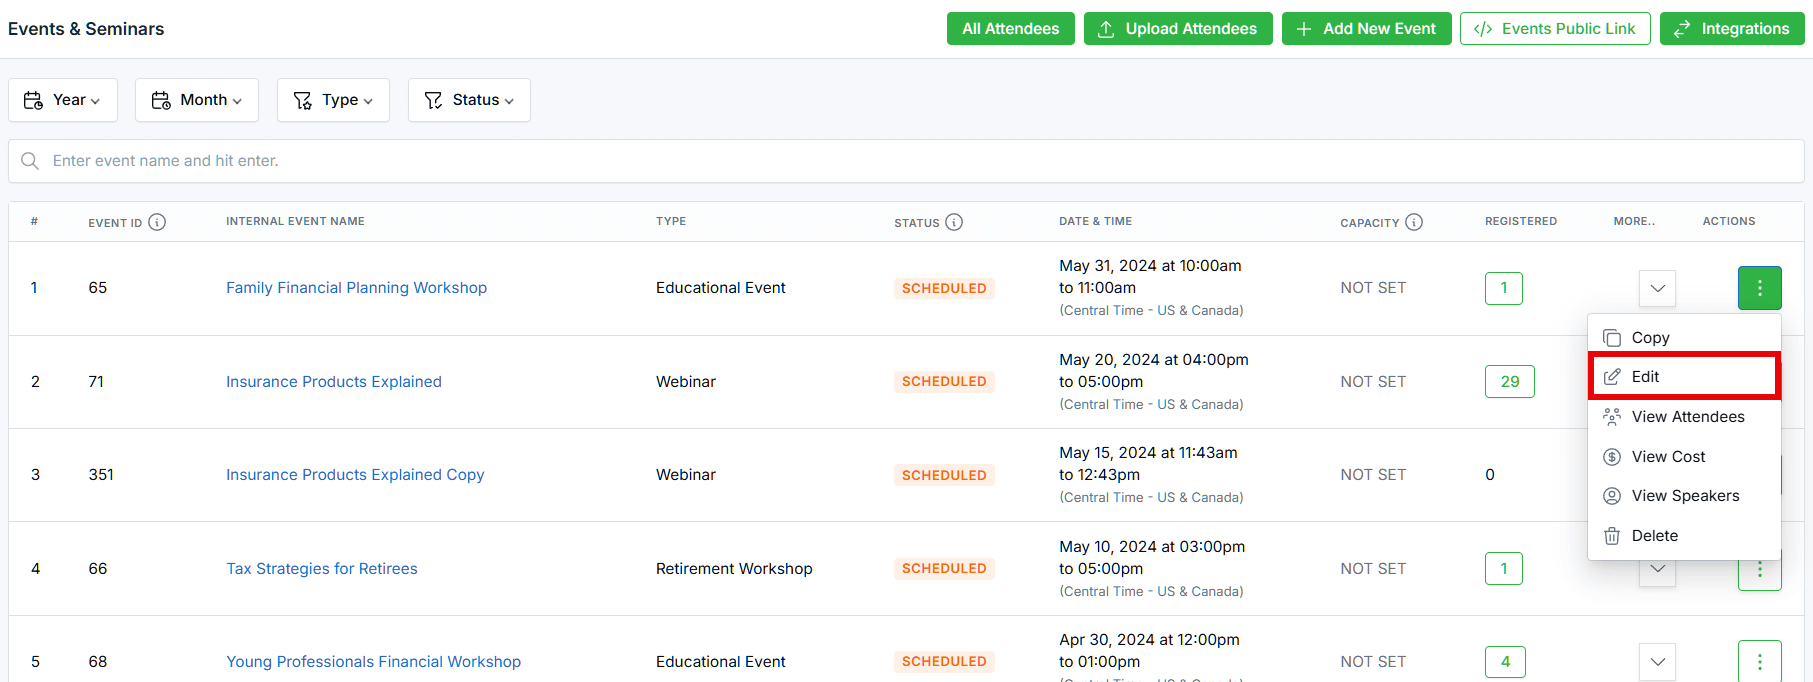
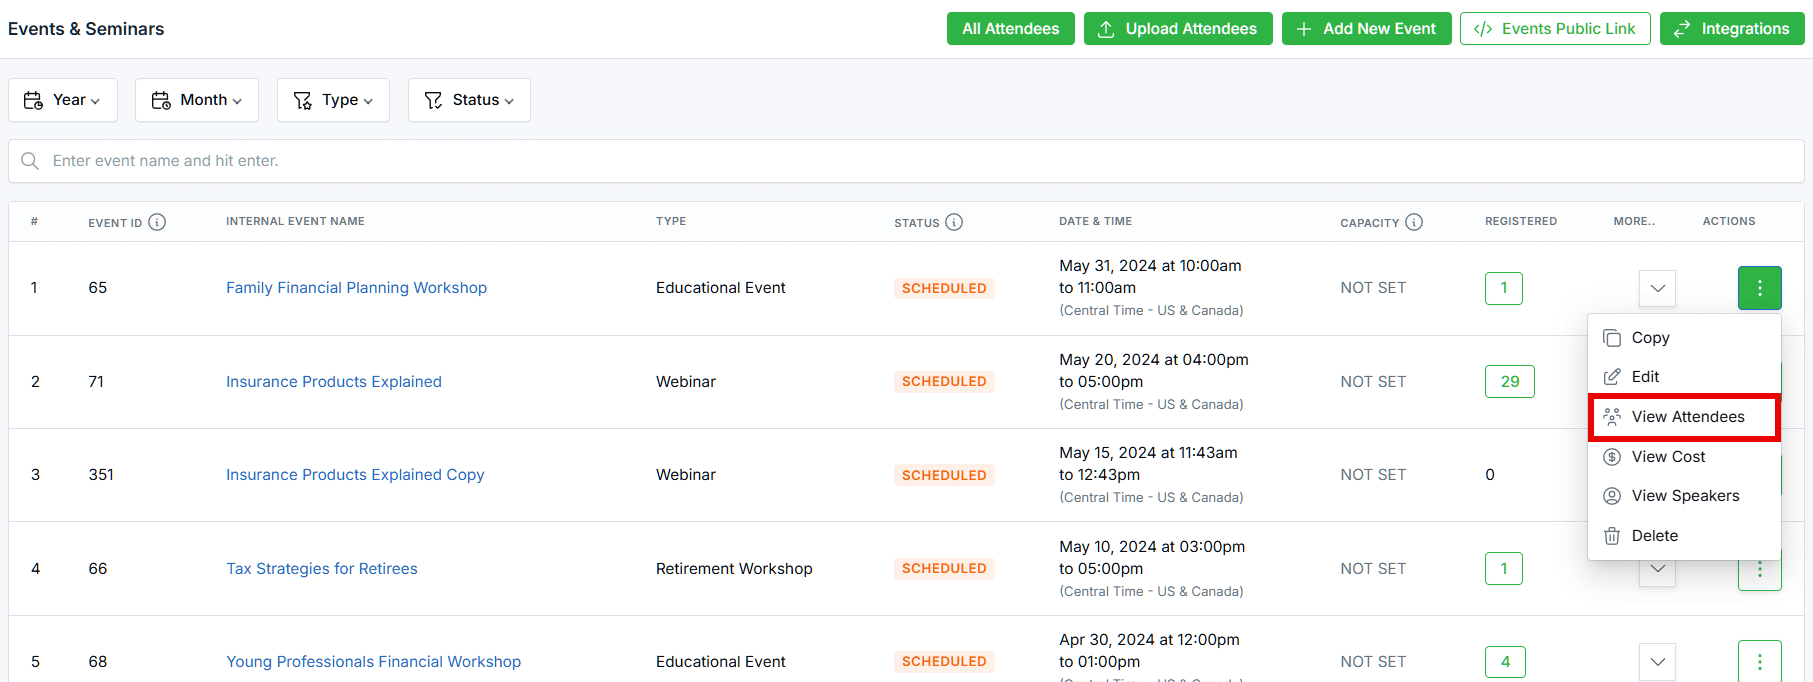
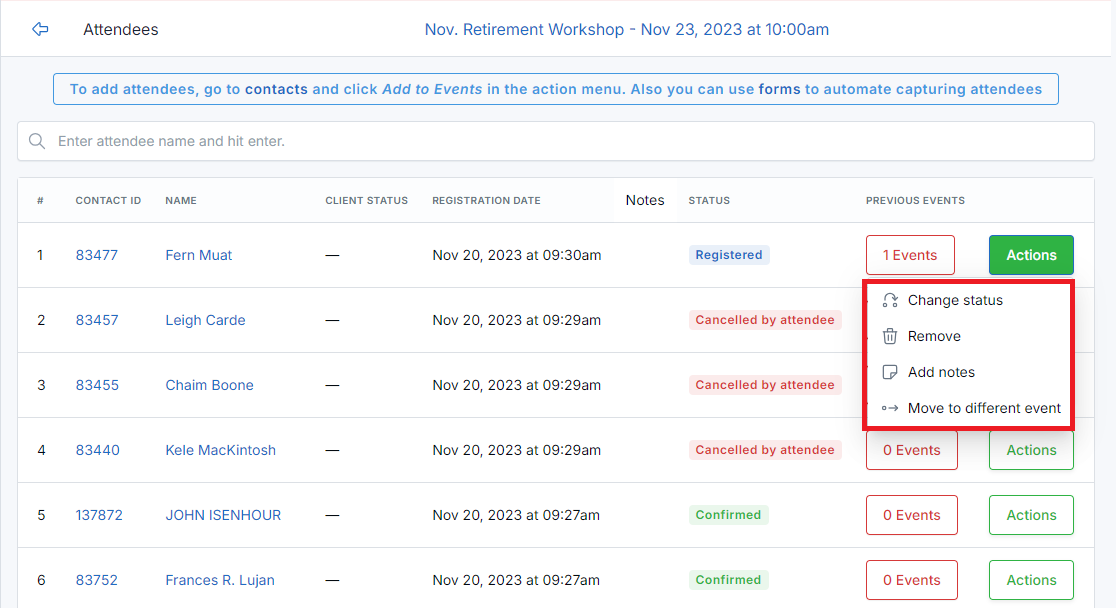
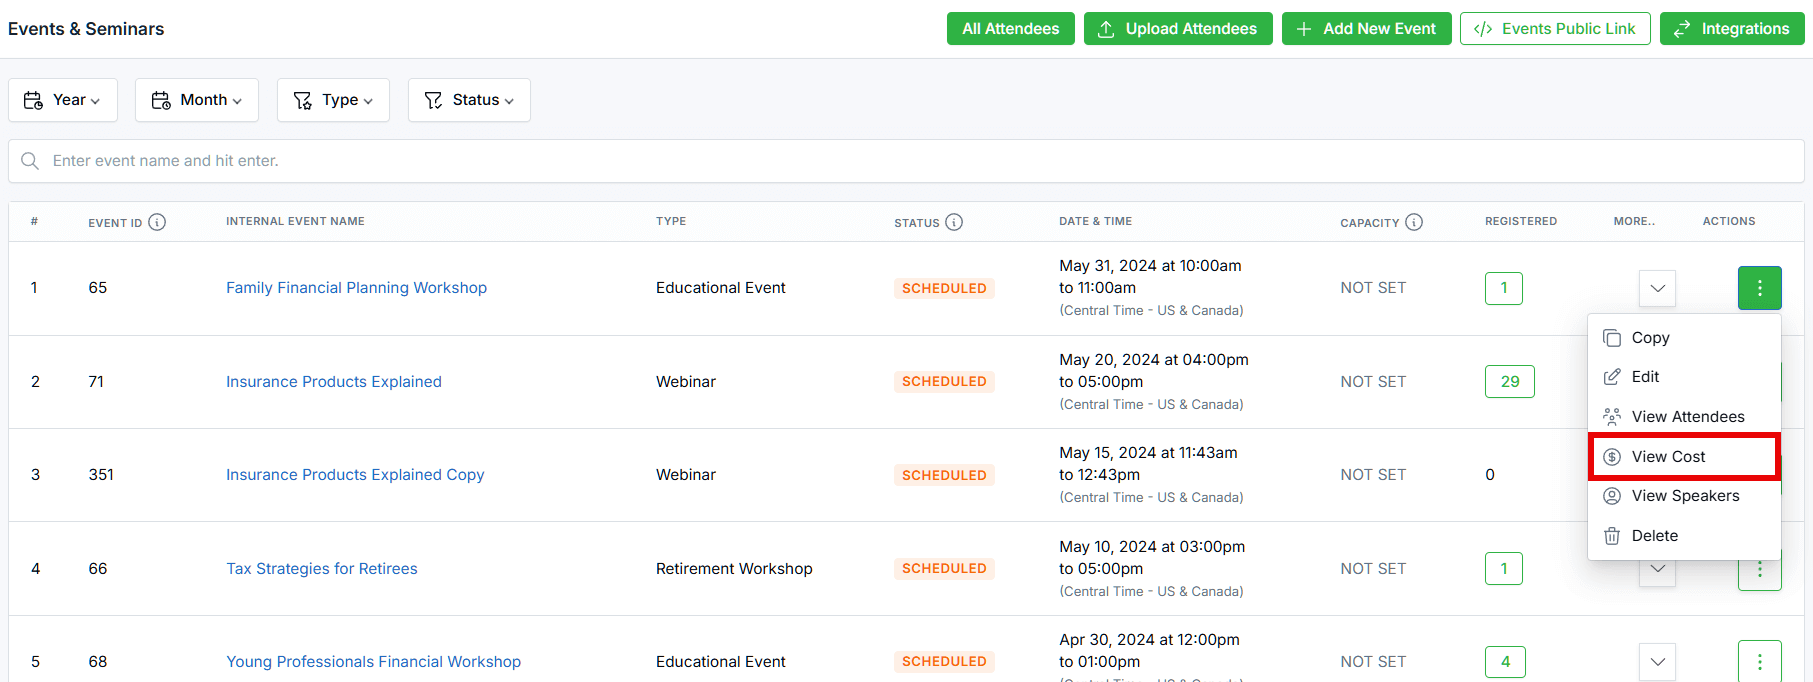
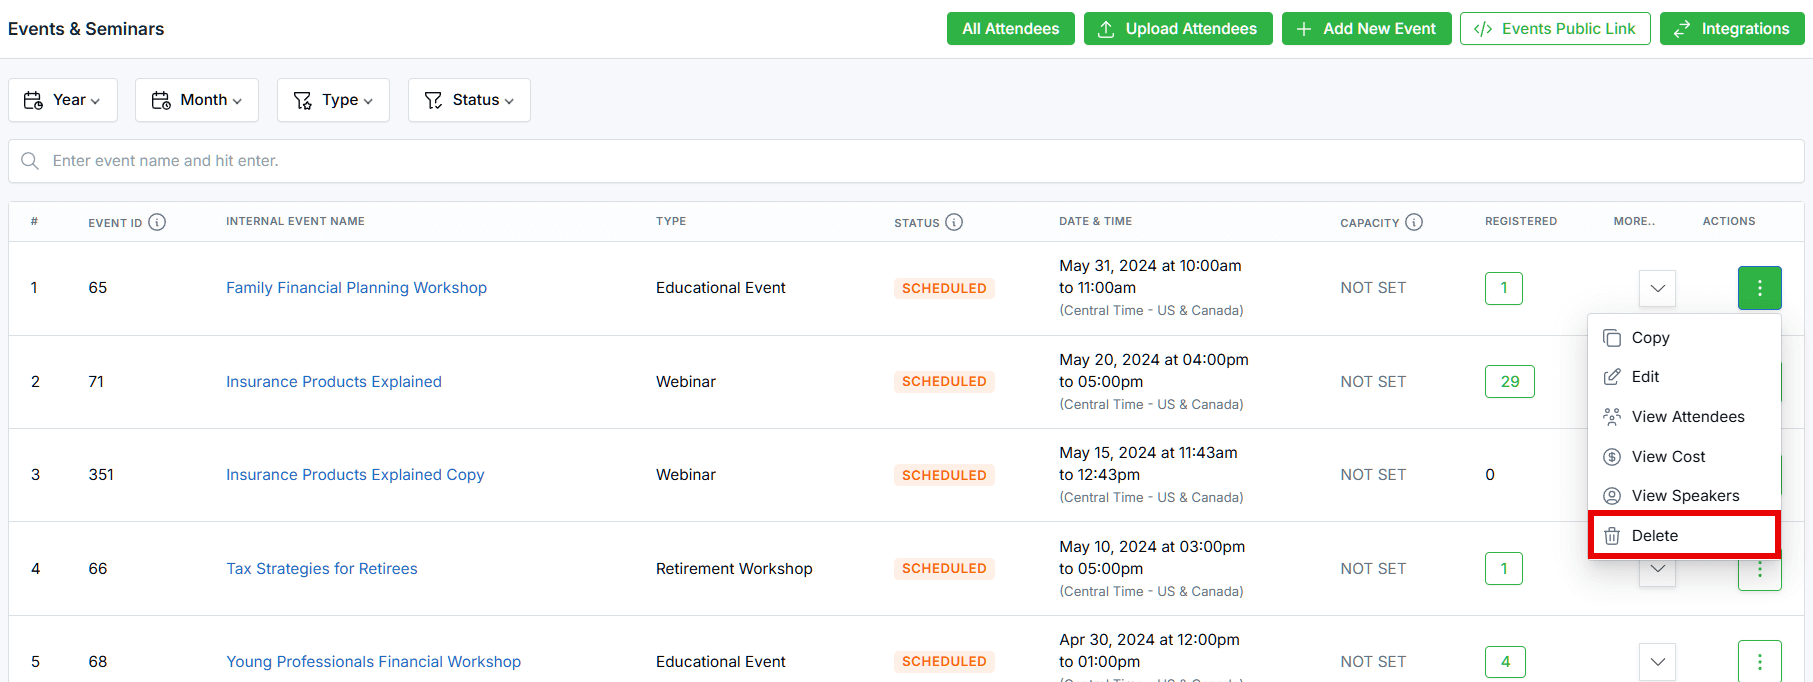
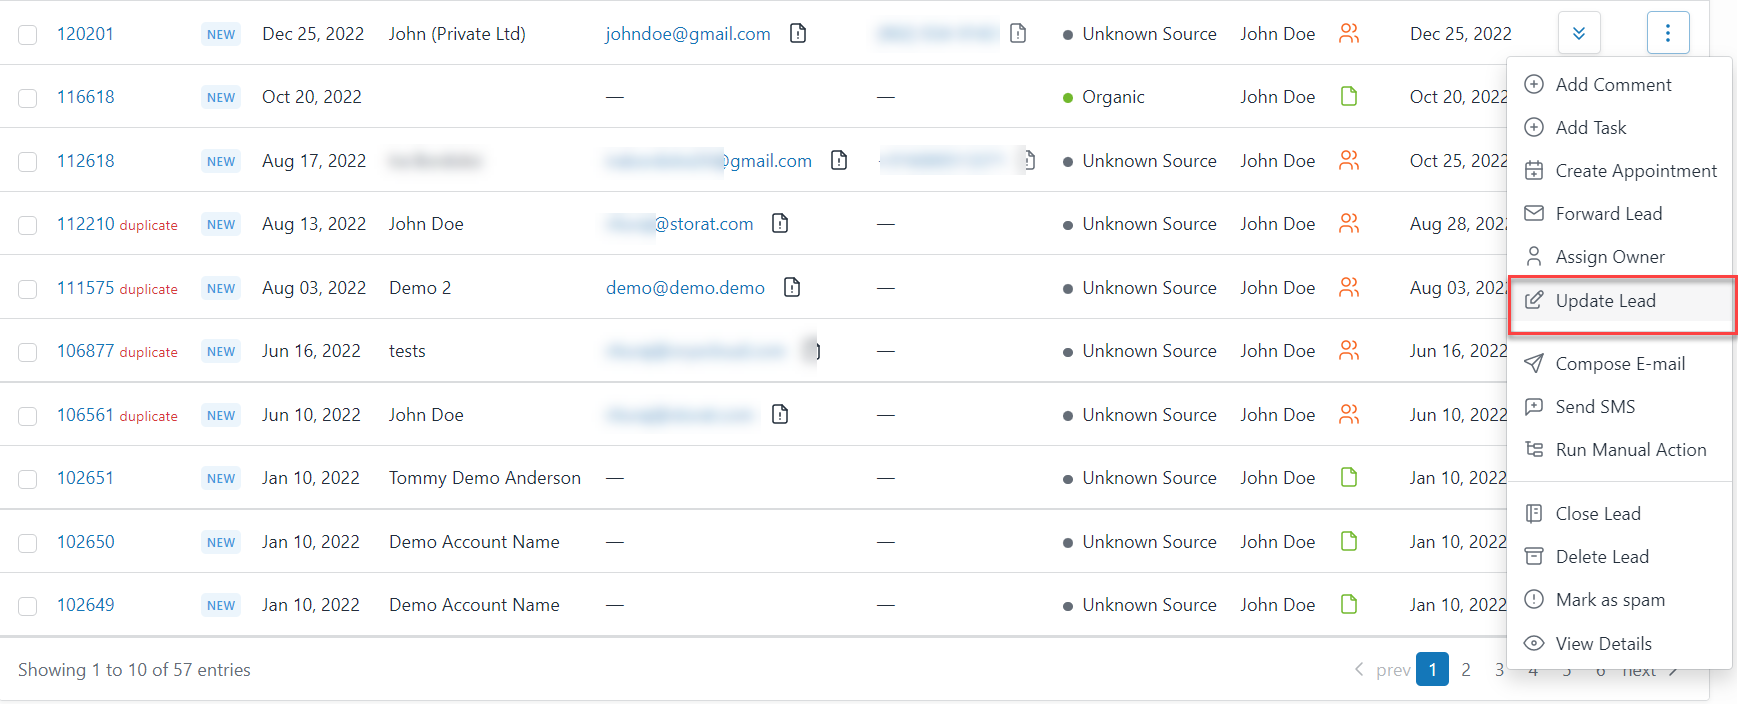
On the Events & Seminars main page, you'll find a three-dot menu next to each event.
Let’s see how these options work:
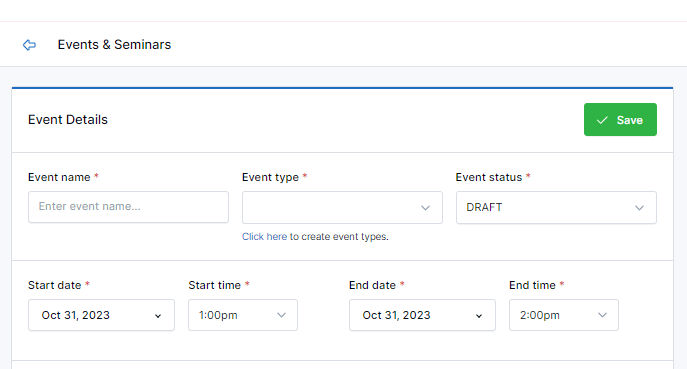
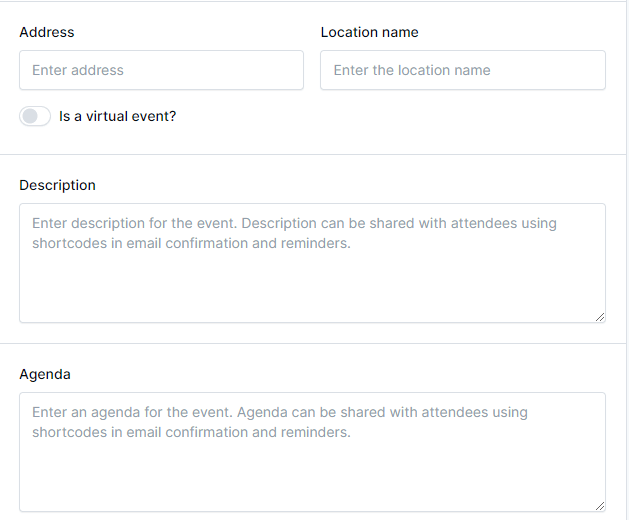
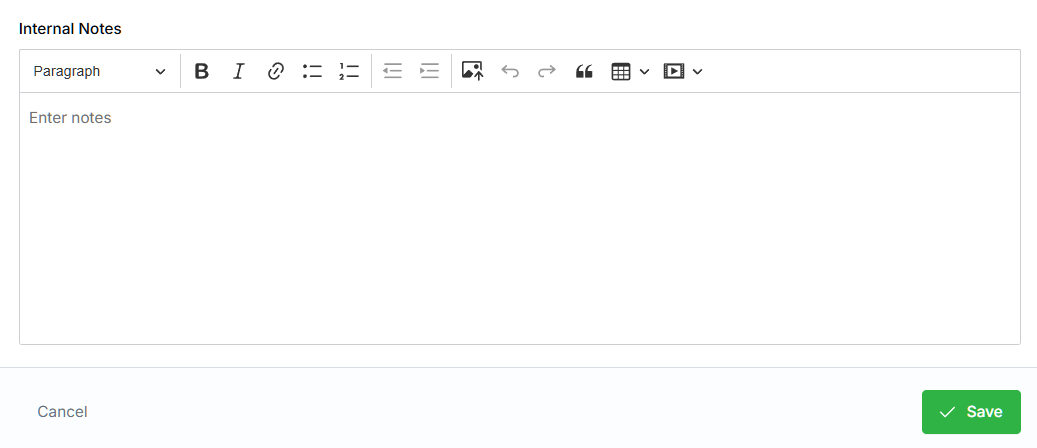
To edit an event, follow these steps:


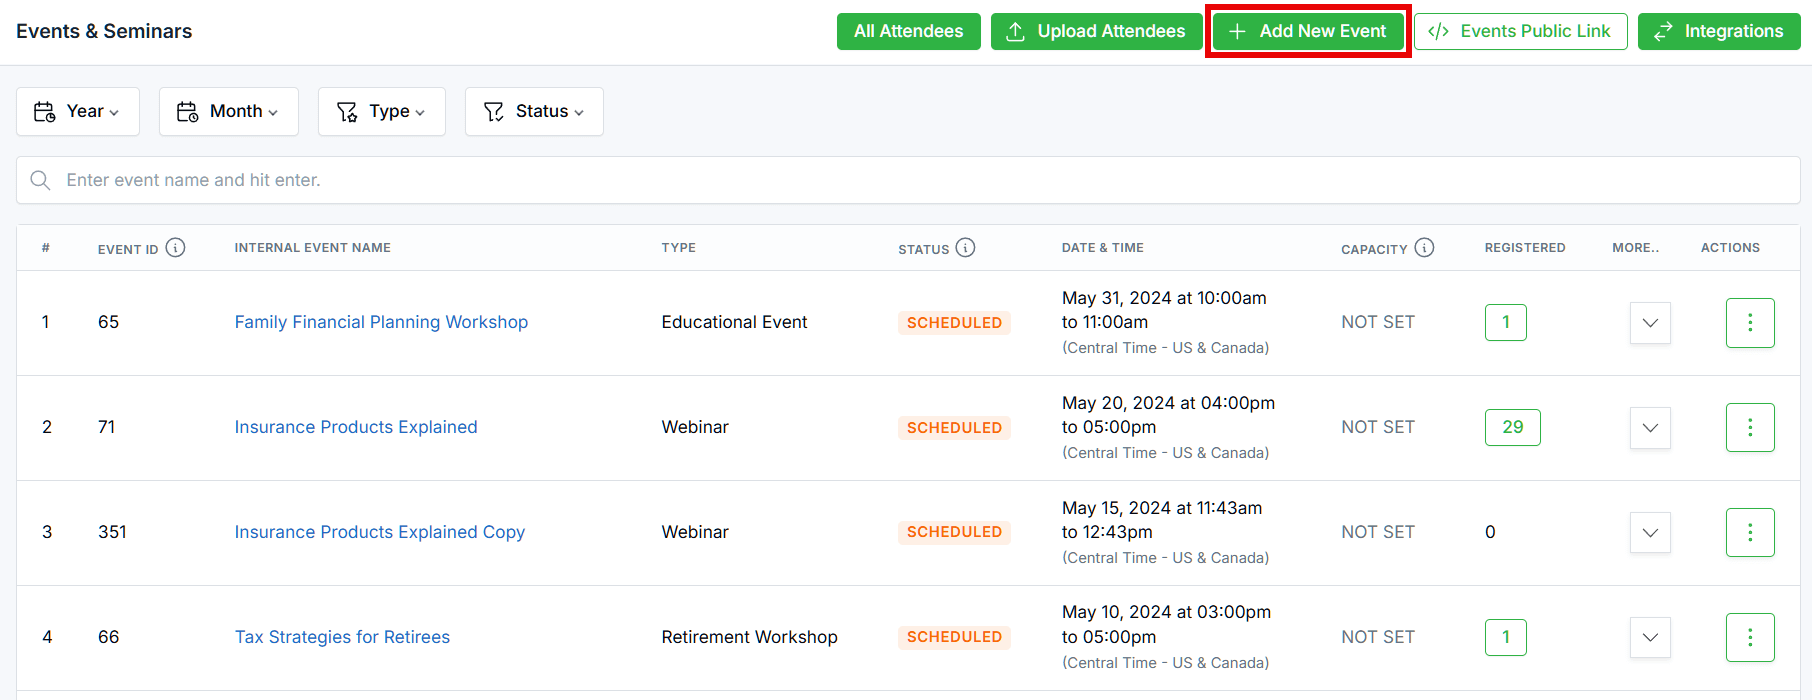
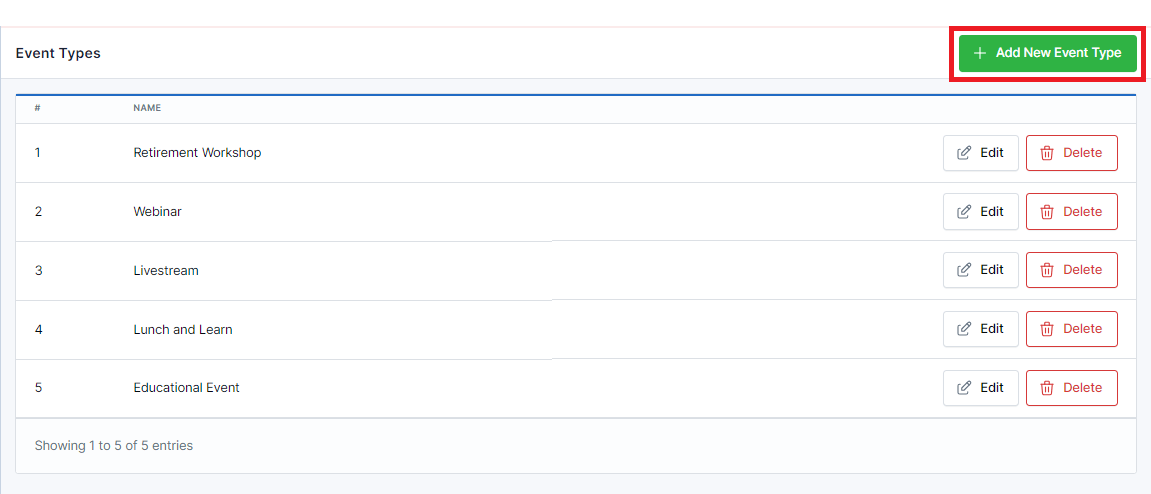
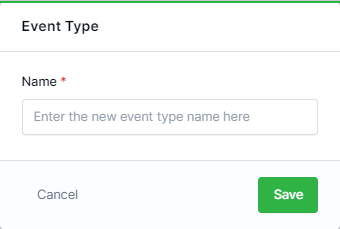
Here are the step-by-step instructions to add a new event type:
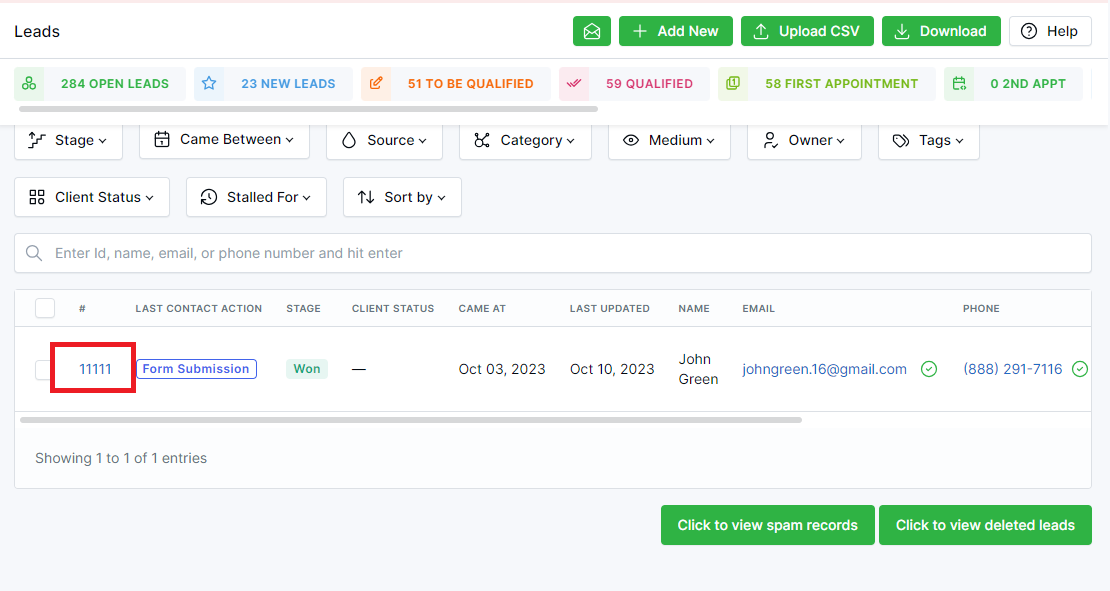
To help financial advisors with collecting client information, LeadCenter presents a solution in the form of a Financial Questionnaire. This questionnaire is designed to save both your and your client’s time. It allows your clients to fill out the information at their own pace, taking as much time as they need. Once they submit the form with complete information, you can take time to better understand their financial needs and create a plan that best suits their unique requirements.
Let’s see how this works:
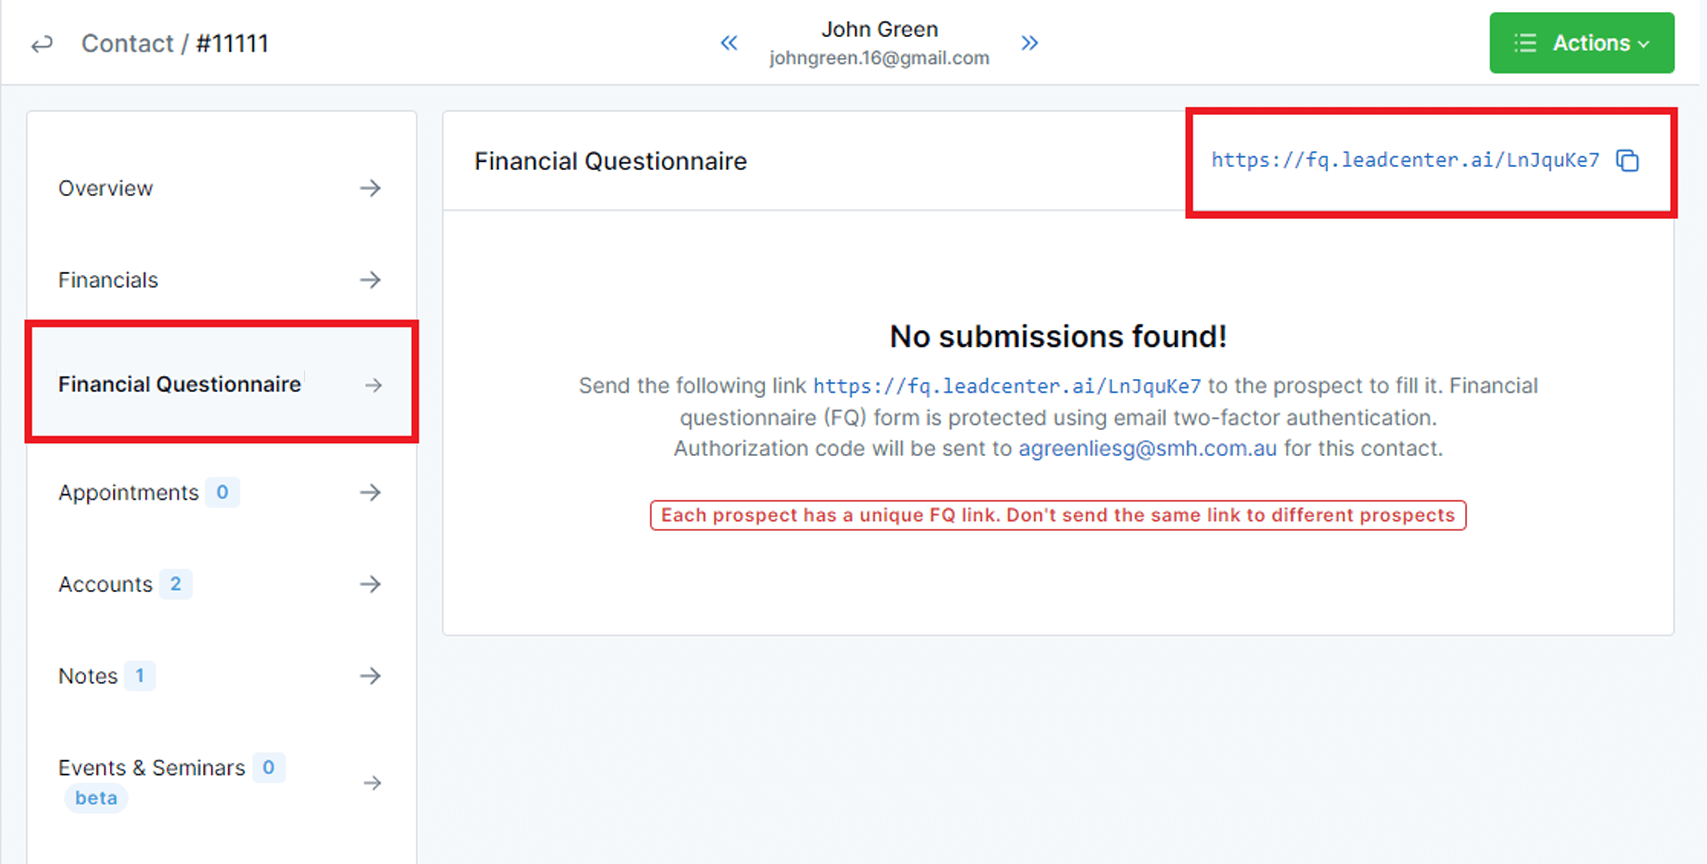
Let’s see what this questionnaire entails:
The financial questionnaire is a multi-layered form with sections containing specific questions regarding your lead’s personal and financial details. You’ll find these sections listed in the left-side pane. You can move to any section by clicking on it and filling out the details as you go.
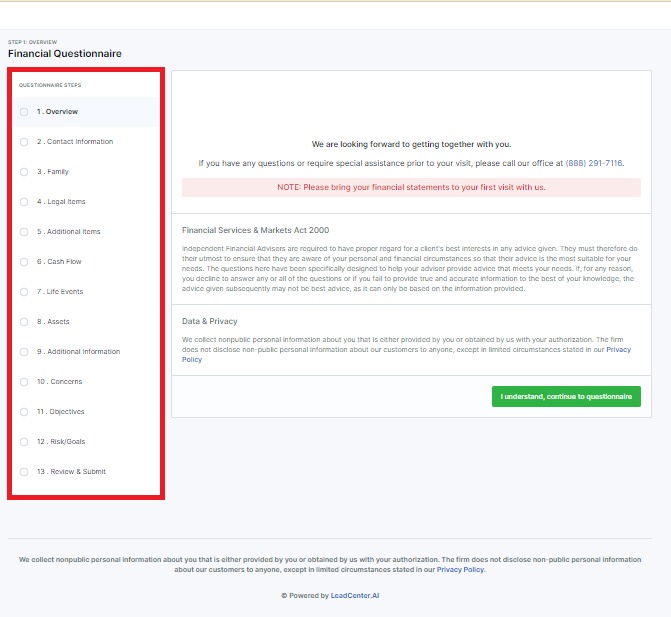
Let’s explore these sections:
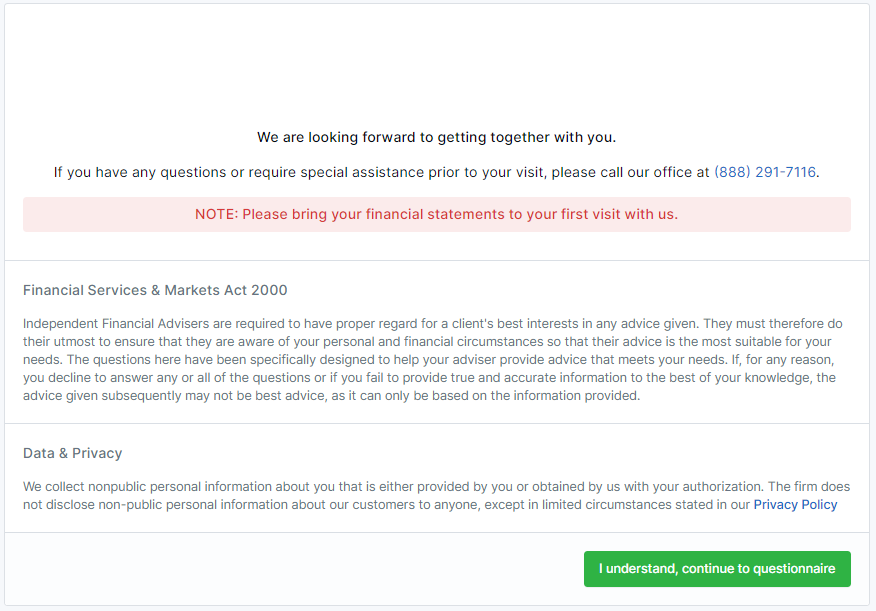
This section contains information regarding the terms, conditions, and privacy policy. This is a disclaimer for you to understand the scope of information sharing and make an informed decision based on that.
This section contains different fields to fill in contact information. You can provide your contact details to enhance reachability. This information contains your first and last name, phone number, date of birth, etc.
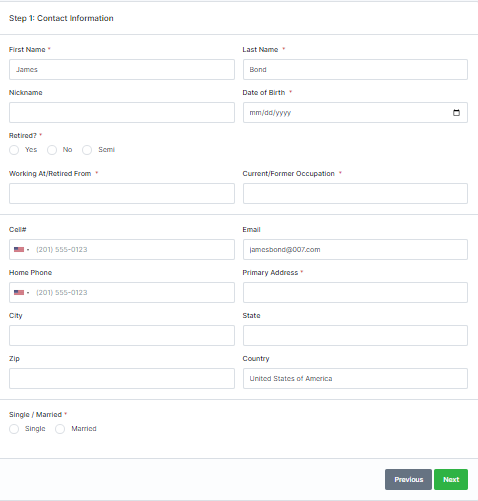
Please note that the fields marked with an asterisk are mandatory to fill in.
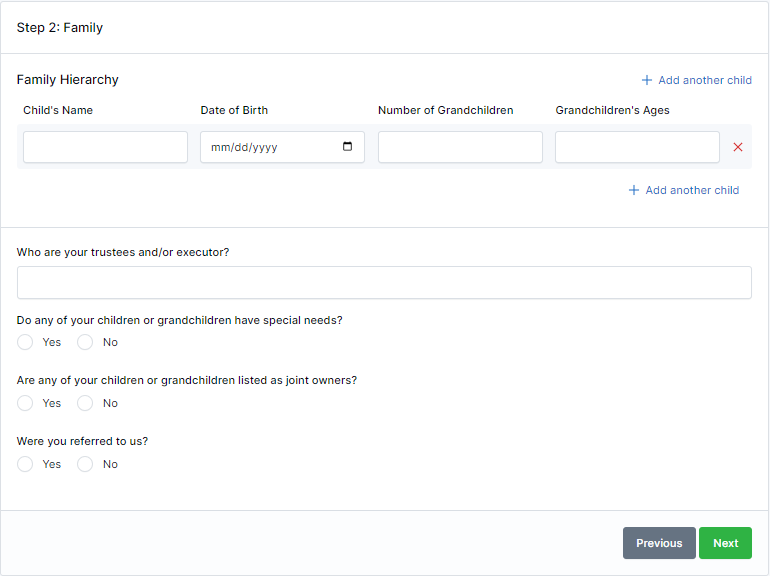
This section collects details regarding your family members. It helps your financial advisor to create a plan based on your family situation. For example, if you have a dependent family member.
You’ll see Yes/No questions in this section about the legal documents you have.
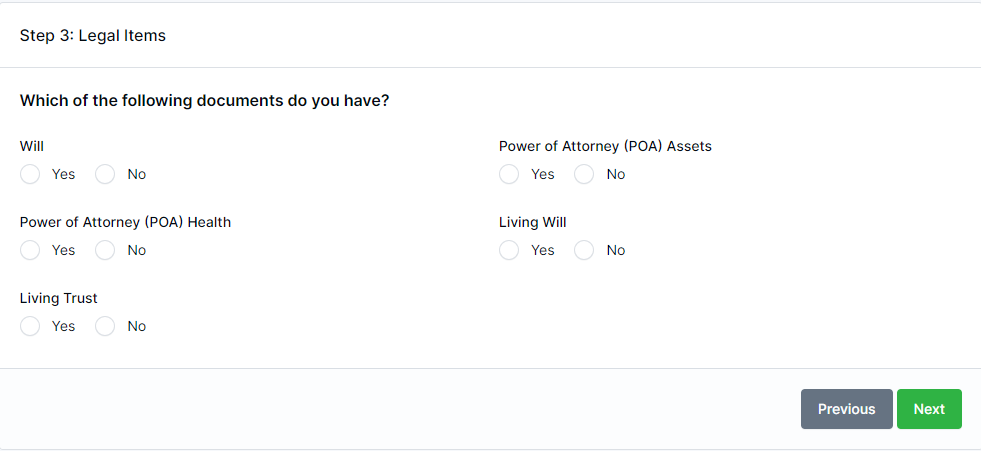
The additional items here refer to various legal documents or certificates that you might need to notify your financial advisor about.

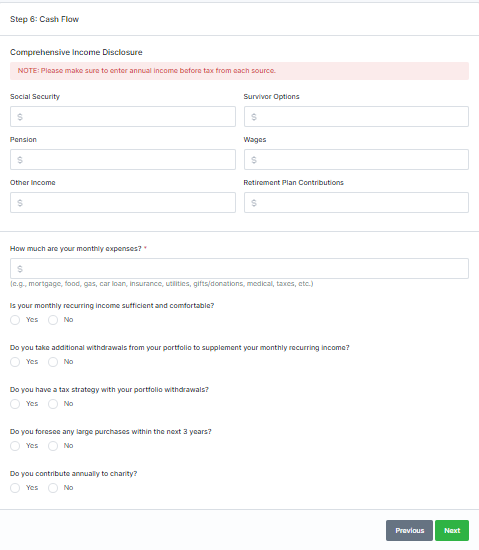
Use this section to submit your income and expenses information. This is to give a clear idea to your financial advisor about whether your monthly income is sufficient for your expenses.
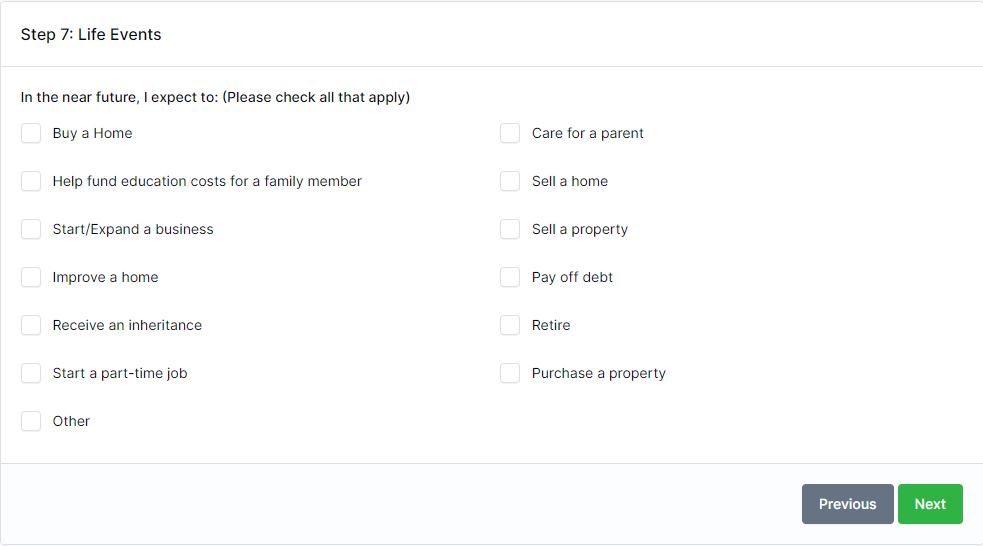
This section contains questions regarding life changes you may experience. This allows your advisor to tailor a plan that specifically caters to these changes and their financial impact. There’s a list of events and you can check all the boxes that apply.
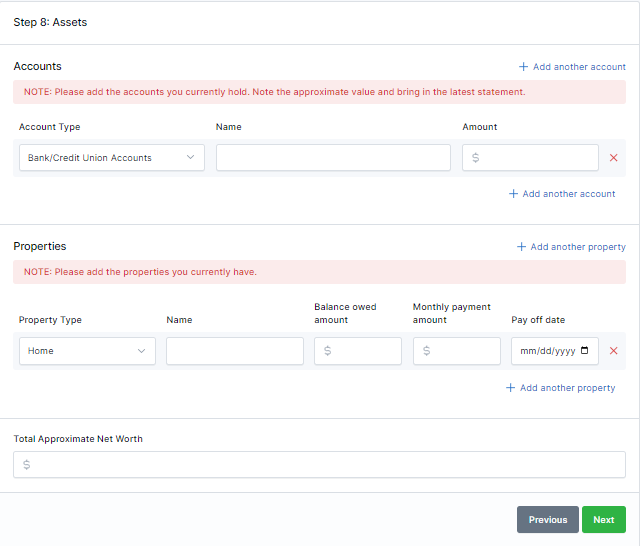
Here you submit information regarding your net worth. This will include any and all accounts you’re currently holding and the properties you possess.
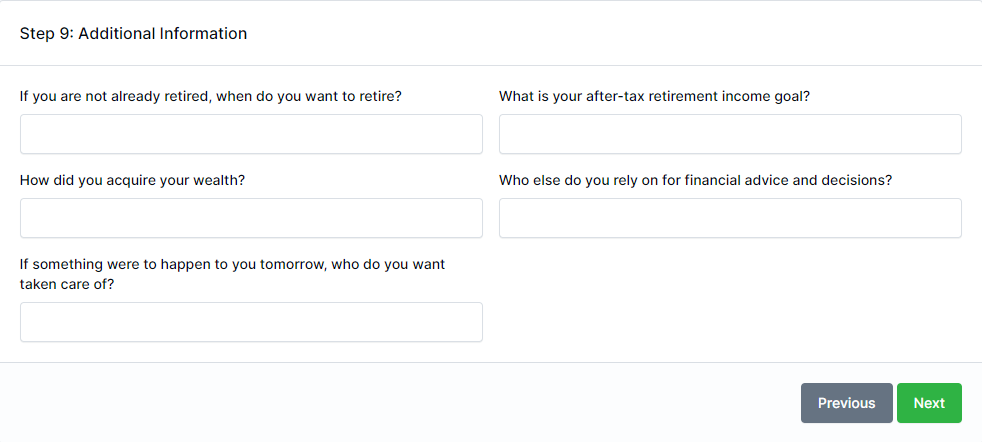
Use this section to enter details like your income goal after retirement and your beneficiaries, etc.
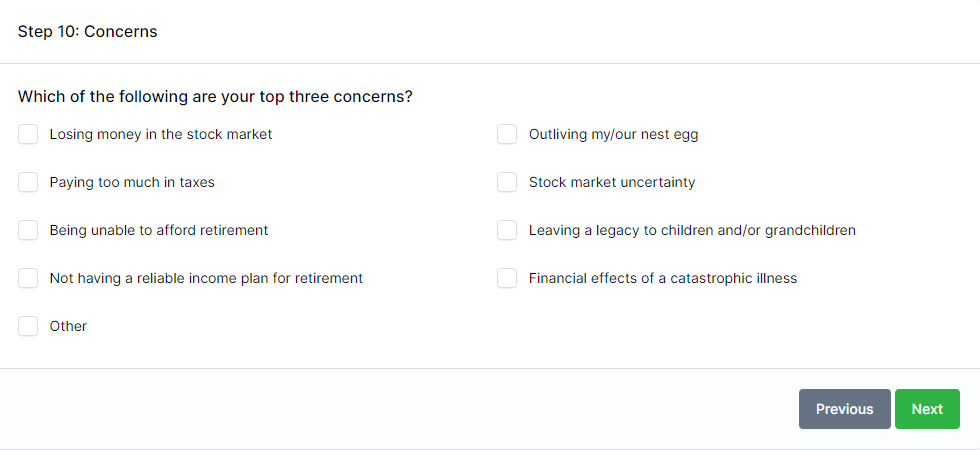
As the name suggests, you can check boxes for your top three concerns in this section. This helps your financial advisor create a plan to manage these concerns.
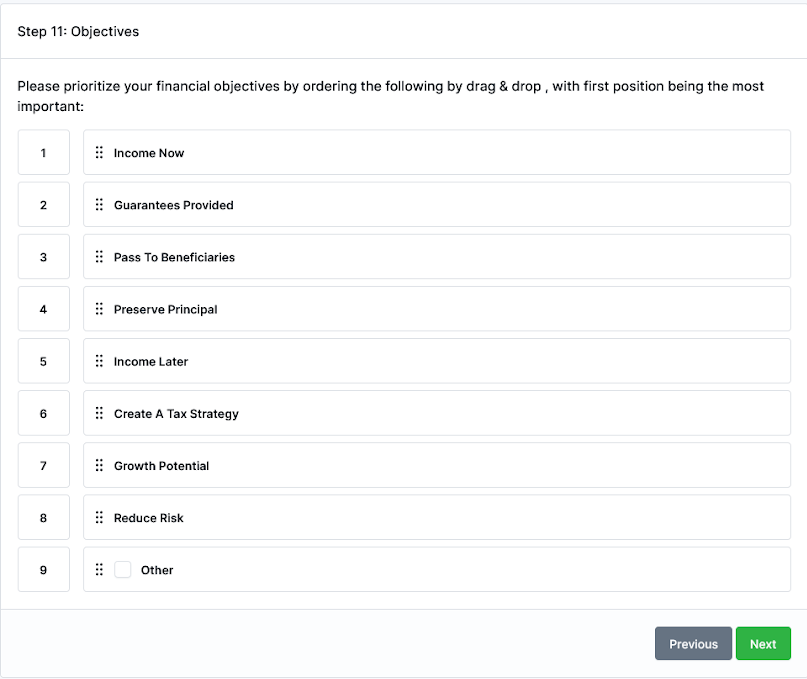
Use this section to address your financial priorities. The scoring system allows you to select a number between 1 and 9 to clearly communicate your top priorities.
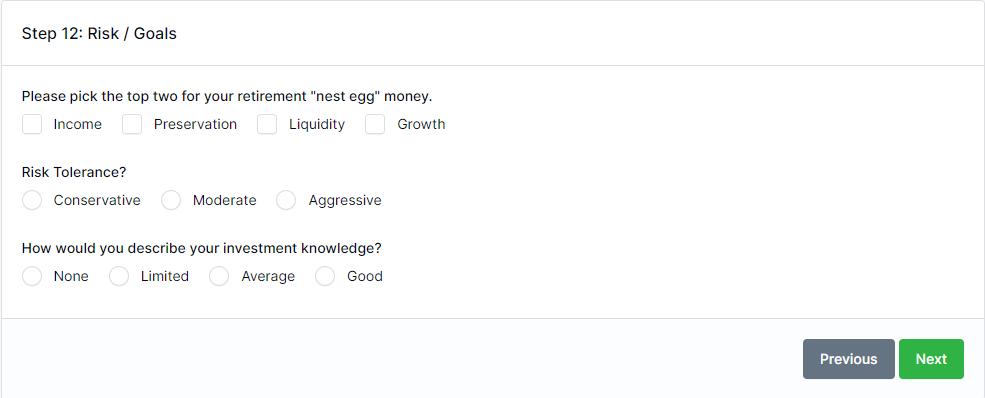
This section enables you to define your financial goals and the risk factors you want to steer clear of.
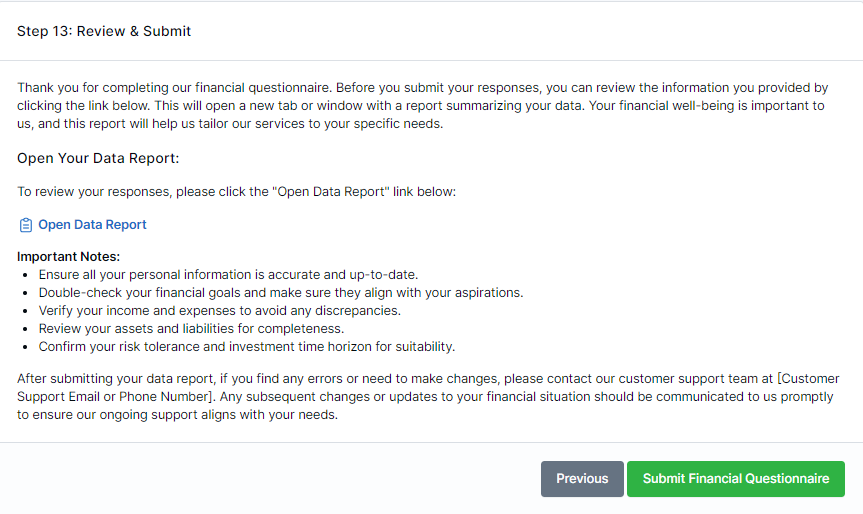
This is the last step in submitting your questionnaire. You can move to other sections and edit your answers accordingly.
LeadCentre.AI’s feature to send and receive E-mails, allows users to send and receive E-mails directly from the LeadCentre.AI interface. To send any E-mail from LeadCentre.AI, the user needs to configure an email-sending account, see Configuring Personal Level Email Account.
The LeadCenter.AI Emails section allows the user to :
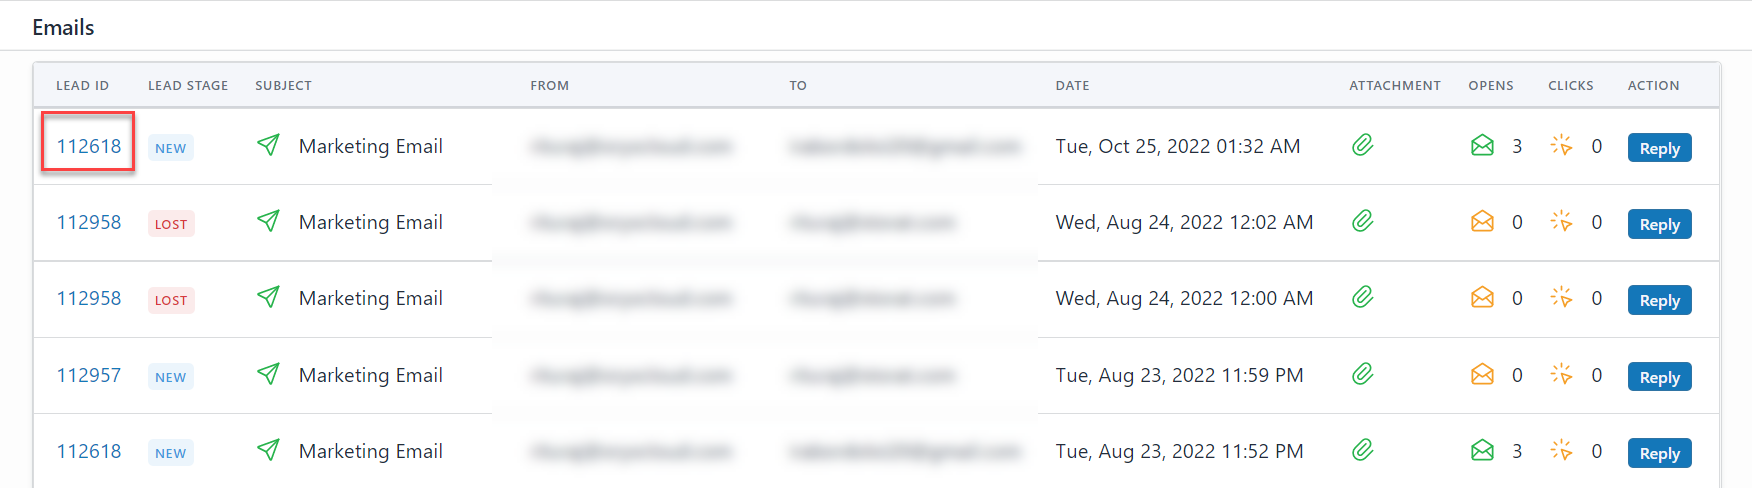
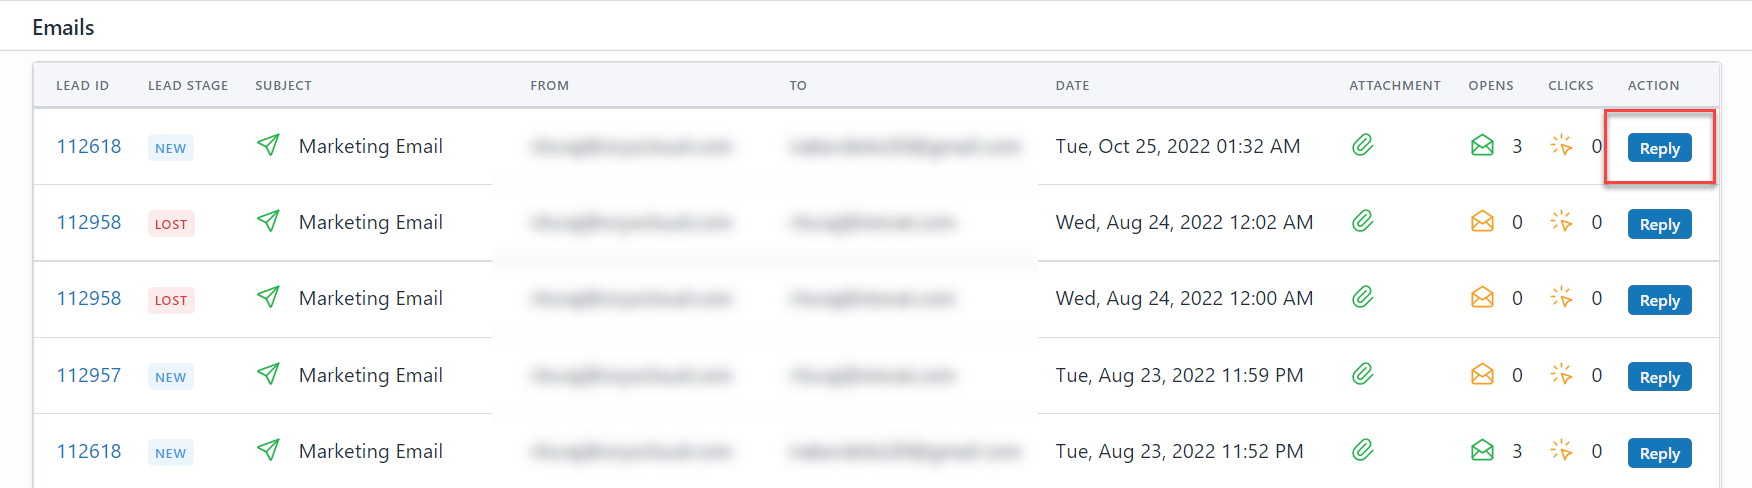
It also allows you to filter Emails based on their Stage, Email ID, Outgoing and Incoming, and Sort. Each filter drop-down option, lets you choose and filter the required Email. It also displays the total number of sent and received emails, open rate, and CTR.
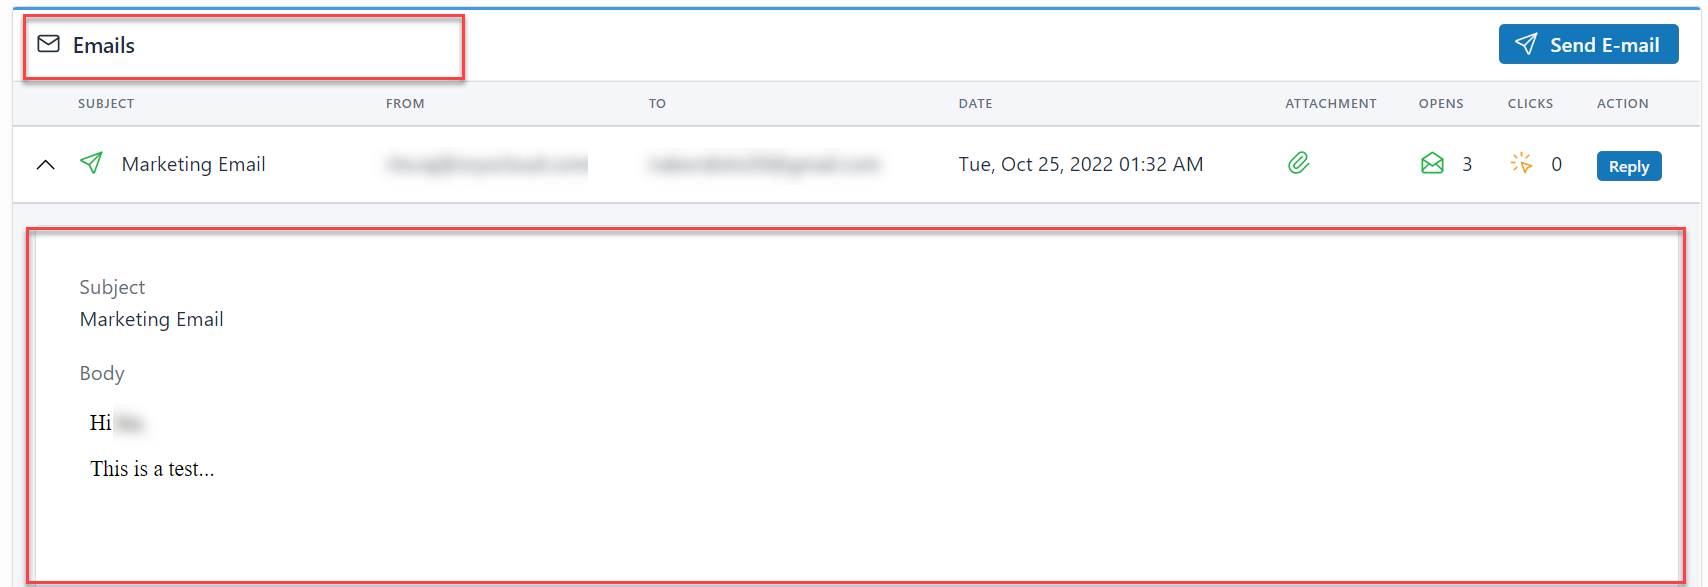
The LeadCentre.AI Emails page displays the list of sent and received Emails for each lead.
To view the Email Details, do the following;

To send an Email, do the following;
LeadCentre.AI's feature to send and receive SMS, allows users to send and receive SMS directly from the LeadCentre.AI interface. To send any SMS from LeadCentre.AI, the user needs to add a virtual number, see Configuring Call Redirect (Virtual Phone Number) to capture Phone Leads.
The LeadCenter.AI SMS section allows the user to :
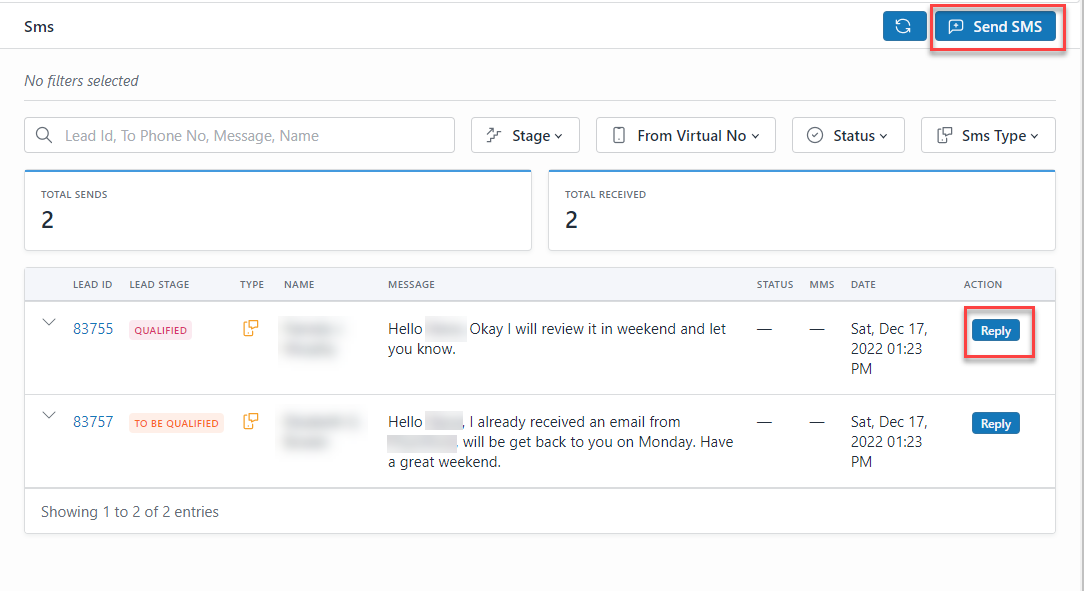
It also allows you to filter SMSs based on their Stage, Virtual Number, Status, and SMS type. Each filter drop-down option, lets you choose and filter the required SMS. It also displays the total number of sent and received SMS.
The LeadCentre.AI SMS page displays the list of sent and received SMS for each lead. Click on the drop-down arrow on the Lead ID to view the chain of SMS sent and received.

To send or reply to an SMS, do the following;
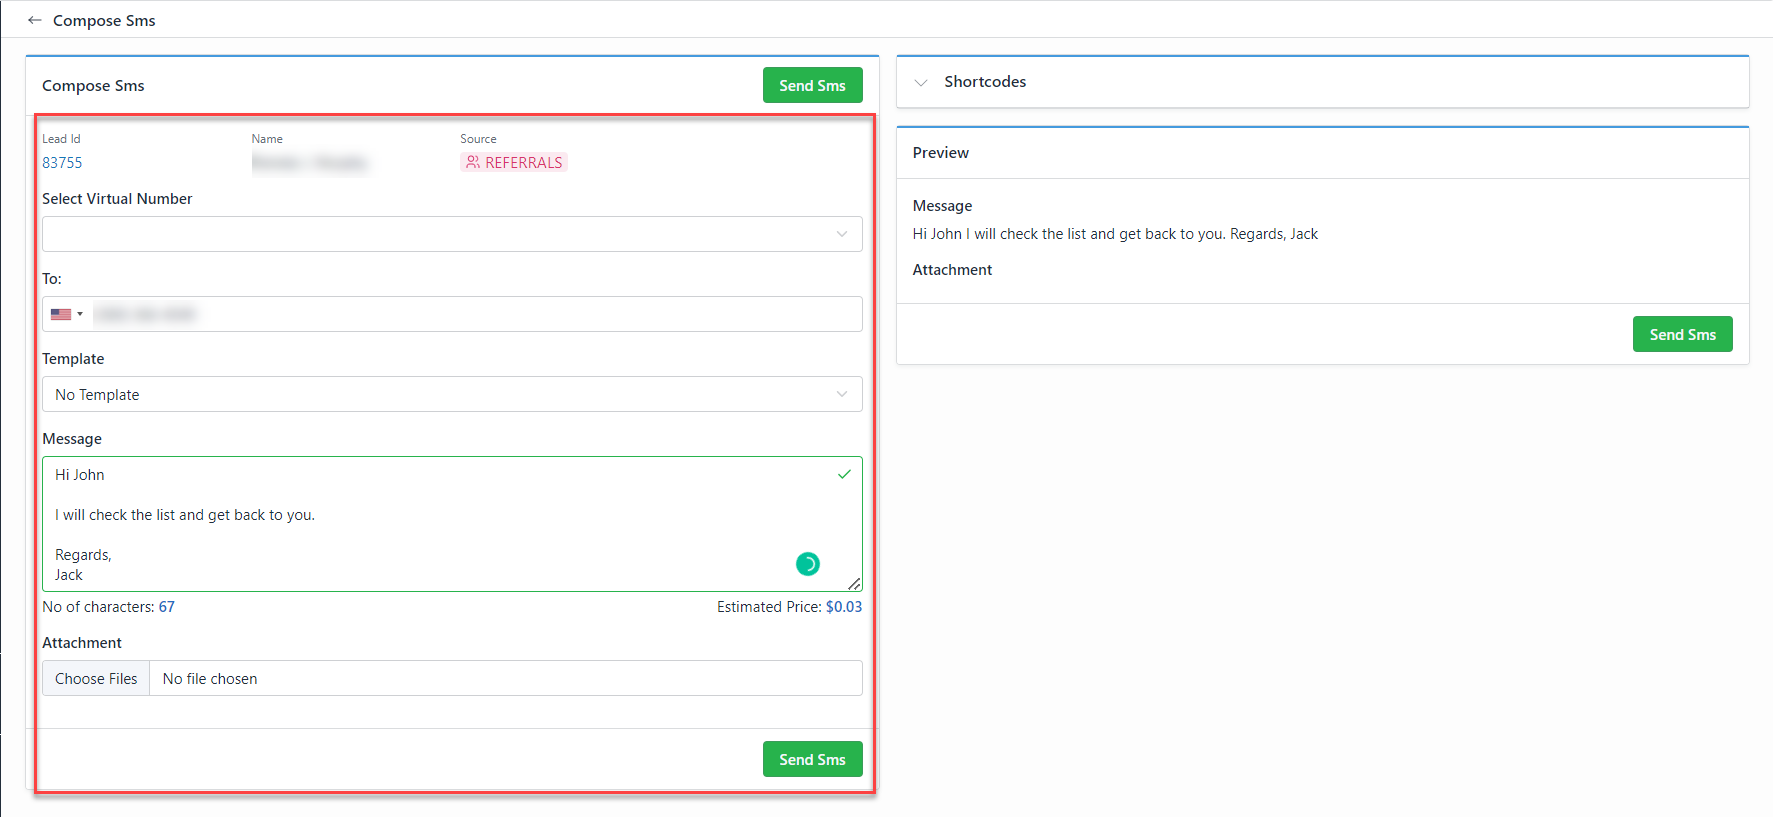
To send an SMS to a lead, do the following;
LeadCenter.AI, Lead Intelligence feature provides the user with more intelligent information about a lead in various forms like the following:
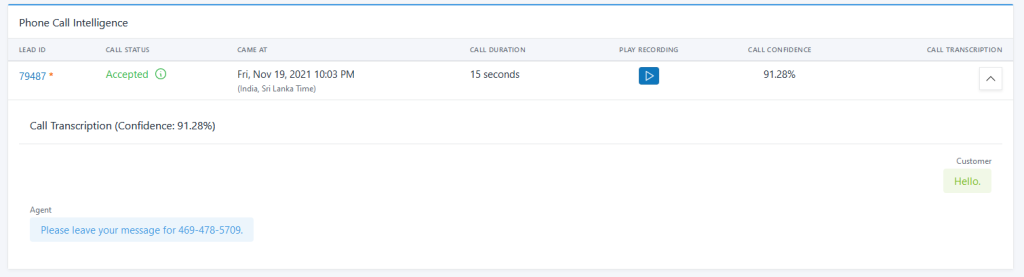
Whenever you receive a call on the virtual number, you can get more information about the lead the Phone Number, its Validity, Type, Owner Name, Phone Owner Type, Carrier, and State. You can also see the verified date of the phone number by the registered carrier.

Phone Call Intelligence also has the functionality of call recording and call transcription. This recording provides information about the lead like the lead ID, Status of the call(ACCEPTED/REJECTED), call arrival, call duration, play recording, call confidence (accuracy of the call), and call transcription.
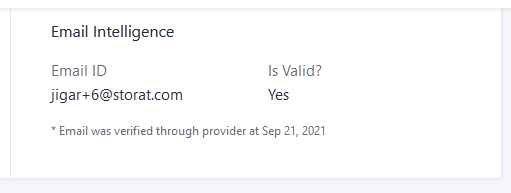
Whenever you receive an email, you can get more information about the lead's email ID, like the Email ID and its validity. You can also see the verified date of the email ID through the provider.
LeadCenter.AI allows managing tasks for all your employees or yourself by creating a to-do list. A to-do list helps to organize your tasks efficiently and effectively.
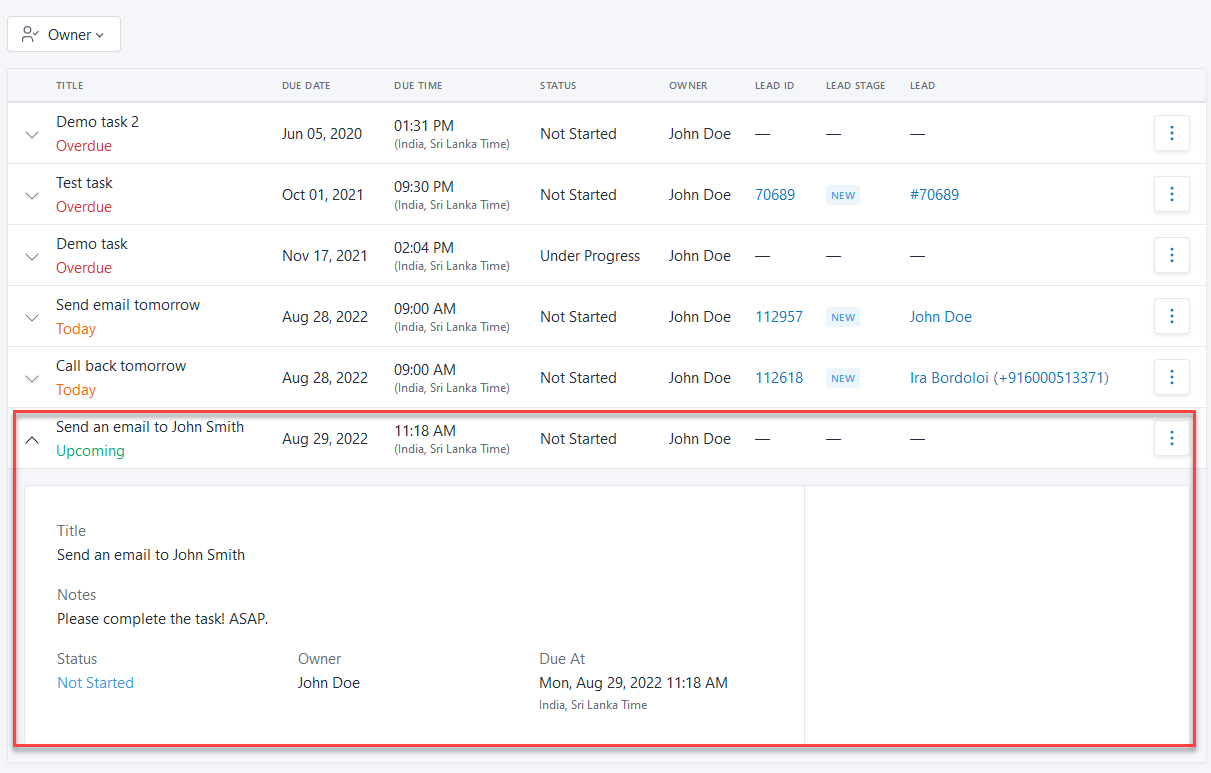
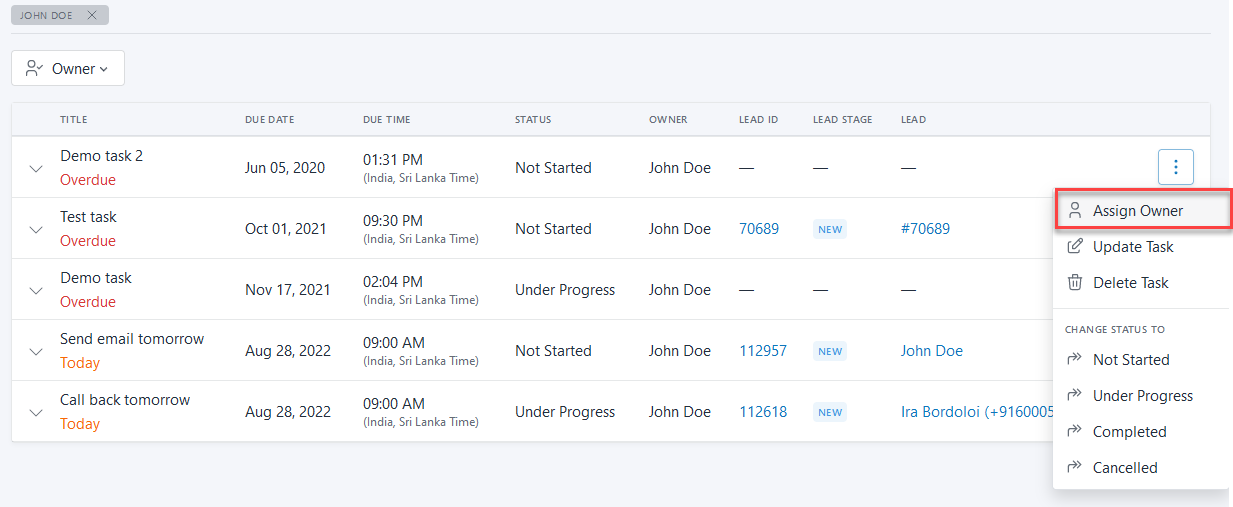
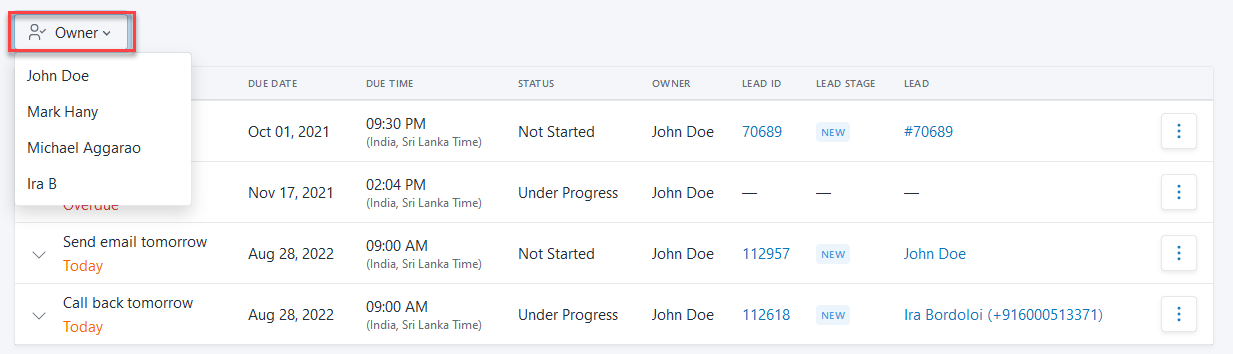
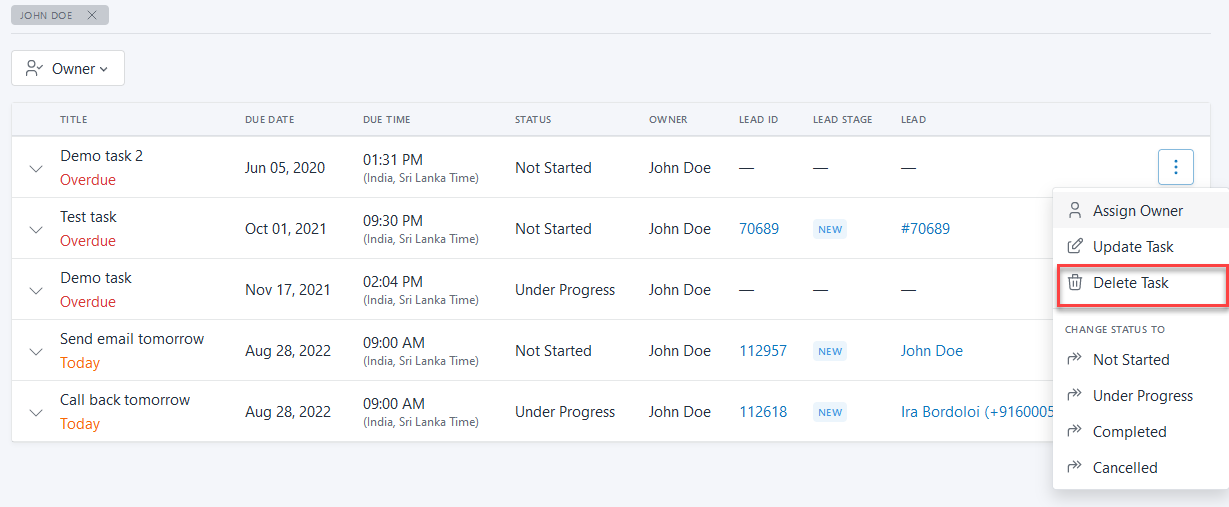
The Tasks page, displays the list of all the created tasks, a count of all the tasks in pending, completed, and canceled state, a filter to sort the task according to the owner, and the options to create, update, delete a task, assign an owner and modify the status.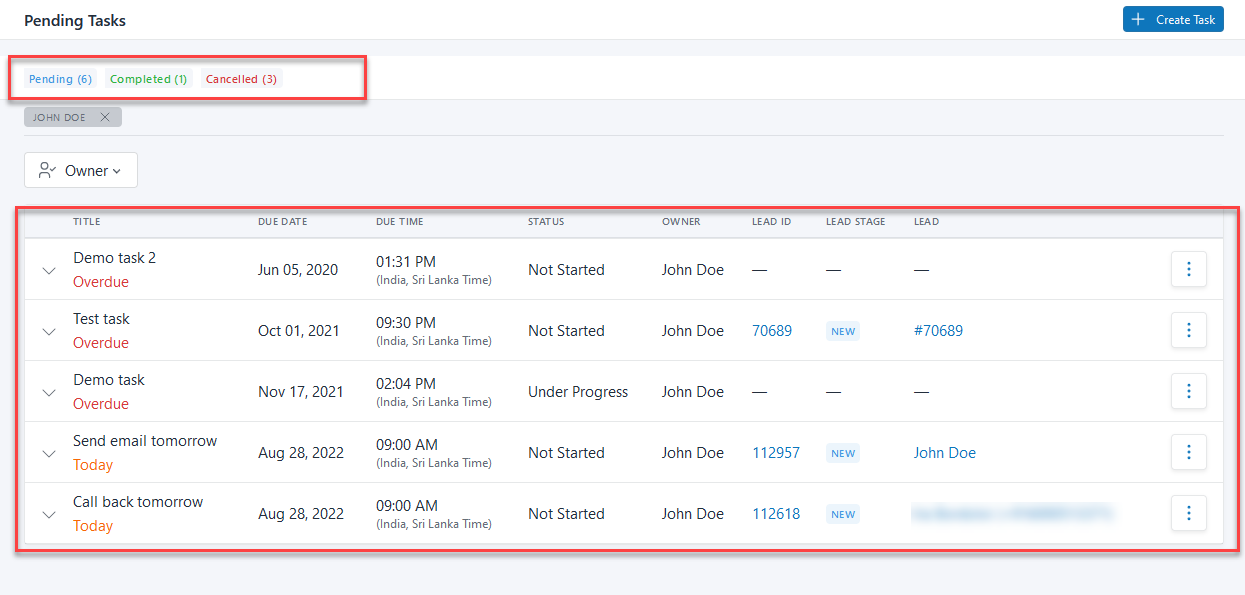
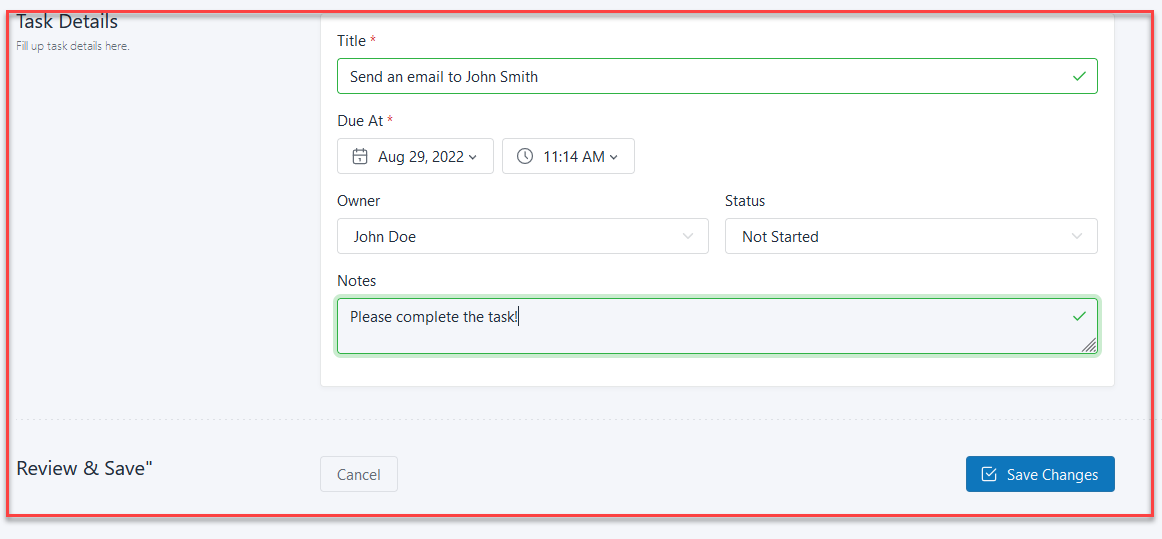
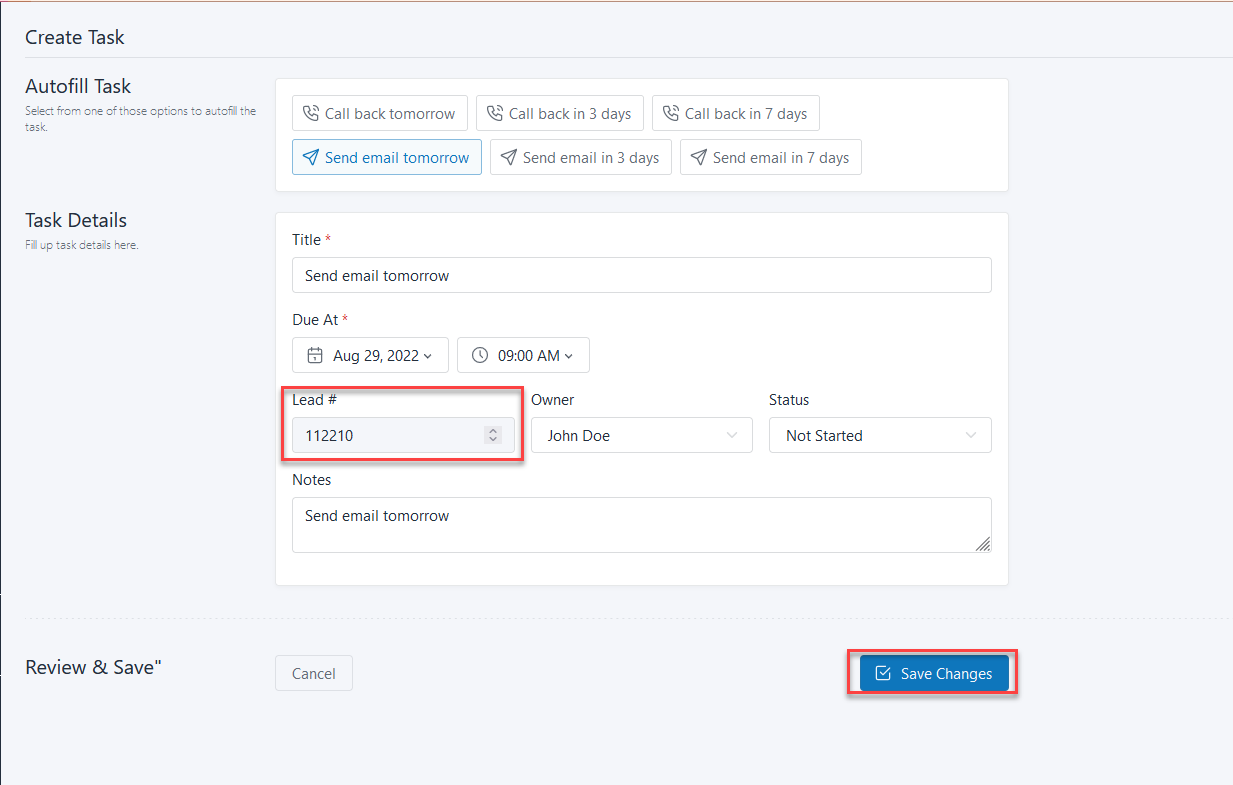
To create a task, do the following;

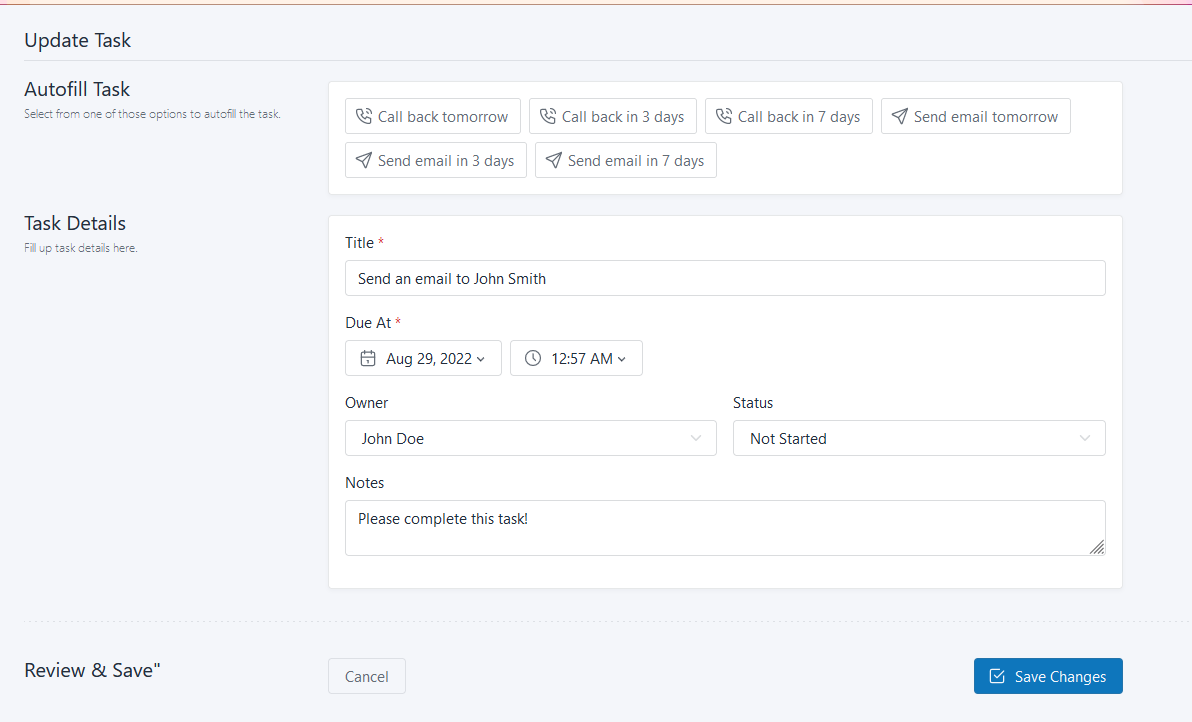
To update a task, do the following;
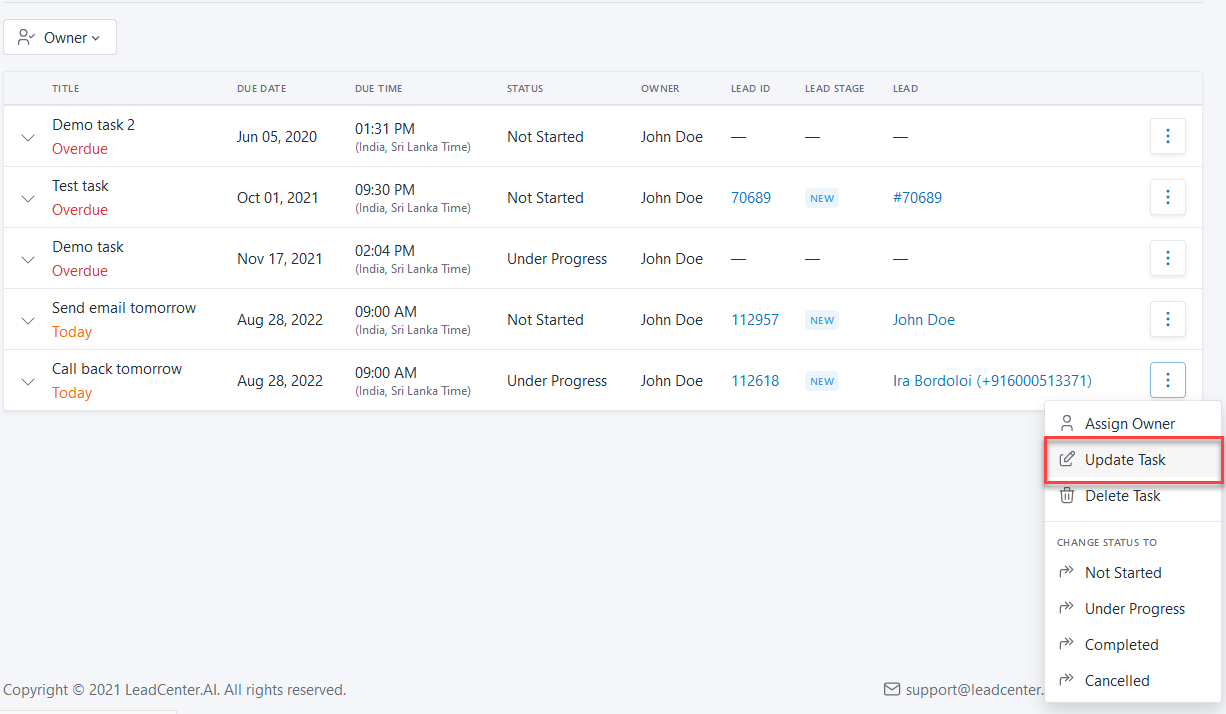
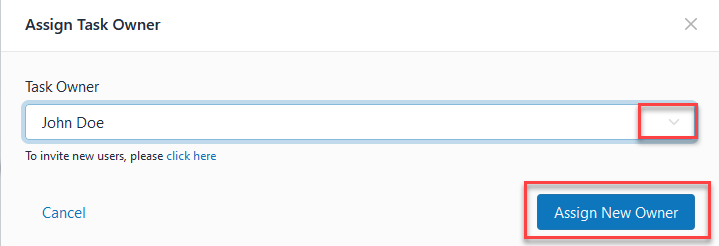
To assign an owner, do the following;

To delete a task, do the following;
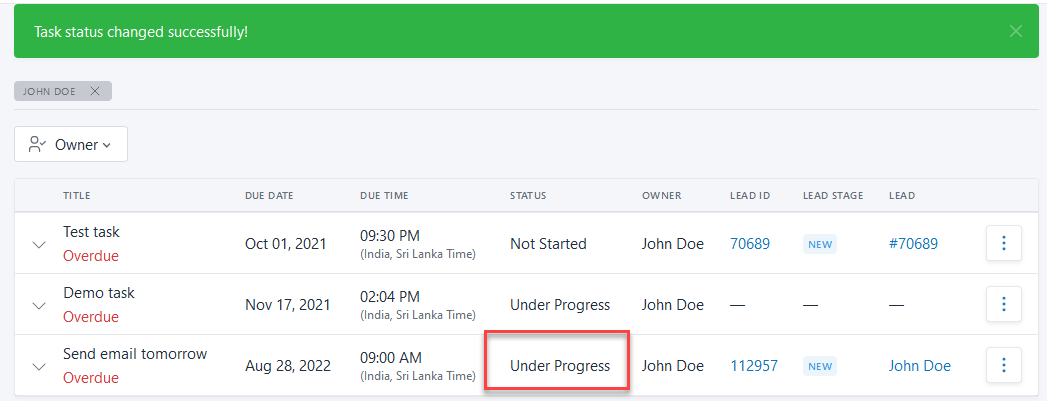
To change the task of status, do the following;

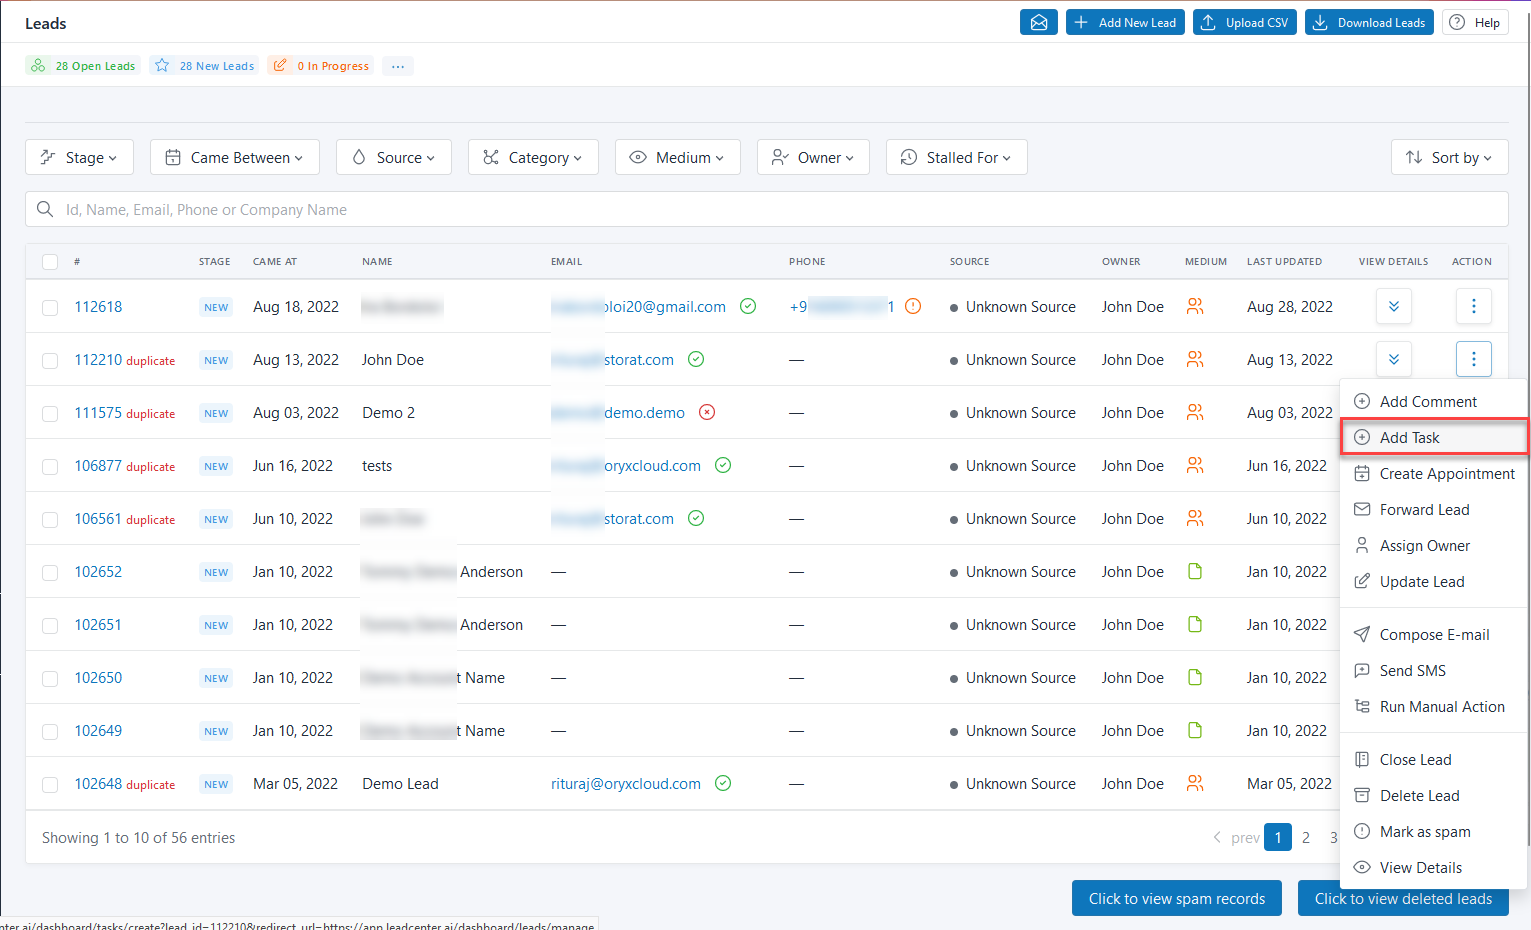
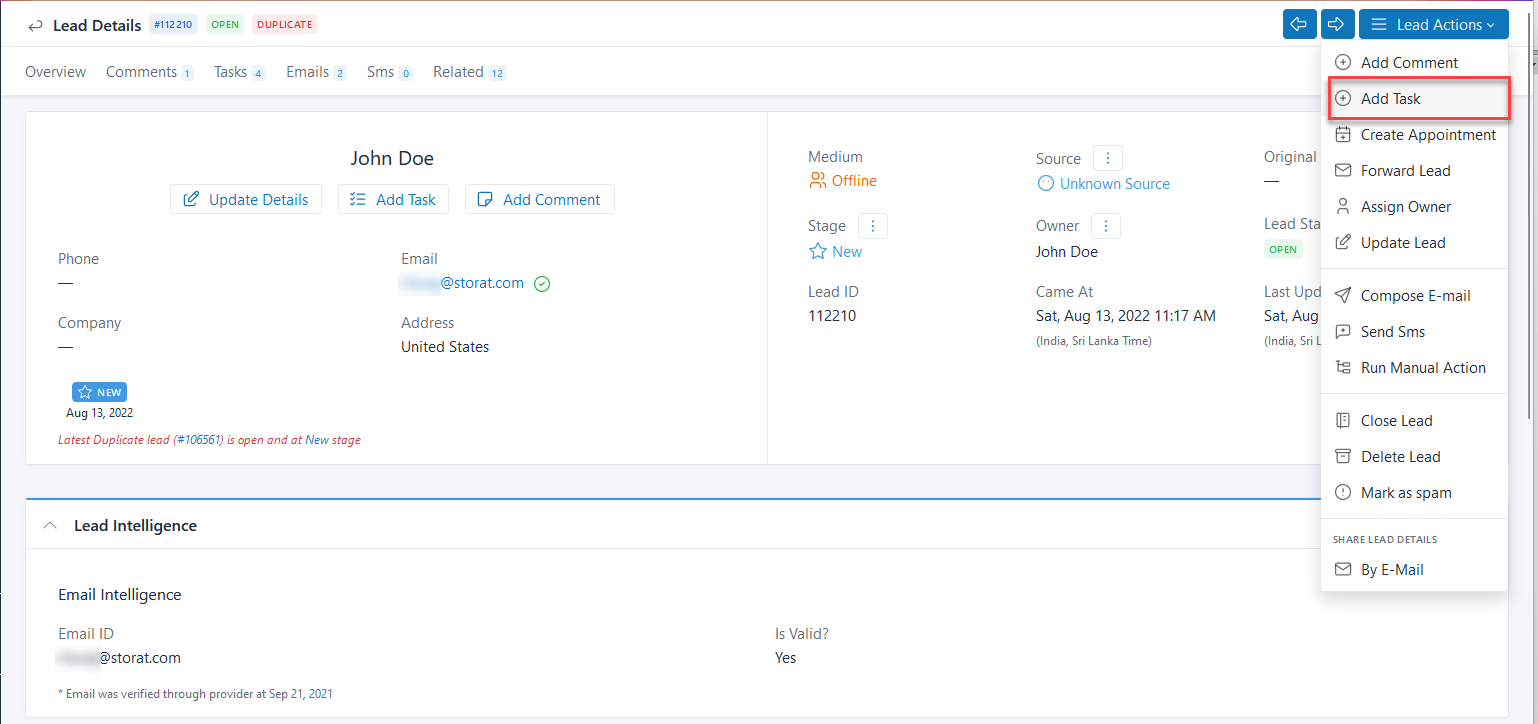
To assign a task to a lead, do the following;
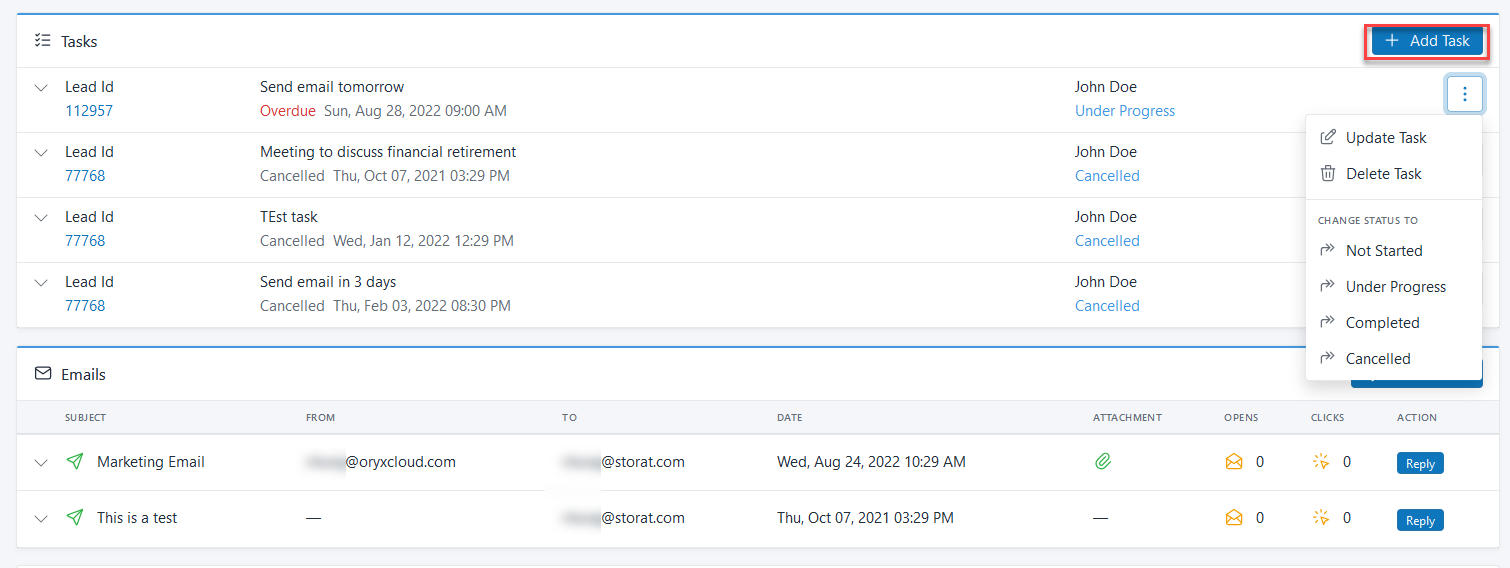
To verify if the task is created for the lead, go to Lead Detail(of the Lead from whom the task was created) and scroll to the Tasks section.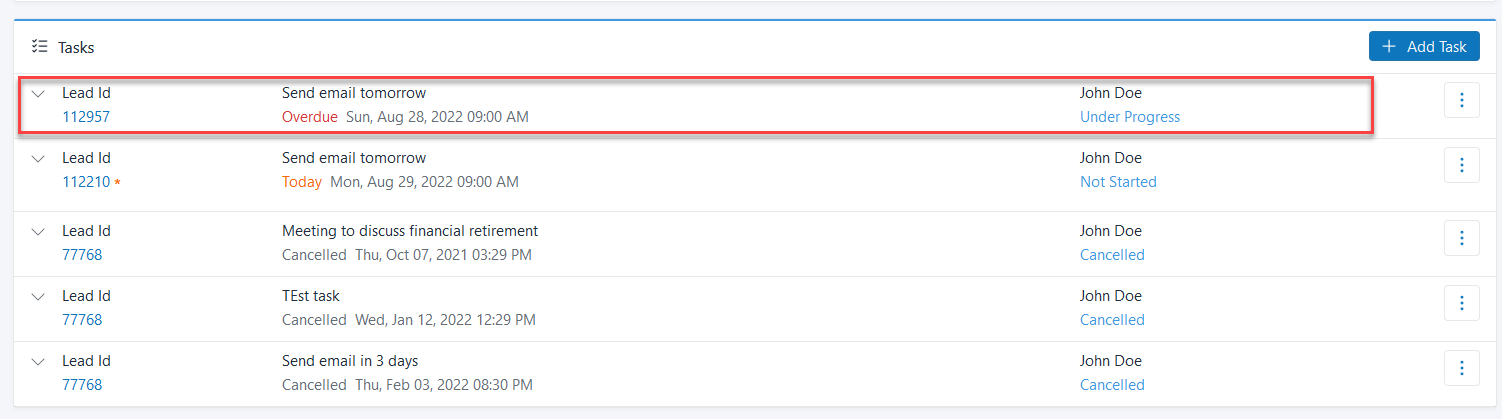
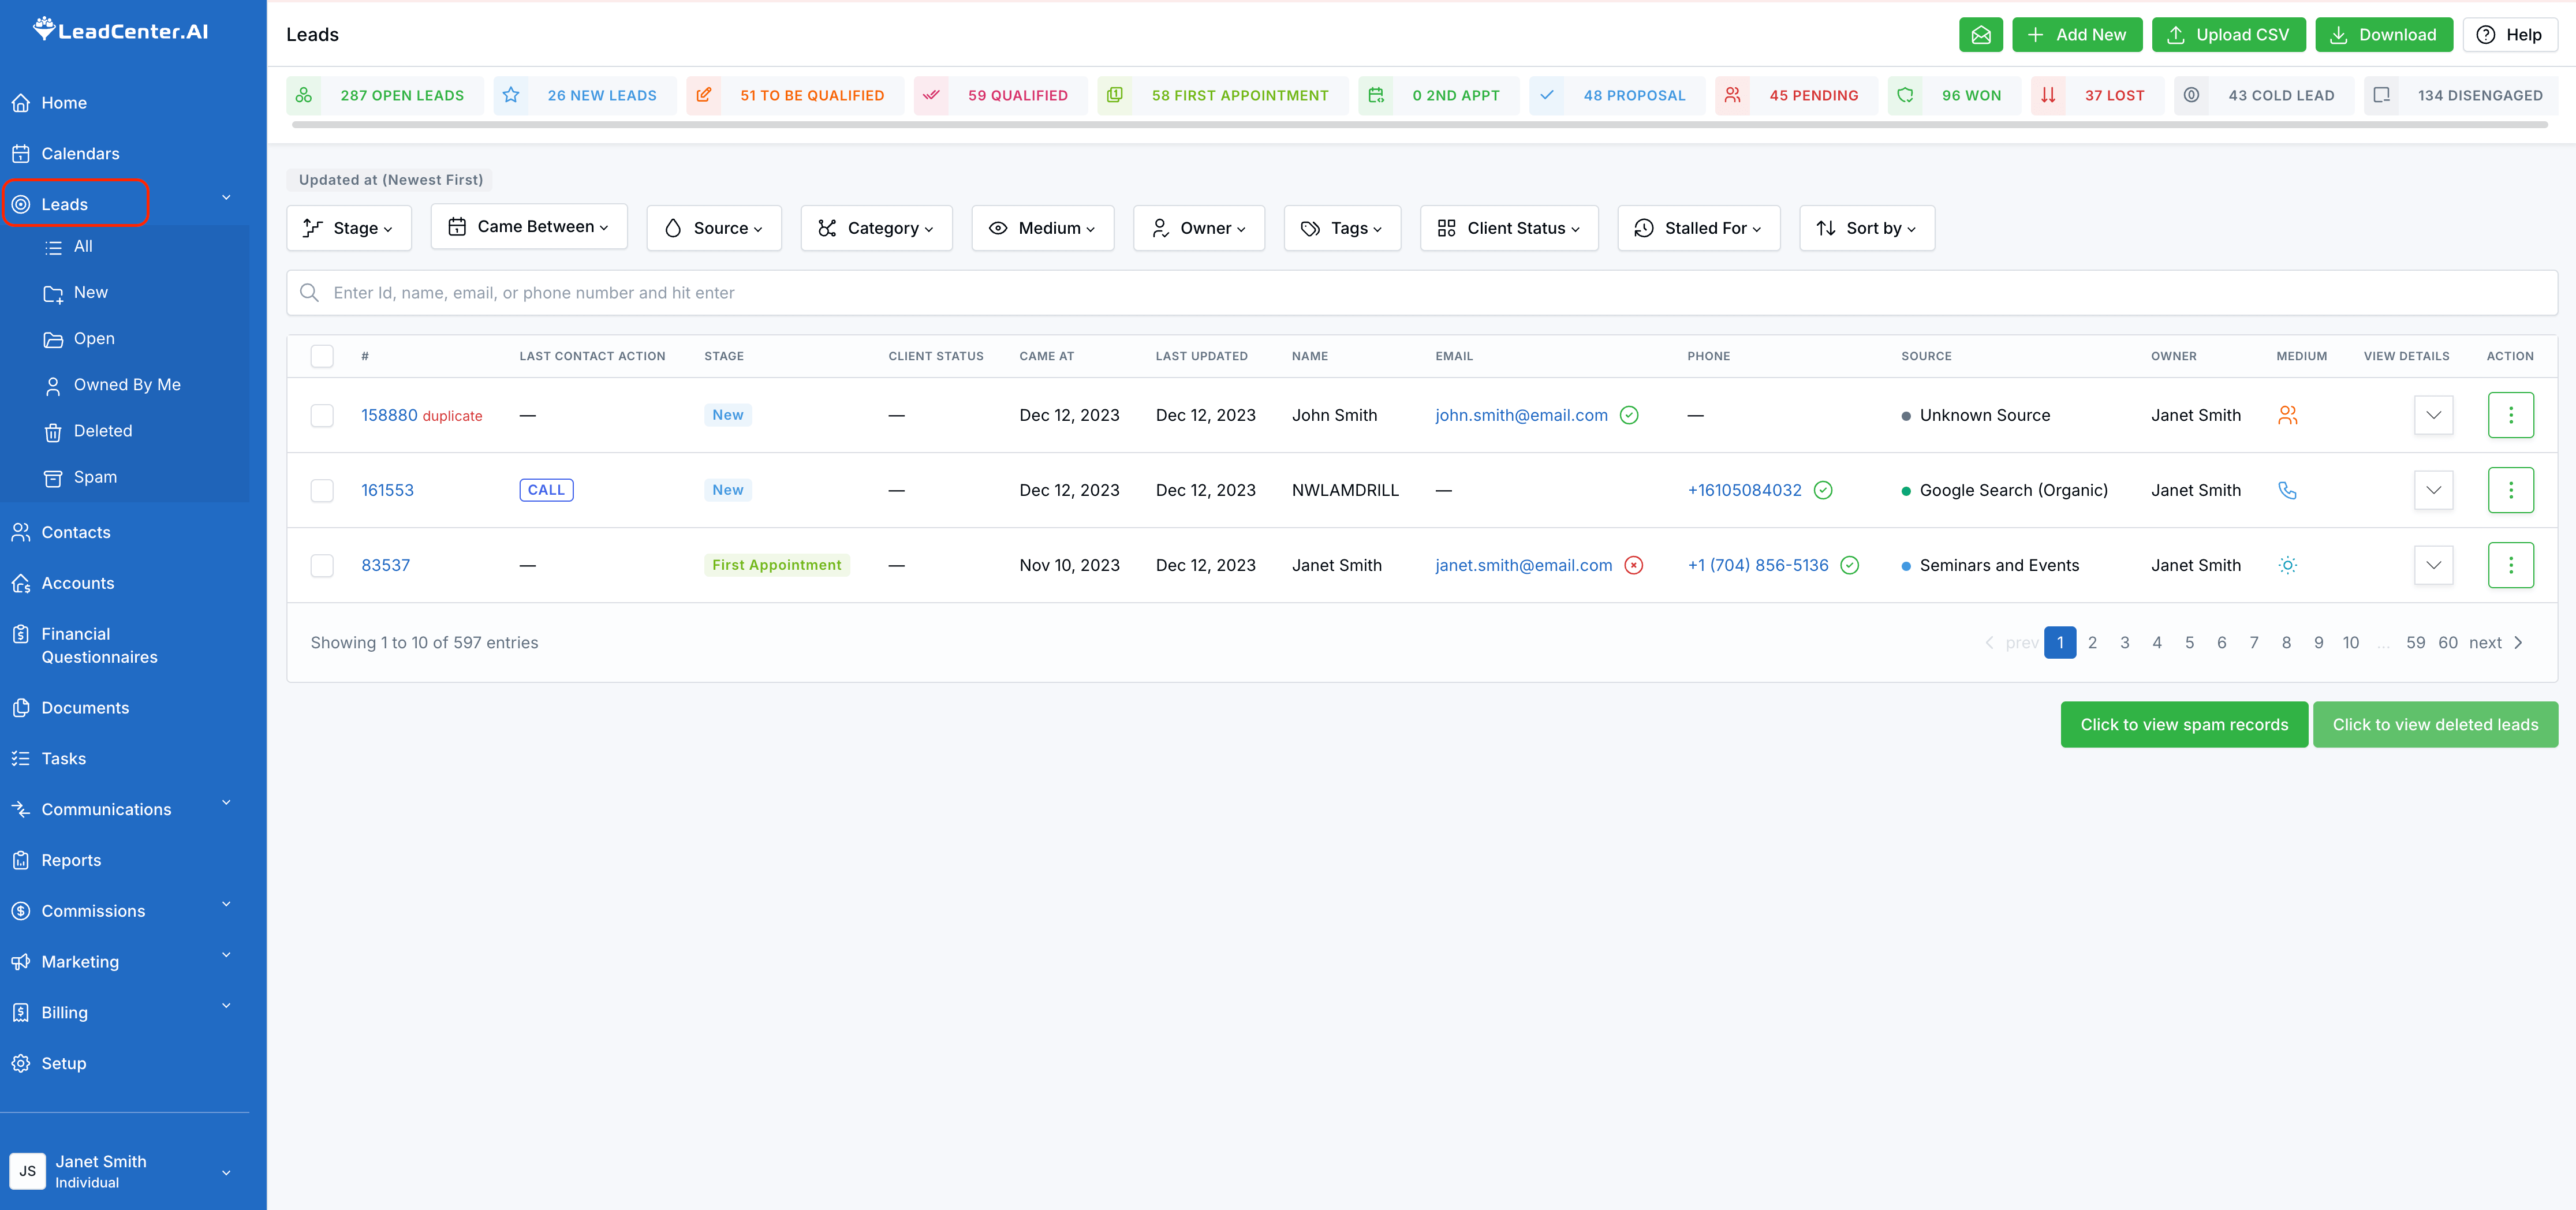
The LeadCenter.AI Lead Management System which is defined as the "Leads" section allows you to manage the information related to leads. It allows you to manage the leads by sending e-mails, creating appointments, adding comments, updating the status of the leads, etc.
To manage leads do the following;
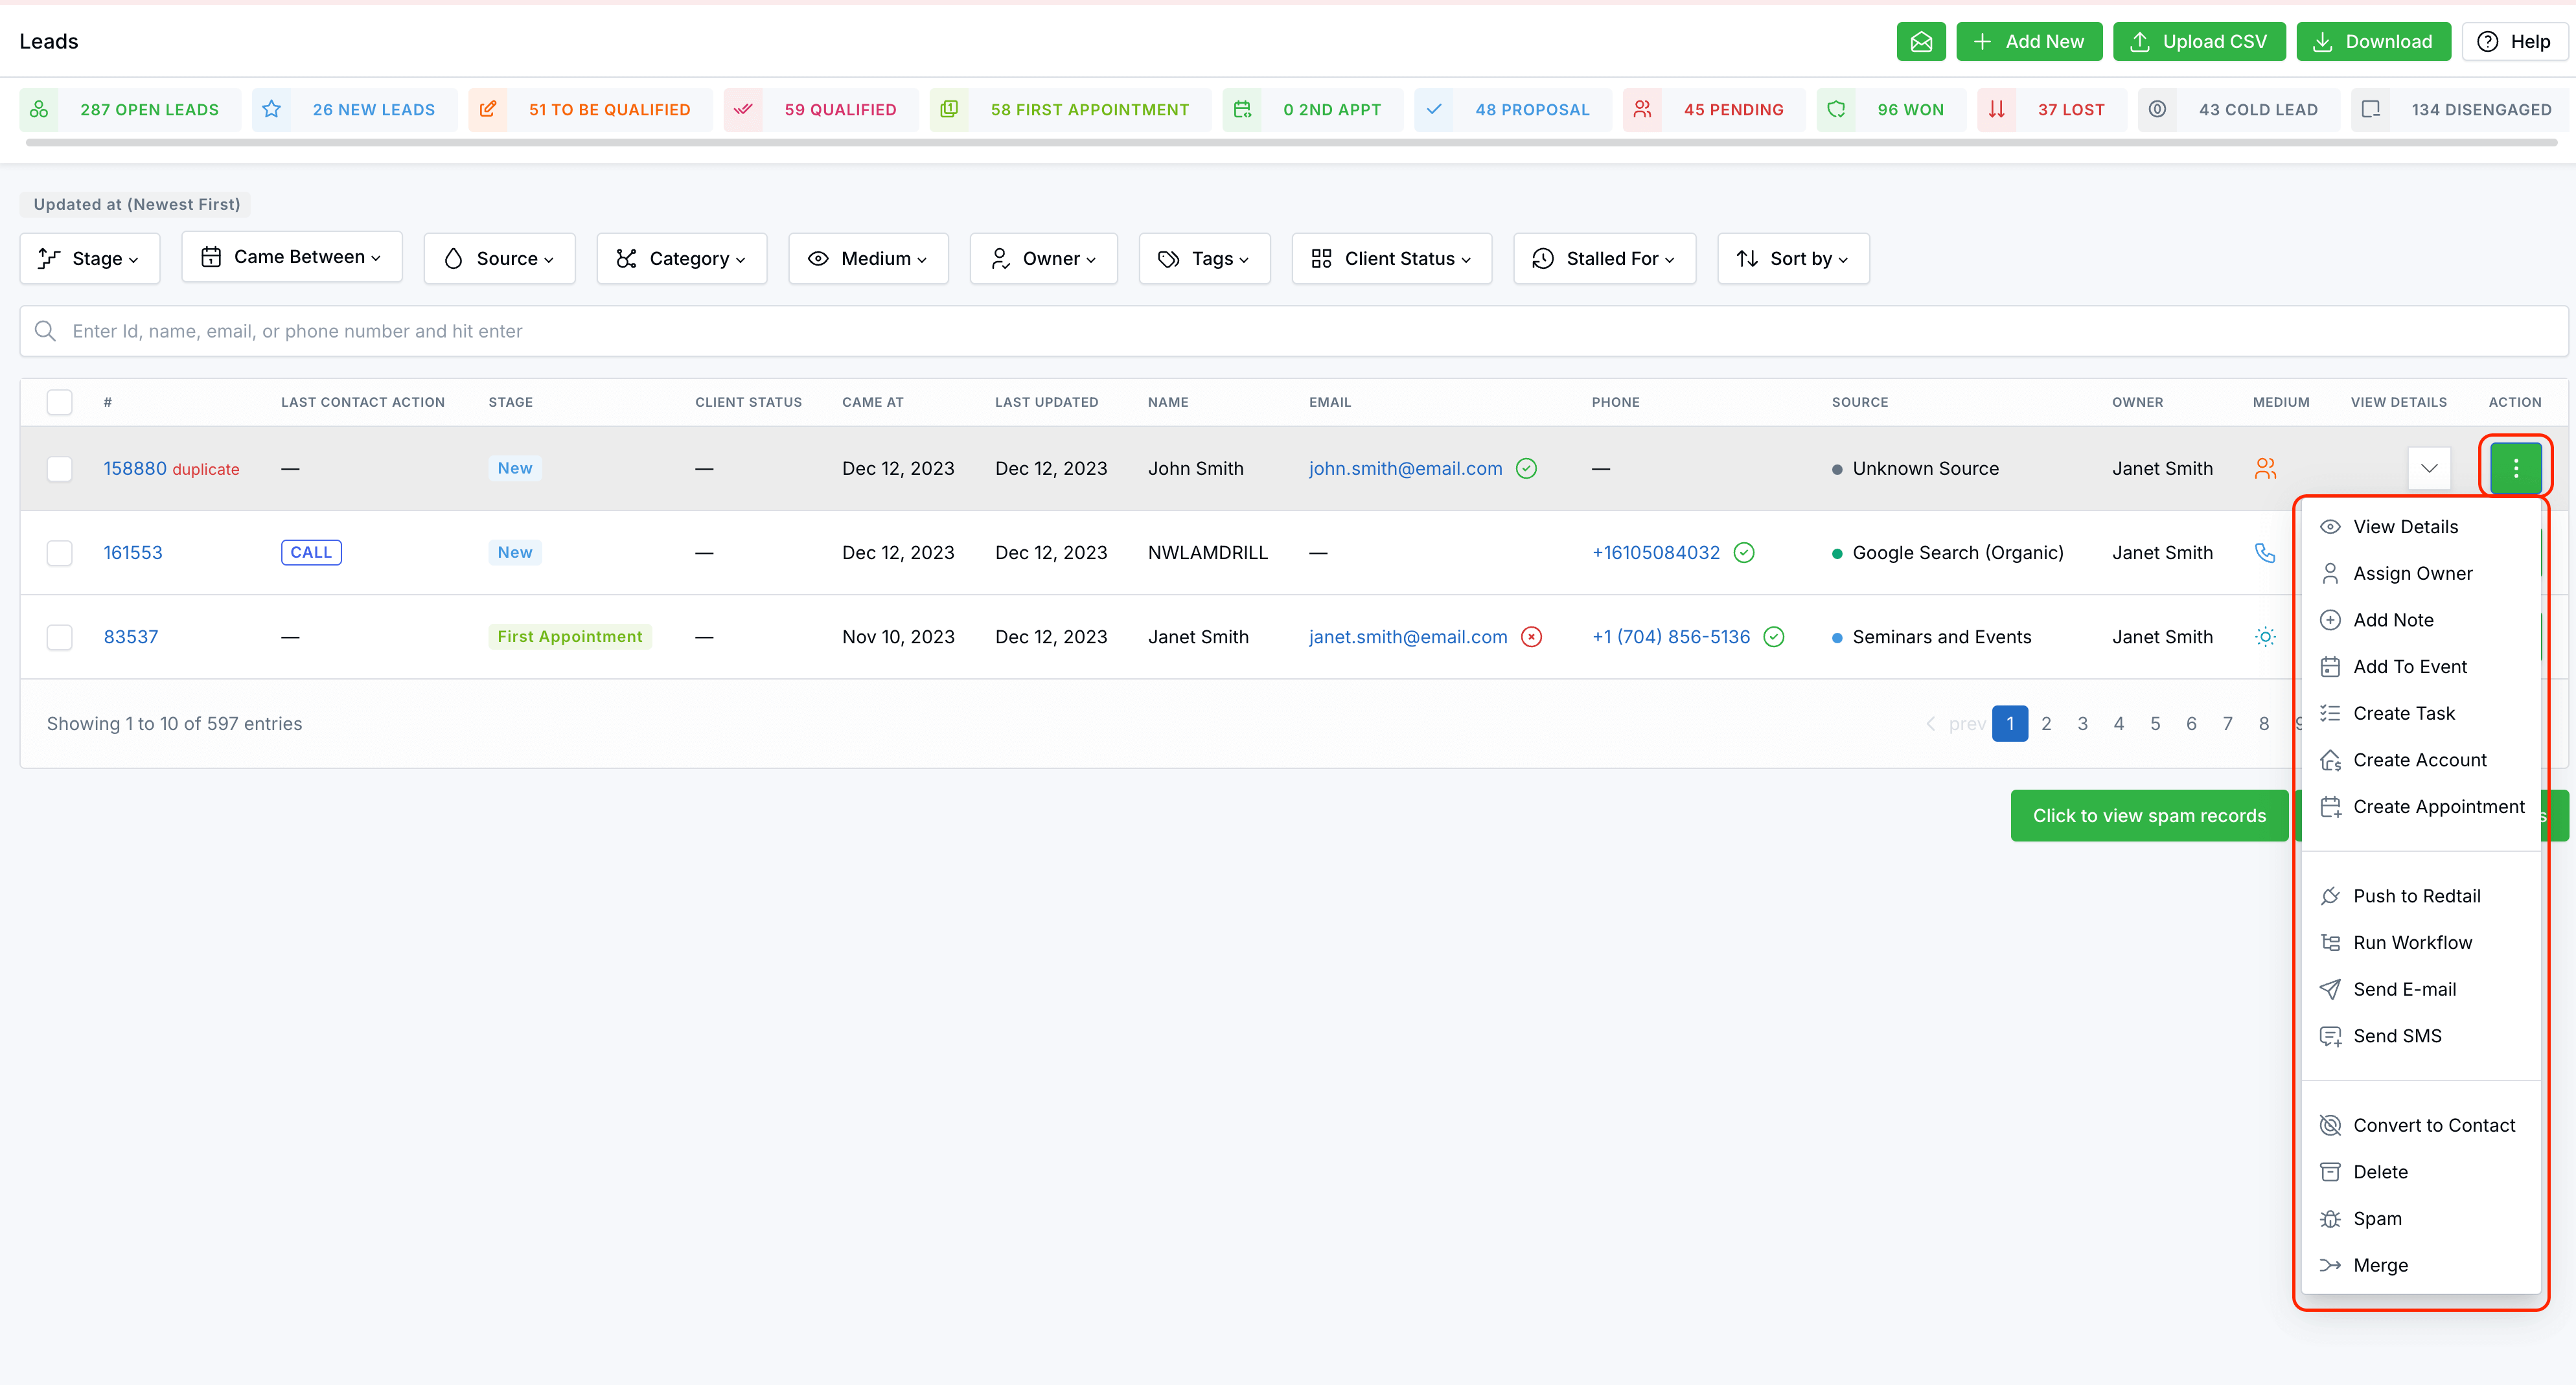
The LeadCenter.AI's Lead Management System manages the following operations;
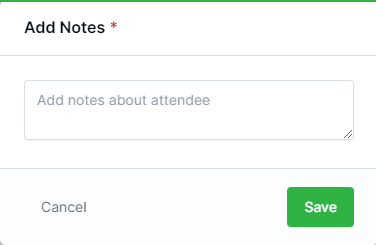
To add any comments for a lead for example; if you had a meeting with the lead or call with the lead or sent an e-mail, you can add the comments by clicking on Add Comments. 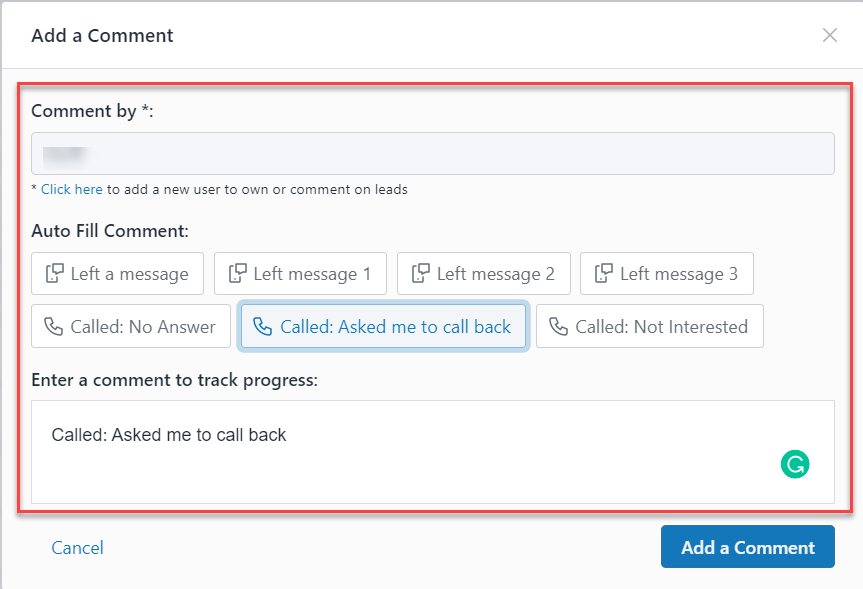
LeadCenter.AI allows managing tasks for all your employees or yourself by creating a to-do list. A to-do list helps to organize your tasks efficiently and effectively. For more details on adding a task, see Managing Tasks.
To create appointments with leads you can create by clicking on Create Appointments. Add the required details to create an appointment with the lead by setting the date and time etc. For more details on creating appointments see creating a new appointment in Managing Appointments.
You can share lead details with a colleague or an employee by clicking on Forward Lead. The Share by Email page is displayed where you can add the email ID of a colleague or an employee and even add a comment.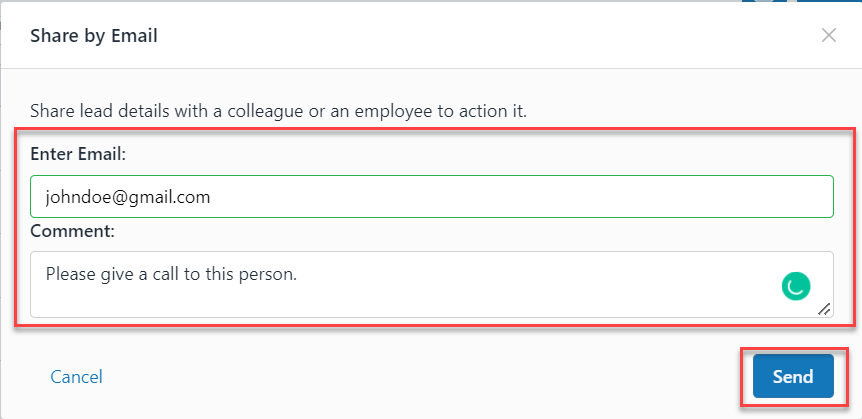
LeadCenter.AI manages multiple owners. To assign an owner for the lead you can do by clicking on the Assign Lead Owner button. You can select the owner to whom you want to assign the lead from the drop-down list.
It also allows you to invite new users, click on "please click here" See Adding and Deleting Users to add an owner. 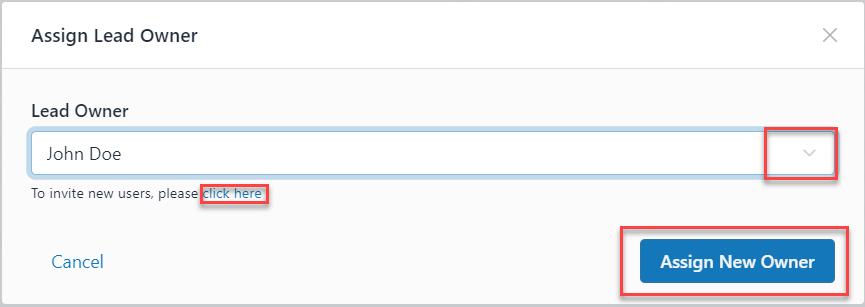
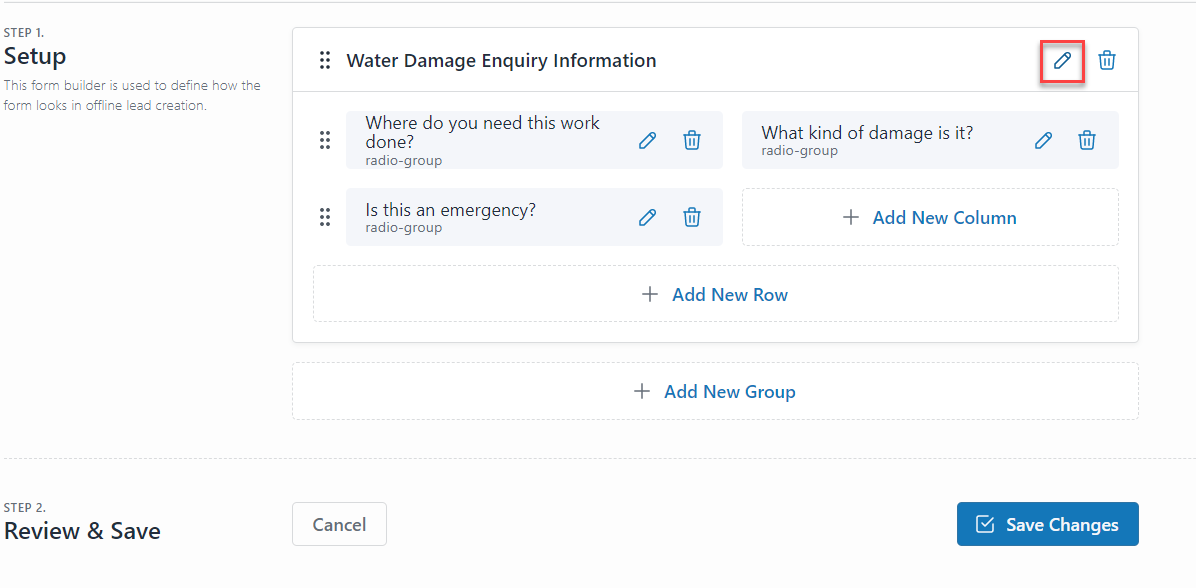
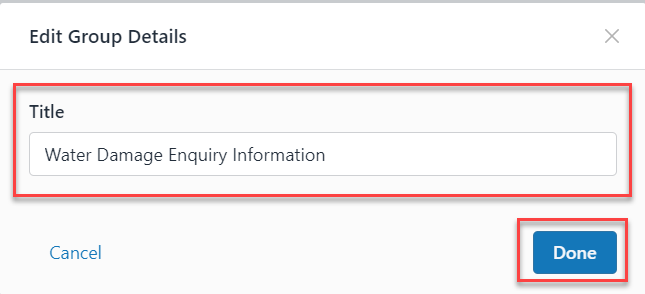
You can update the information for example; basic information, address information, and Water Damage Enquiry Information for each lead by clicking on Update Lead.
Modify the information to be updated for the lead and click on the Save Changes button.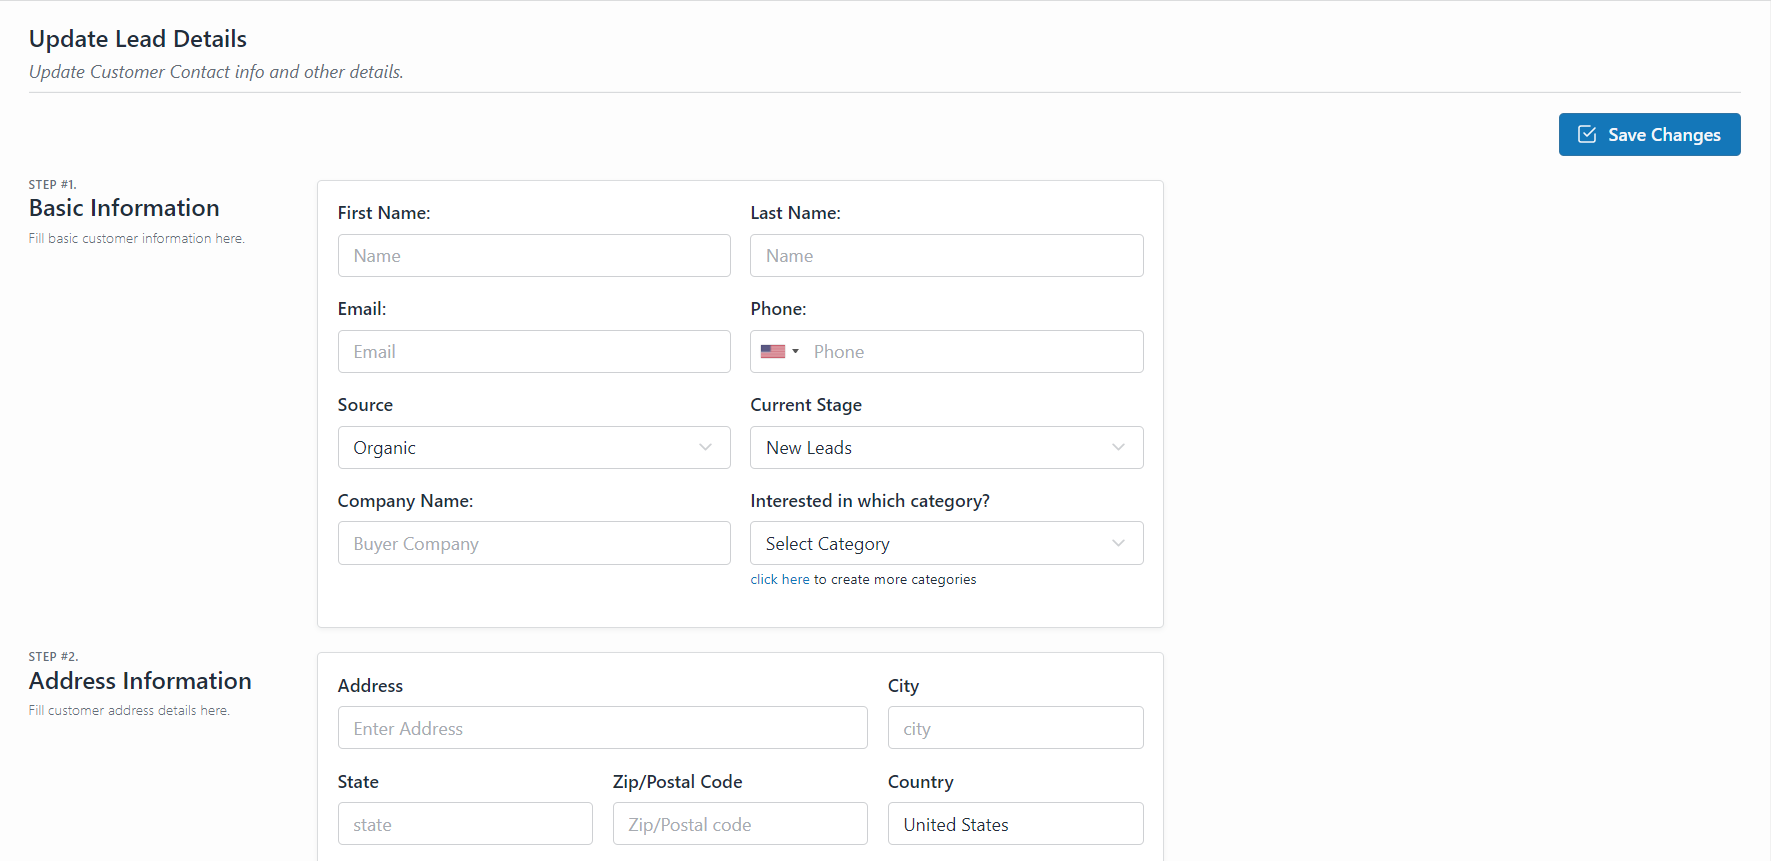
You can also compose an e-mail from the LeadCenter.AI platform to the lead by clicking on Compose E-mail.
You can compose your text for the lead and Click on Send E-mail button to send out the e-mail to the lead. For more details to send e-mails, see Sending and Receiving E-mails.
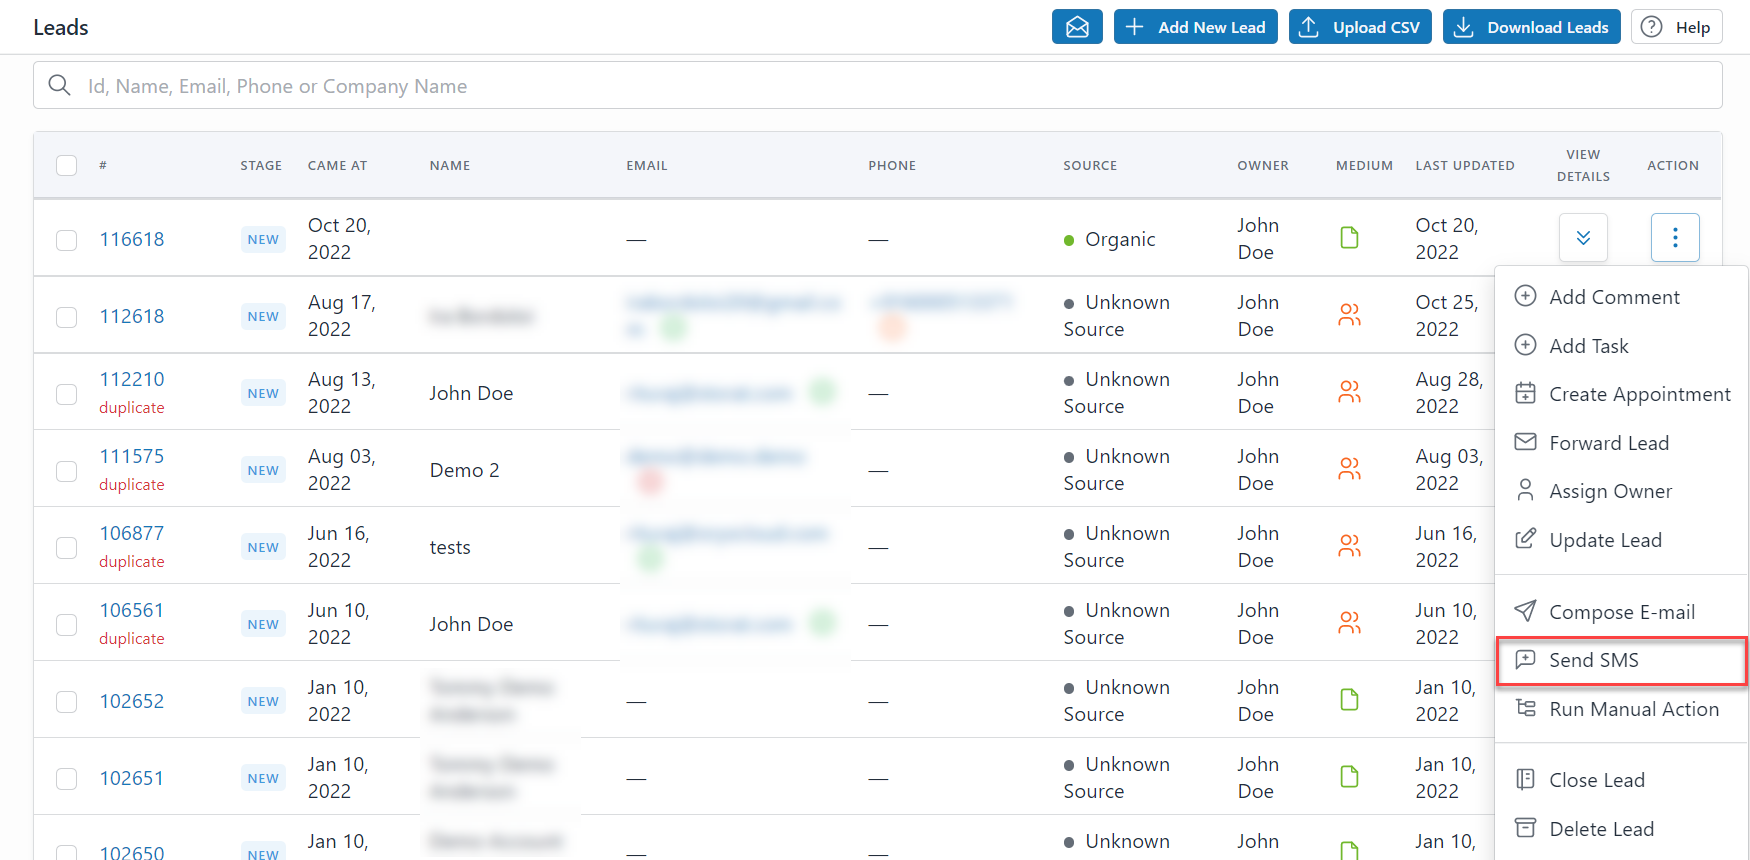
LeadCenter.AI Sending SMS is a premium feature. You will need to upgrade your site with a premium plan to send SMS to your lead.
Once you have upgraded to this premium service, you can send an SMS to your lead by clicking on Send SMS. You can compose your message and Click on Send SMS button to send out the SMS to the lead. For more details to send SMS, see Sending and Receiving SMS.
LeadCenter.AI allows the user to run a manual action. Select the action to be executed and click on the Run button to run the manual action.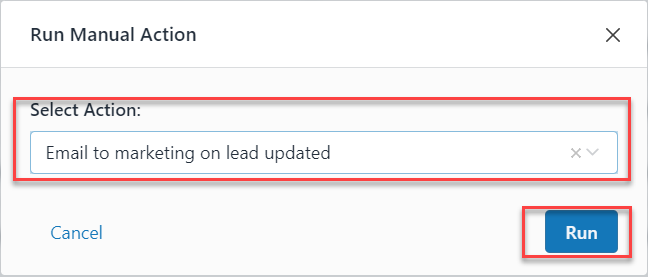
When you want to move a lead to a closed state, for example, won, disengaged stage, etc. you can close the lead by clicking on the Close Lead button.
Enter the Actual Revenue, Select Close Stage from the drop-down list, and click on the Close Lead button to close the lead.
Note: You can add the Actual Revenue as zero ($0) for other closed stages except Won Stage.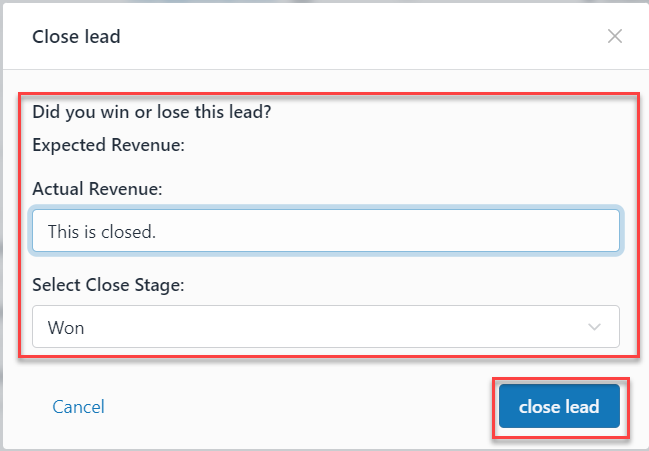
LeadCenter.AI Lead Management System allows you to delete a lead. Whenever a lead needs to be removed click on the Delete Lead button.
When you want to view the detailed information of a lead, you can view the lead details by clicking on the View Details button. Viewing Details displays the "View and Manage Your Lead" page which allows you to view and manage your lead.
You can edit as well as get an overview of the lead along with customer information, appointments, additional information, customer inquiry, actions, comments, emails, and SMS information.
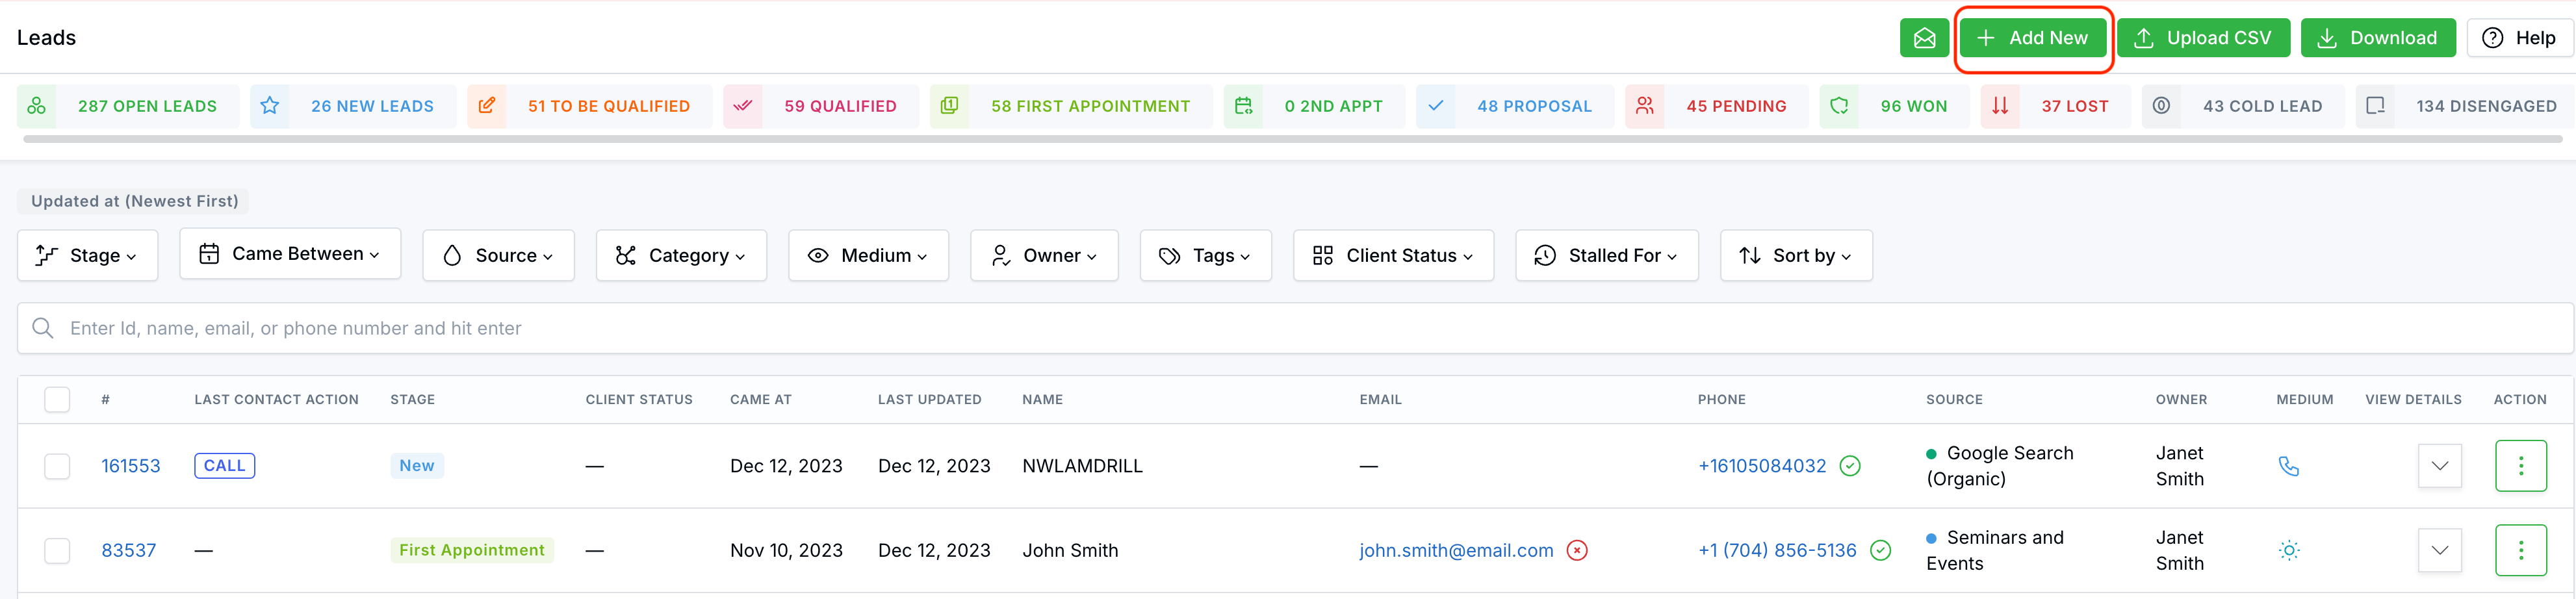
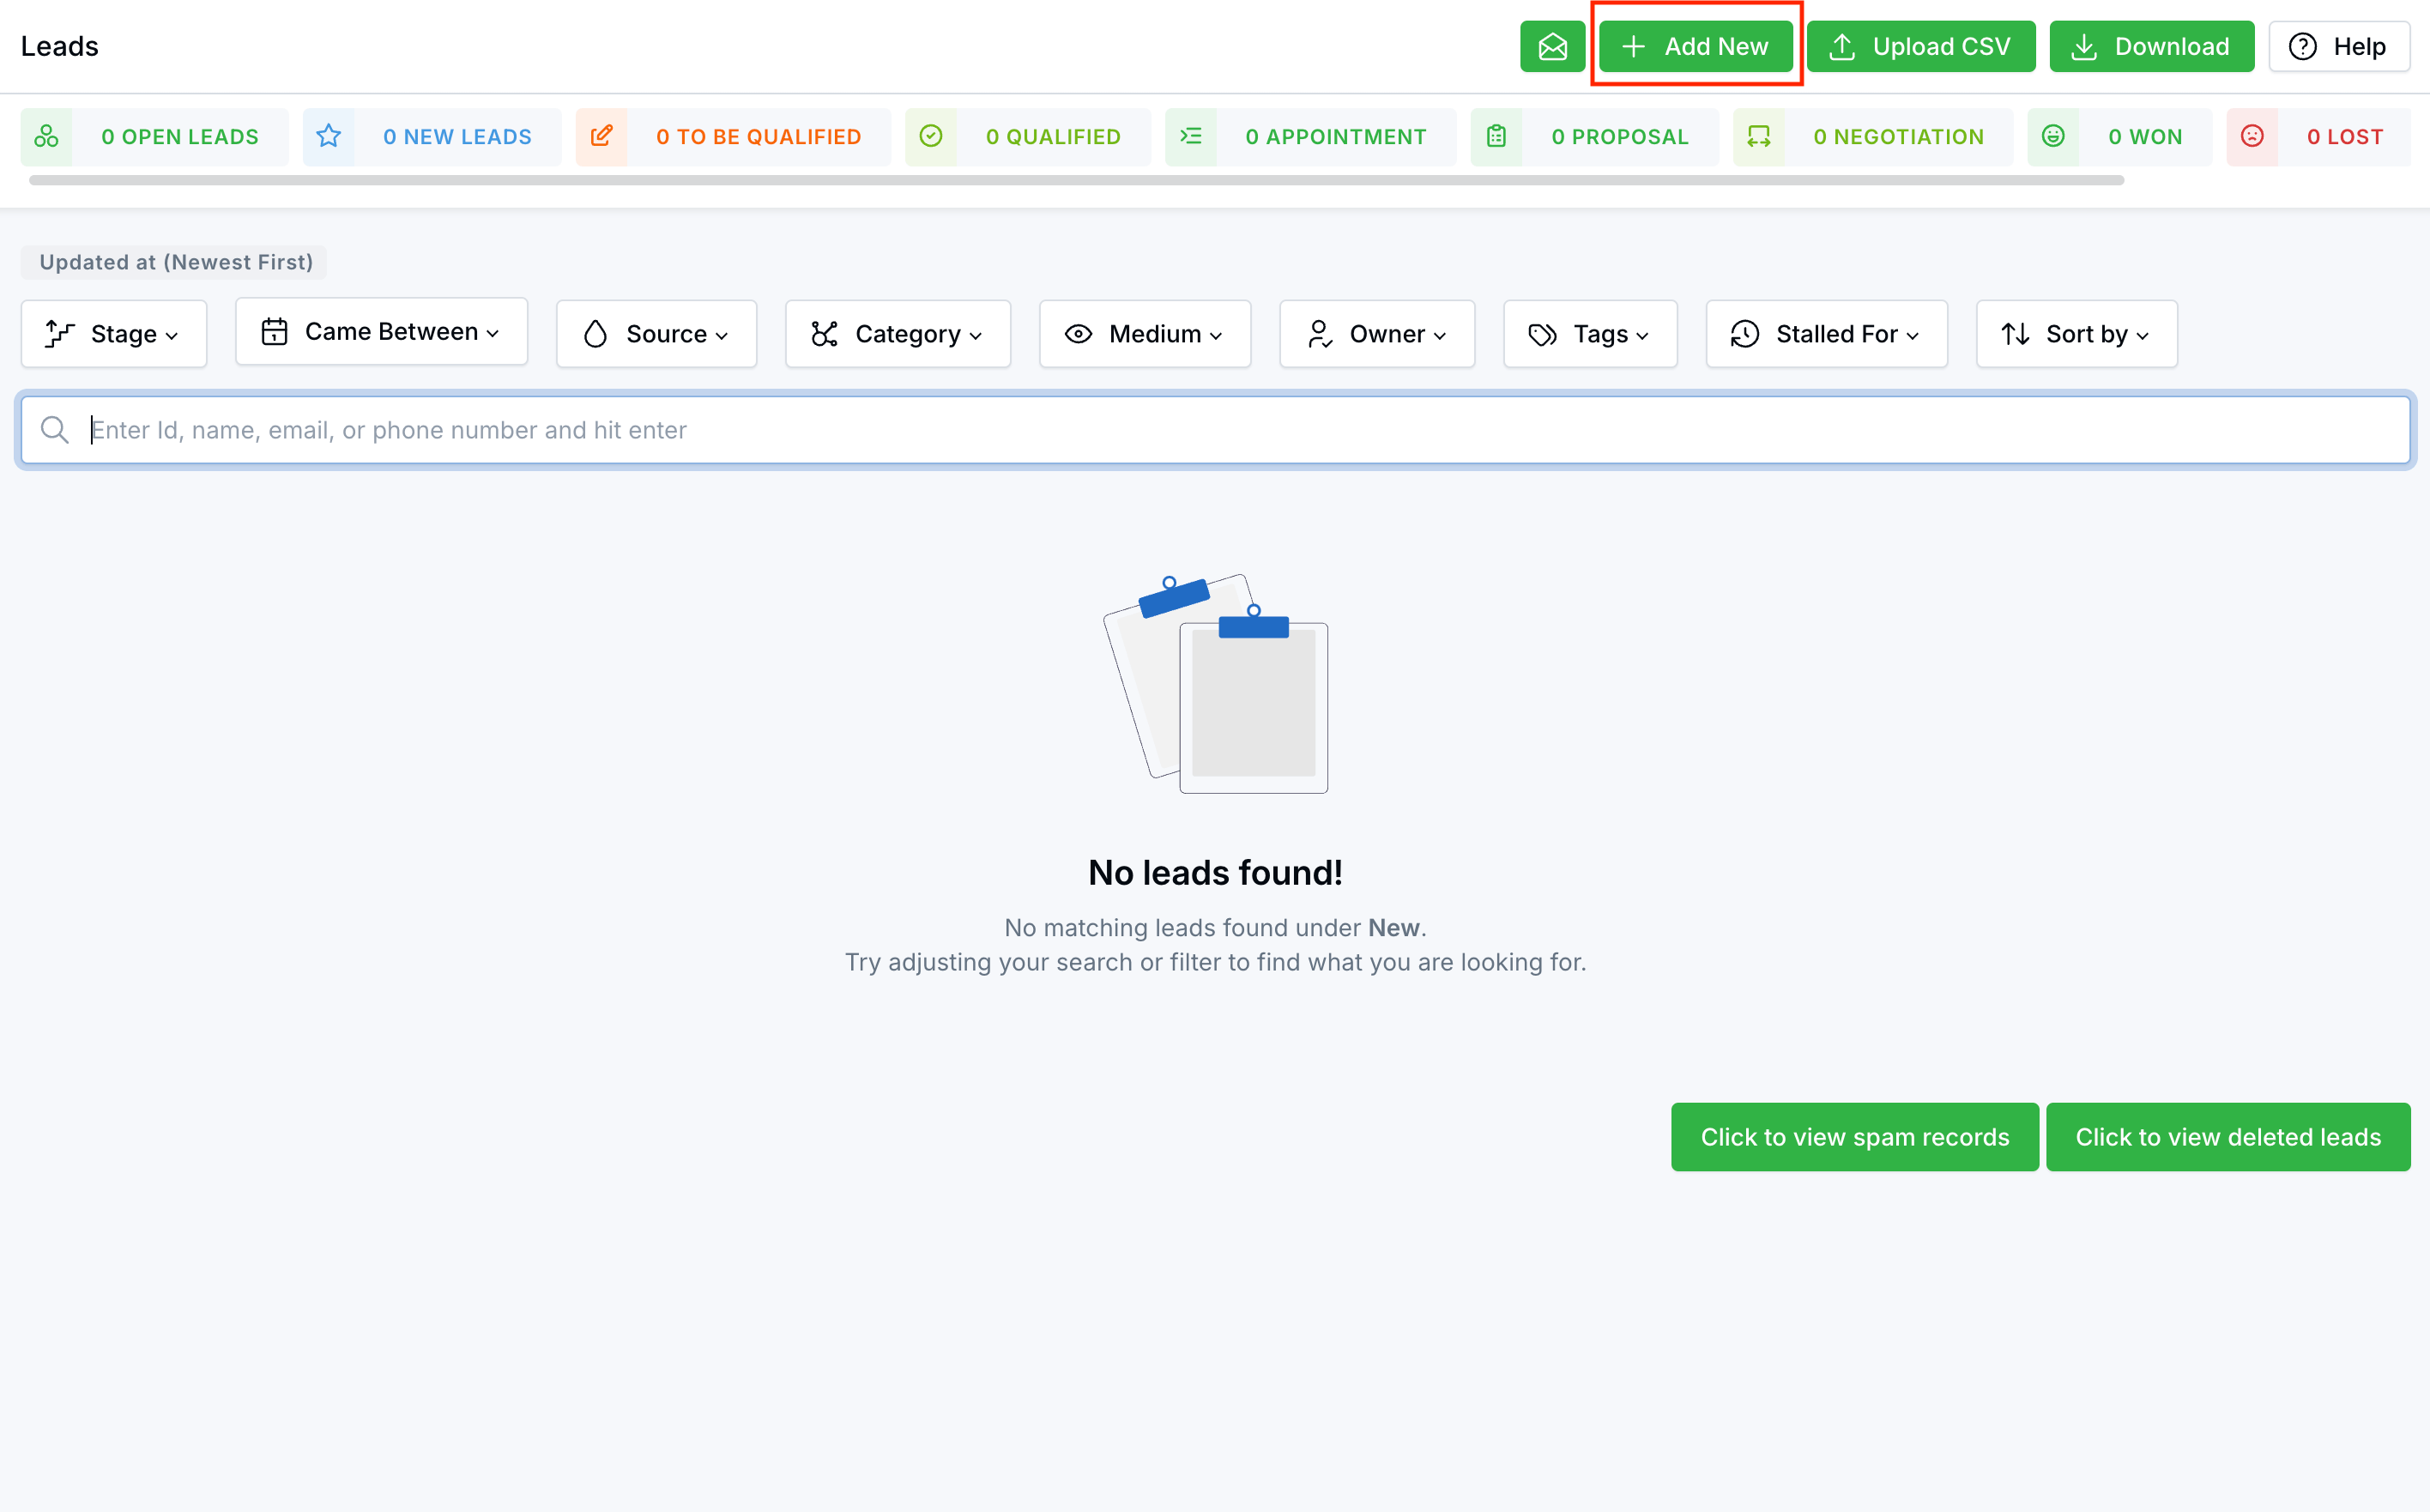
There are some instances where the lead is not generated from the online website forms, for example; you may have acquired the lead via an email campaign or call, etc. for which you have to manually add the lead in offline mode.
By adding the new lead in offline mode in the LeadCenter.AI Lead Management System, you can track all your business here.
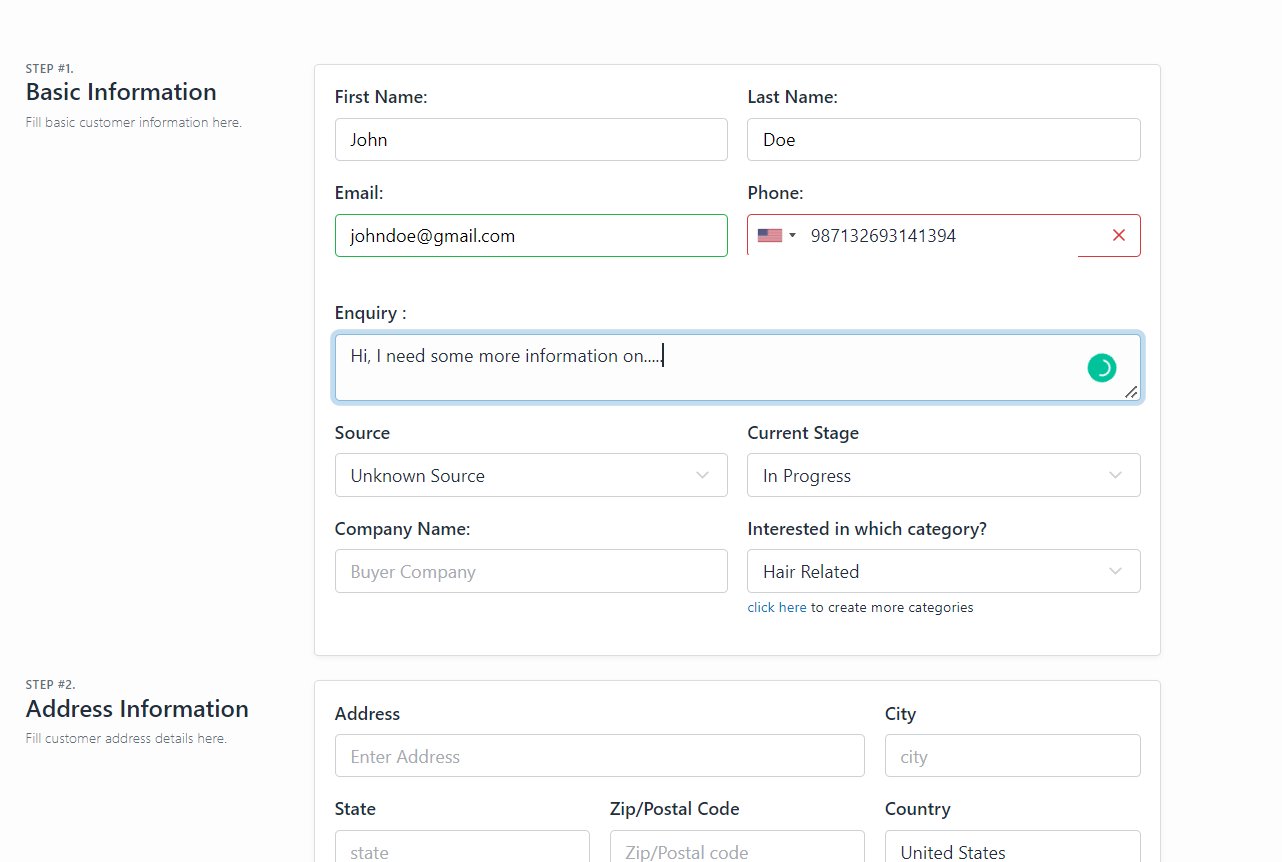
To add a lead in offline mode, do the following;
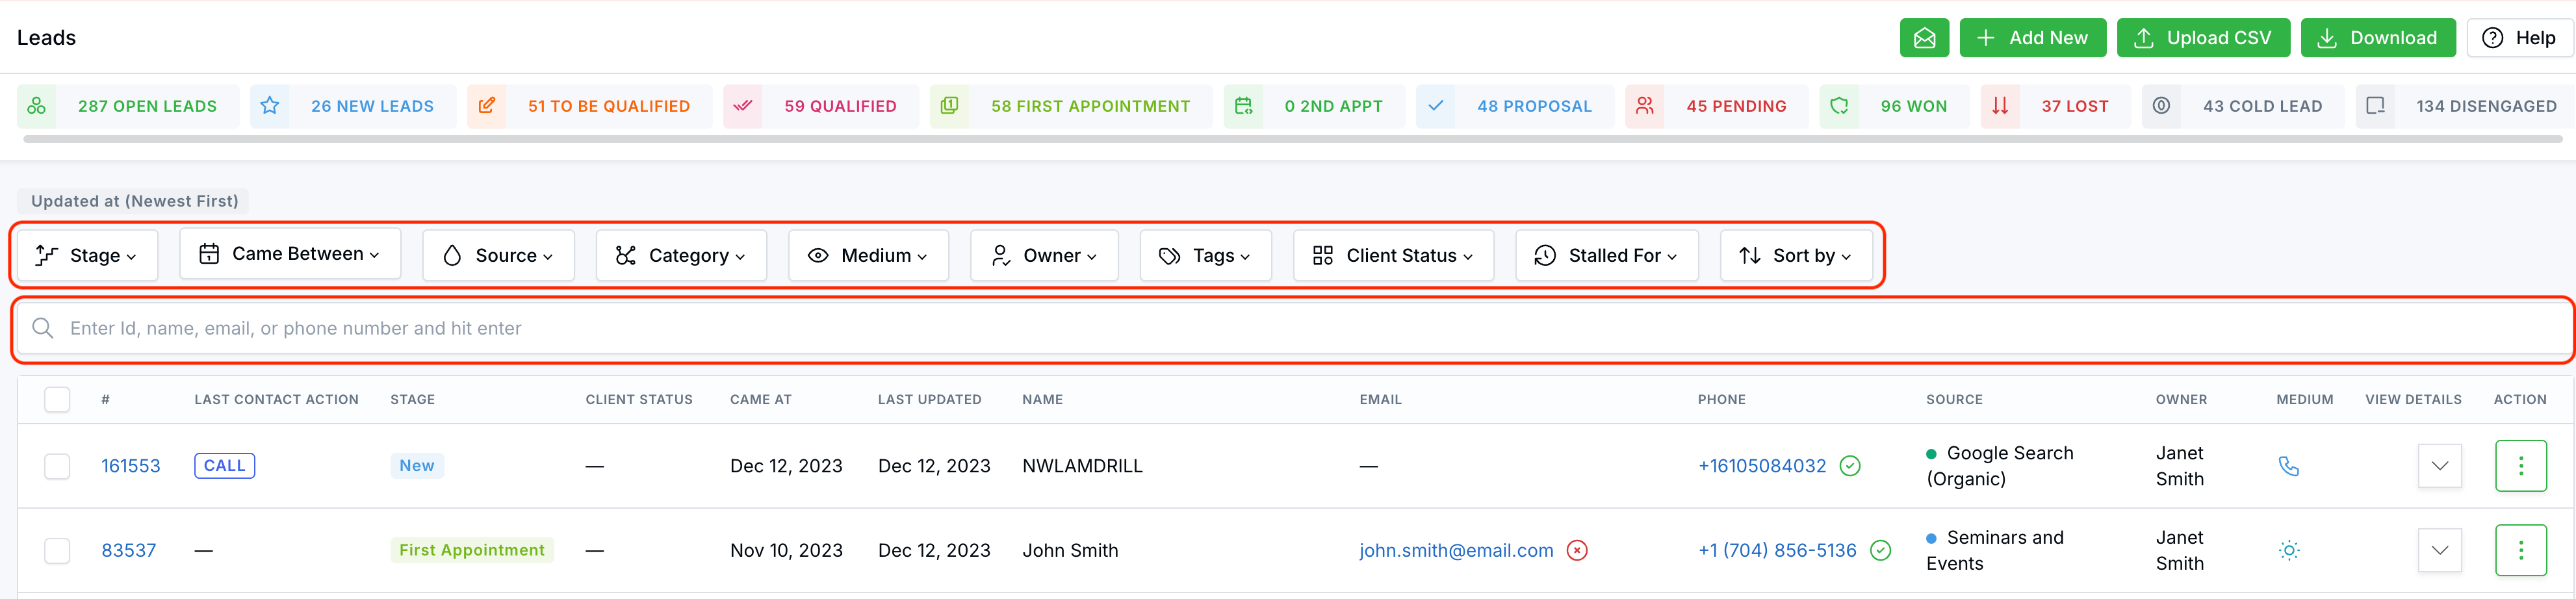
The Searching Lead section describes how to search lead information based on certain filters.
By default, the New stage filter under the Stage column filter will be displayed at the top of the list.
To search for leads, do the following;
There are some instances where the lead is not generated from the online website forms, for example; you may have acquired the lead via an email campaign or call etc. for which you have to manually add the lead in offline mode.
By adding the new lead in offline mode in the LeadCenter.AI Lead Management System, you can track all your business here.
To add a lead in offline mode, do the following;
Searching Lead section describes how to search lead information based on certain filters.
By default the New stage filter under Stage column filter will be displayed at the top of the list.
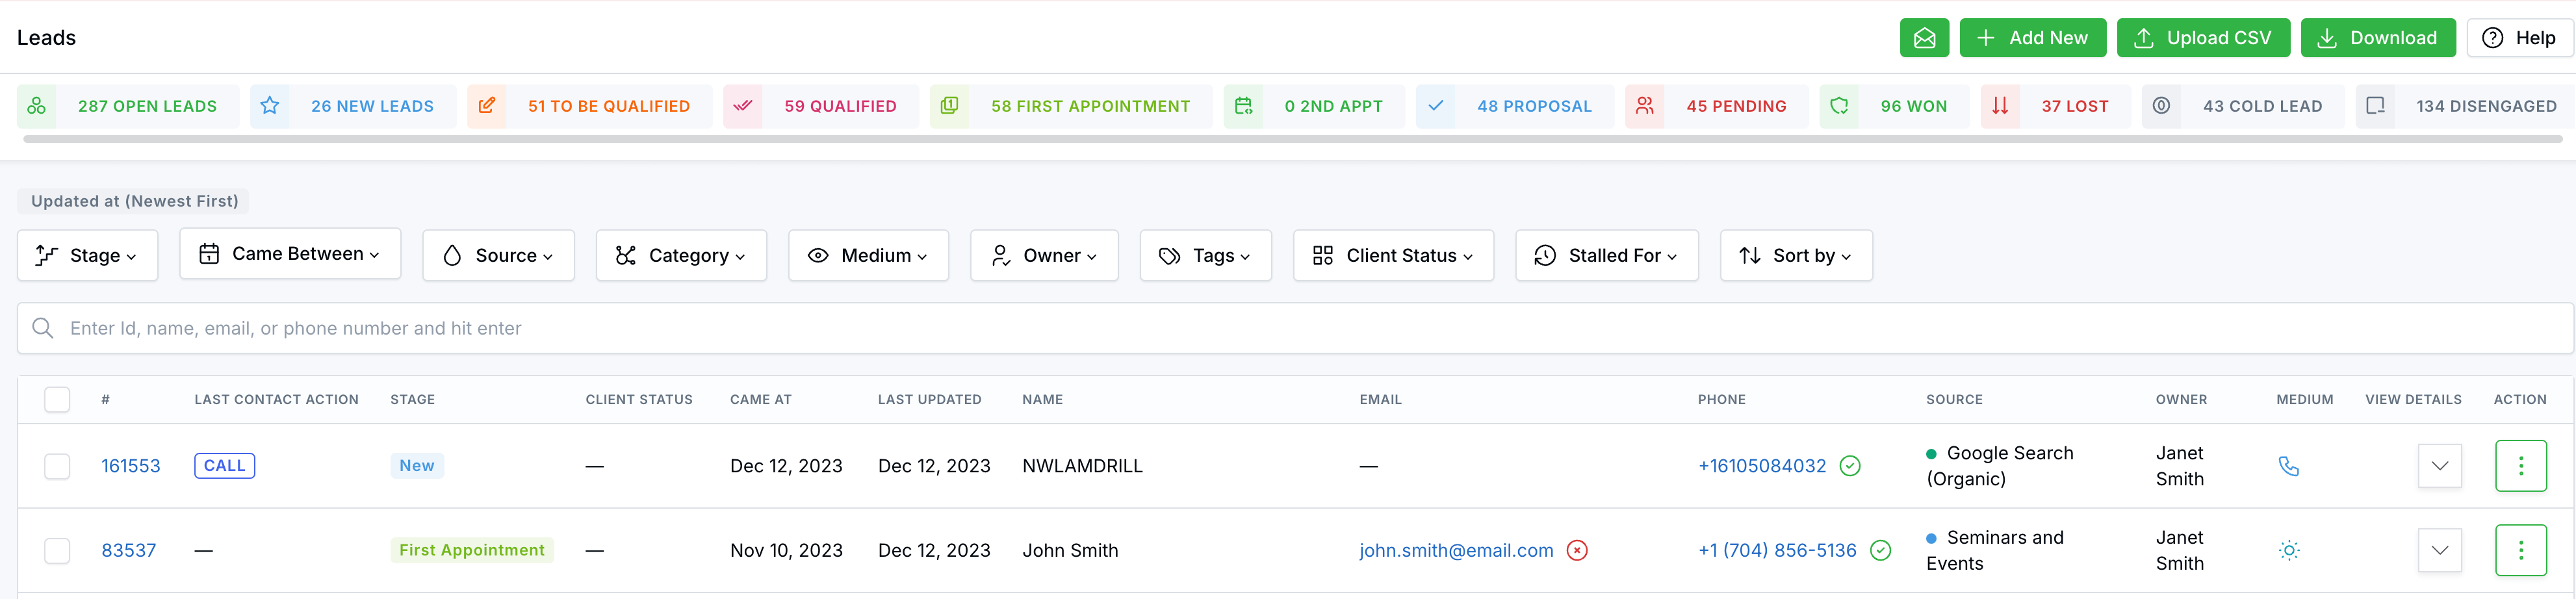
Each of the filter options are explained below;

To search the leads, do the following;
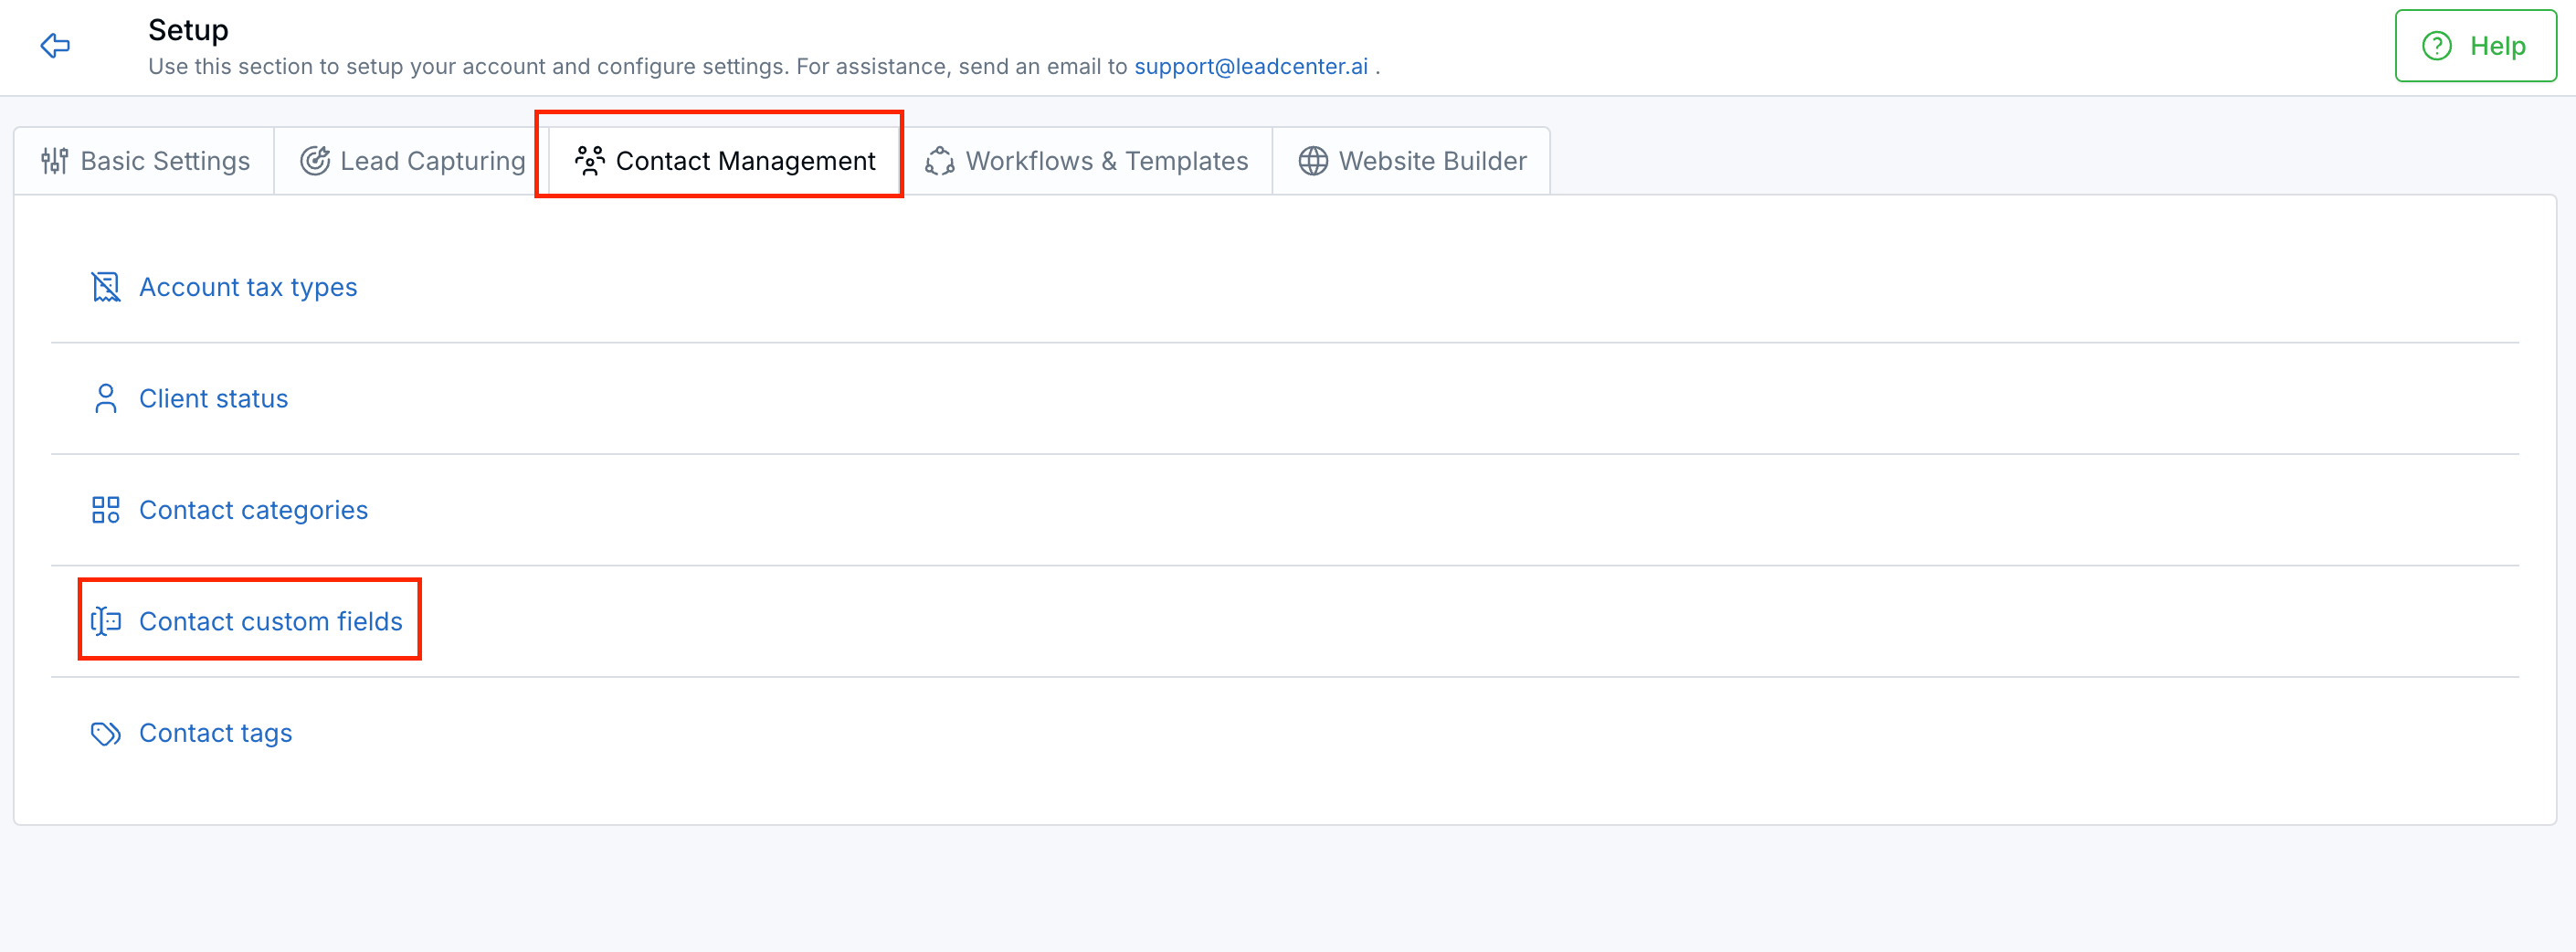
LeadCenter.AI Lead Management Software is built with standard fields for each lead. If you would like to add more information about the lead, you can create custom fields that can be filled manually by an Agent. While LeadCenter.AI comes with standard fields, like name, phone number, and email address, you will probably want to add more of these as well as your own specialized fields. Common examples of custom fields include industry/vertical, company size, and referral information, but the exact use cases depend on what you are trying to accomplish.
The Custom Field Designer can be used to:
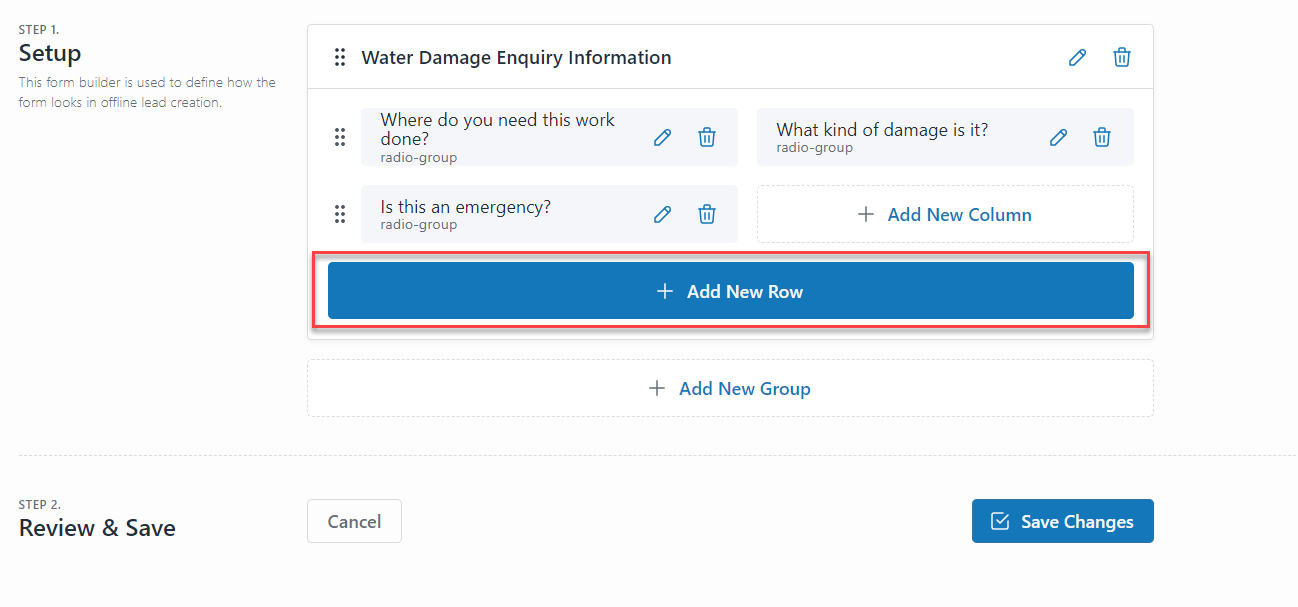
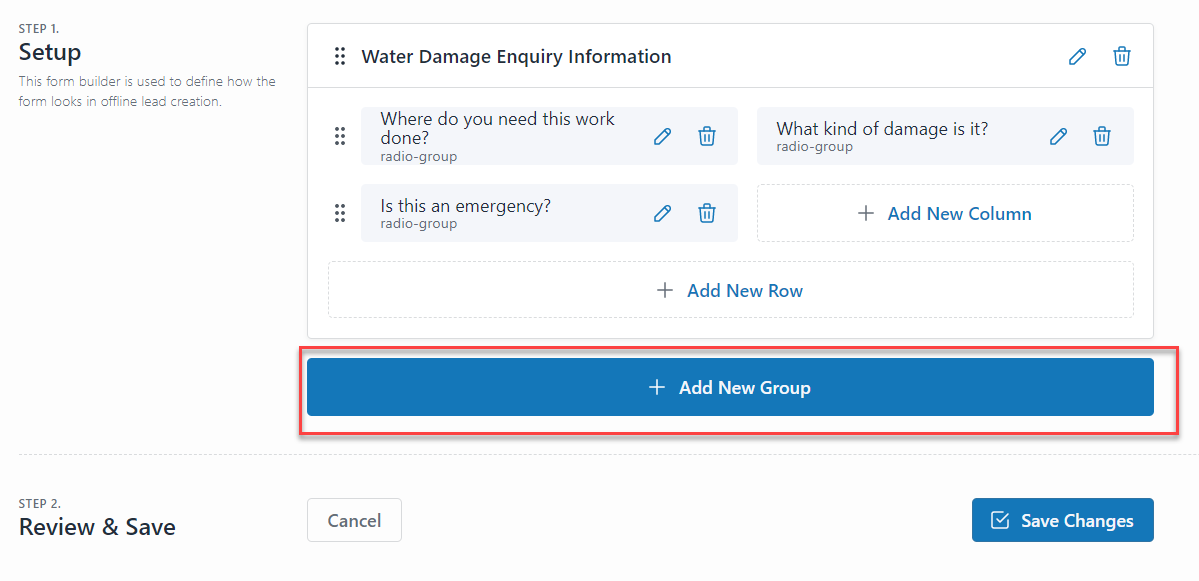
Designing the Custom Fields Page
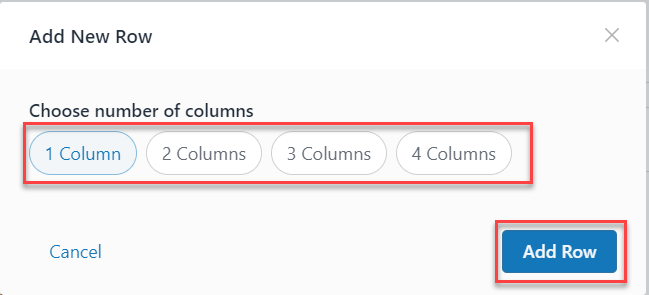
To design a user-friendly custom page, you can:
To create new custom fields or update existing custom fields, follow the steps below:

 If you don't click the Save Changes button, you will lose all the changes you made. Make sure not to close the Designer page before clicking on the Save Changes button.
Now each time to edit a lead, you can fill in the custom fields for that lead.
 The Update Lead page is displayed.
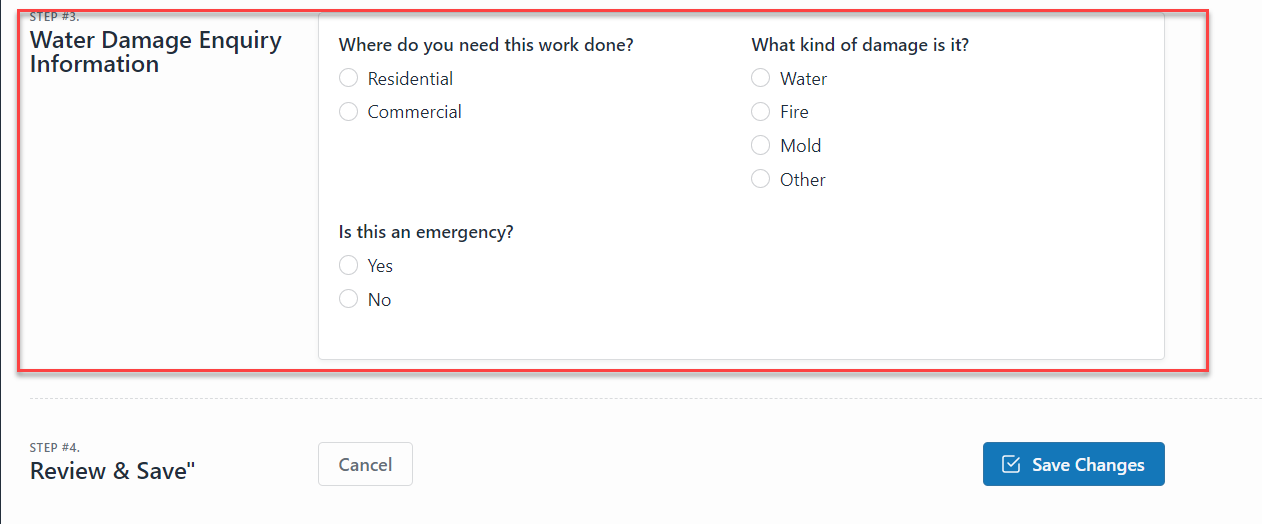
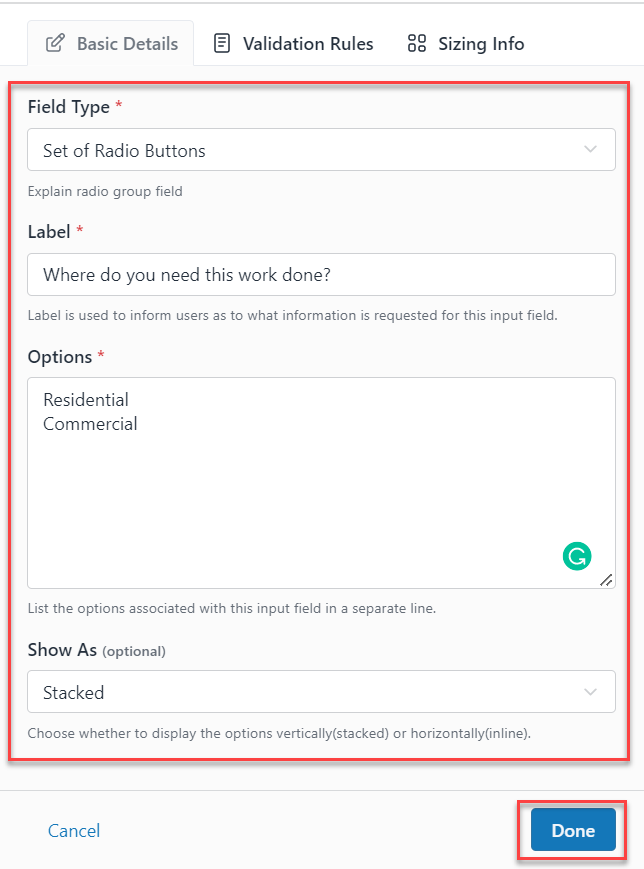
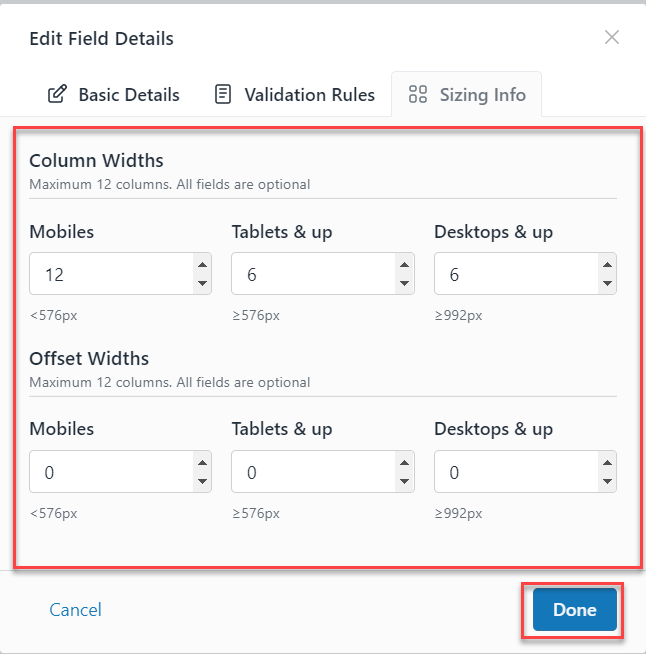
Custom fields support the following data types
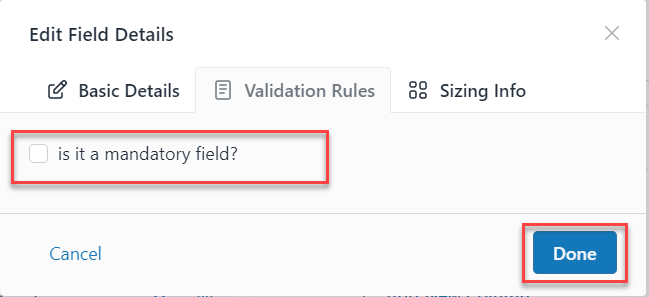
Data Input can be restricted from the Validation Rules with the following options
This section describes setting the lead stages.
There are two stages; open and closed. The Open stage is where the lead has not been closed yet and is still in a progress state. It consists of the New and In Progress stages. On the other hand, the closed stage is when the lead is in the closed state, meaning you have scored the lead, or if you have not scored the lead, it will be displayed in one of the closed states. It consists of the Won, Lost, Disengaged, Duplicate, and Spam stages.
The stages are explained below:
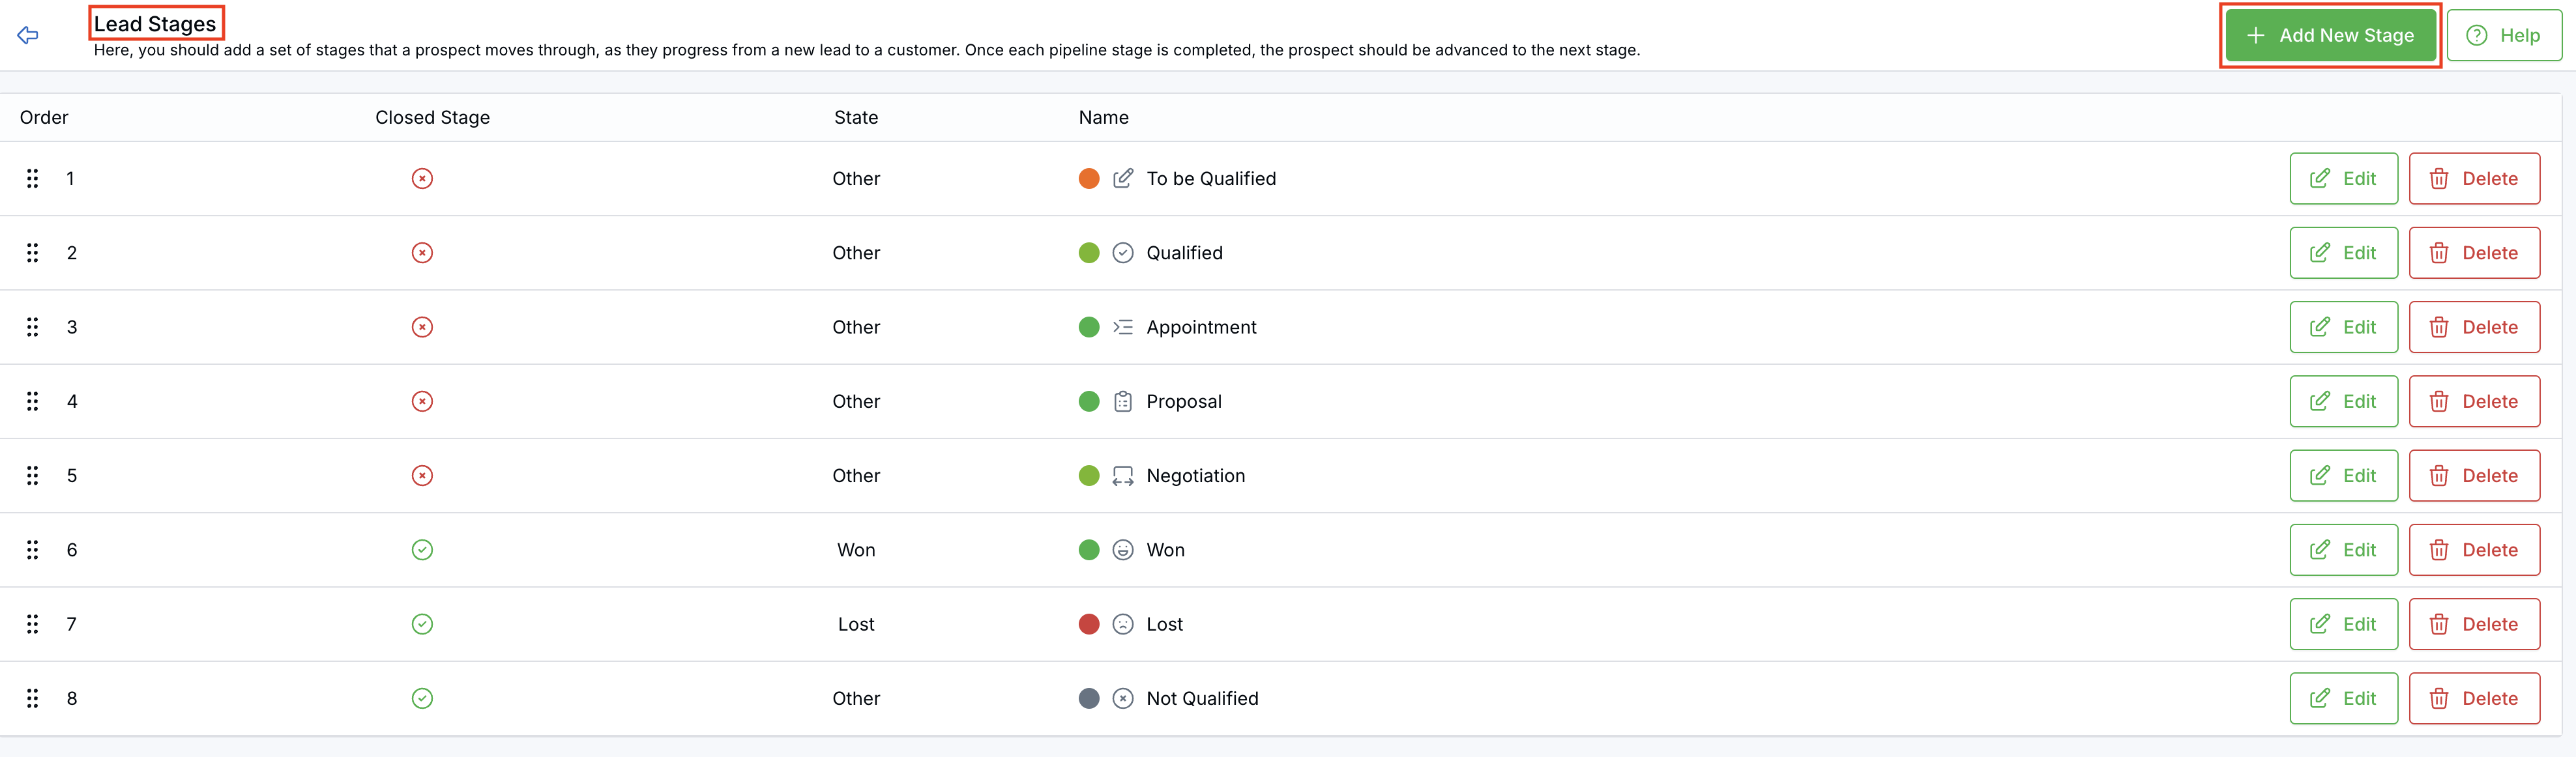
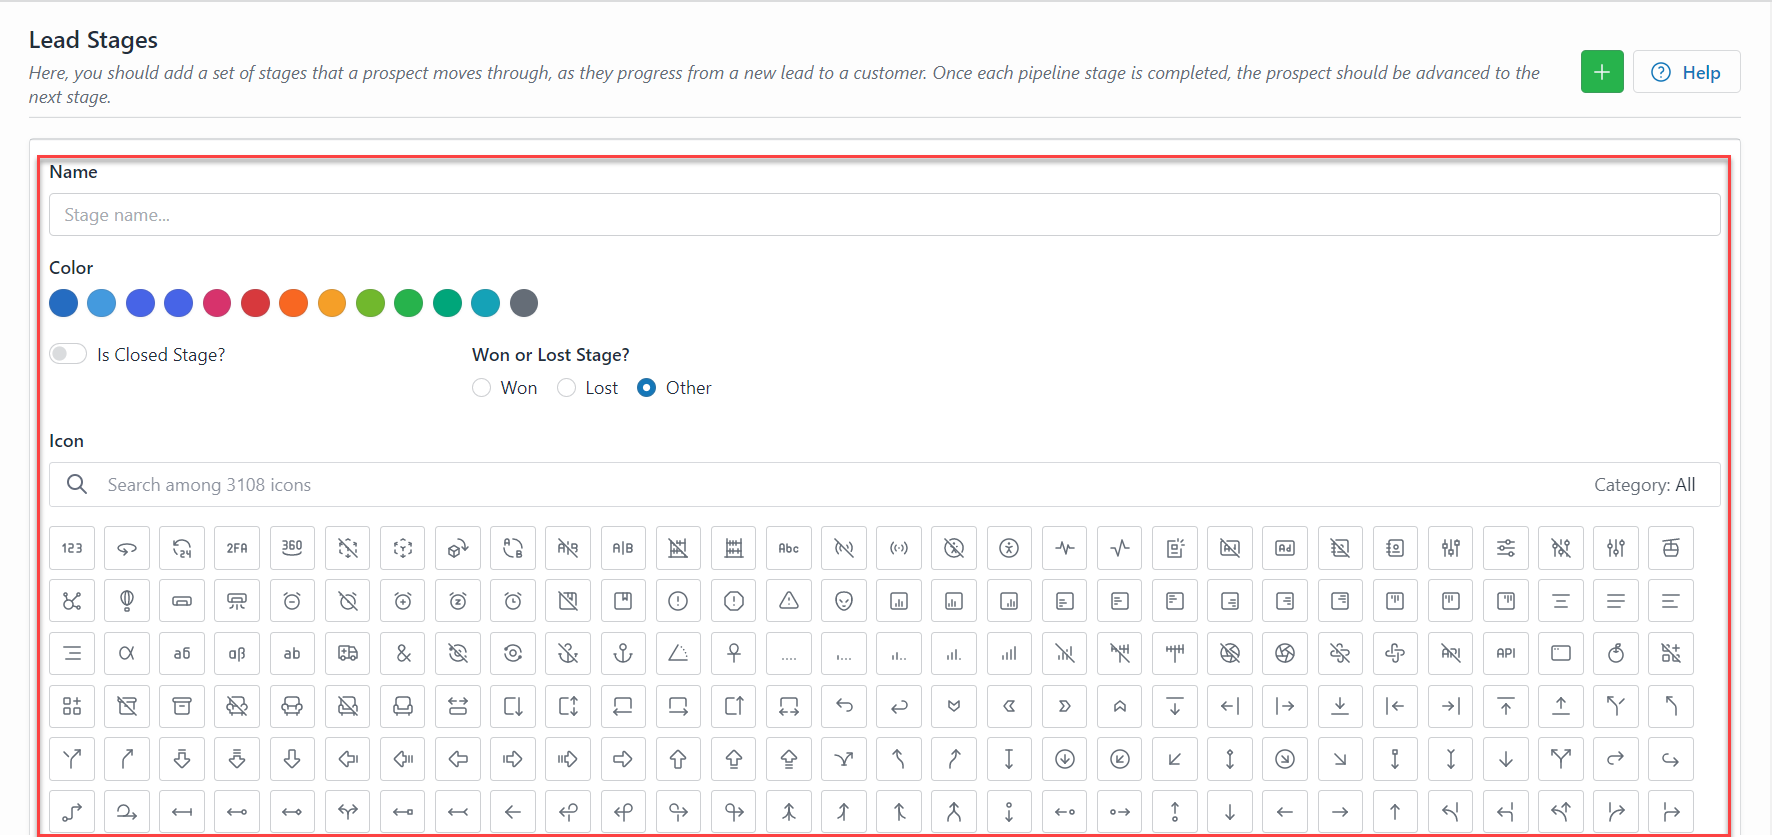
In the Lead Stages page, you should add a set of stages that a prospect moves through, as they progress from a new lead to a customer. Once each pipeline stage is completed, the prospect should be advanced to the next stage.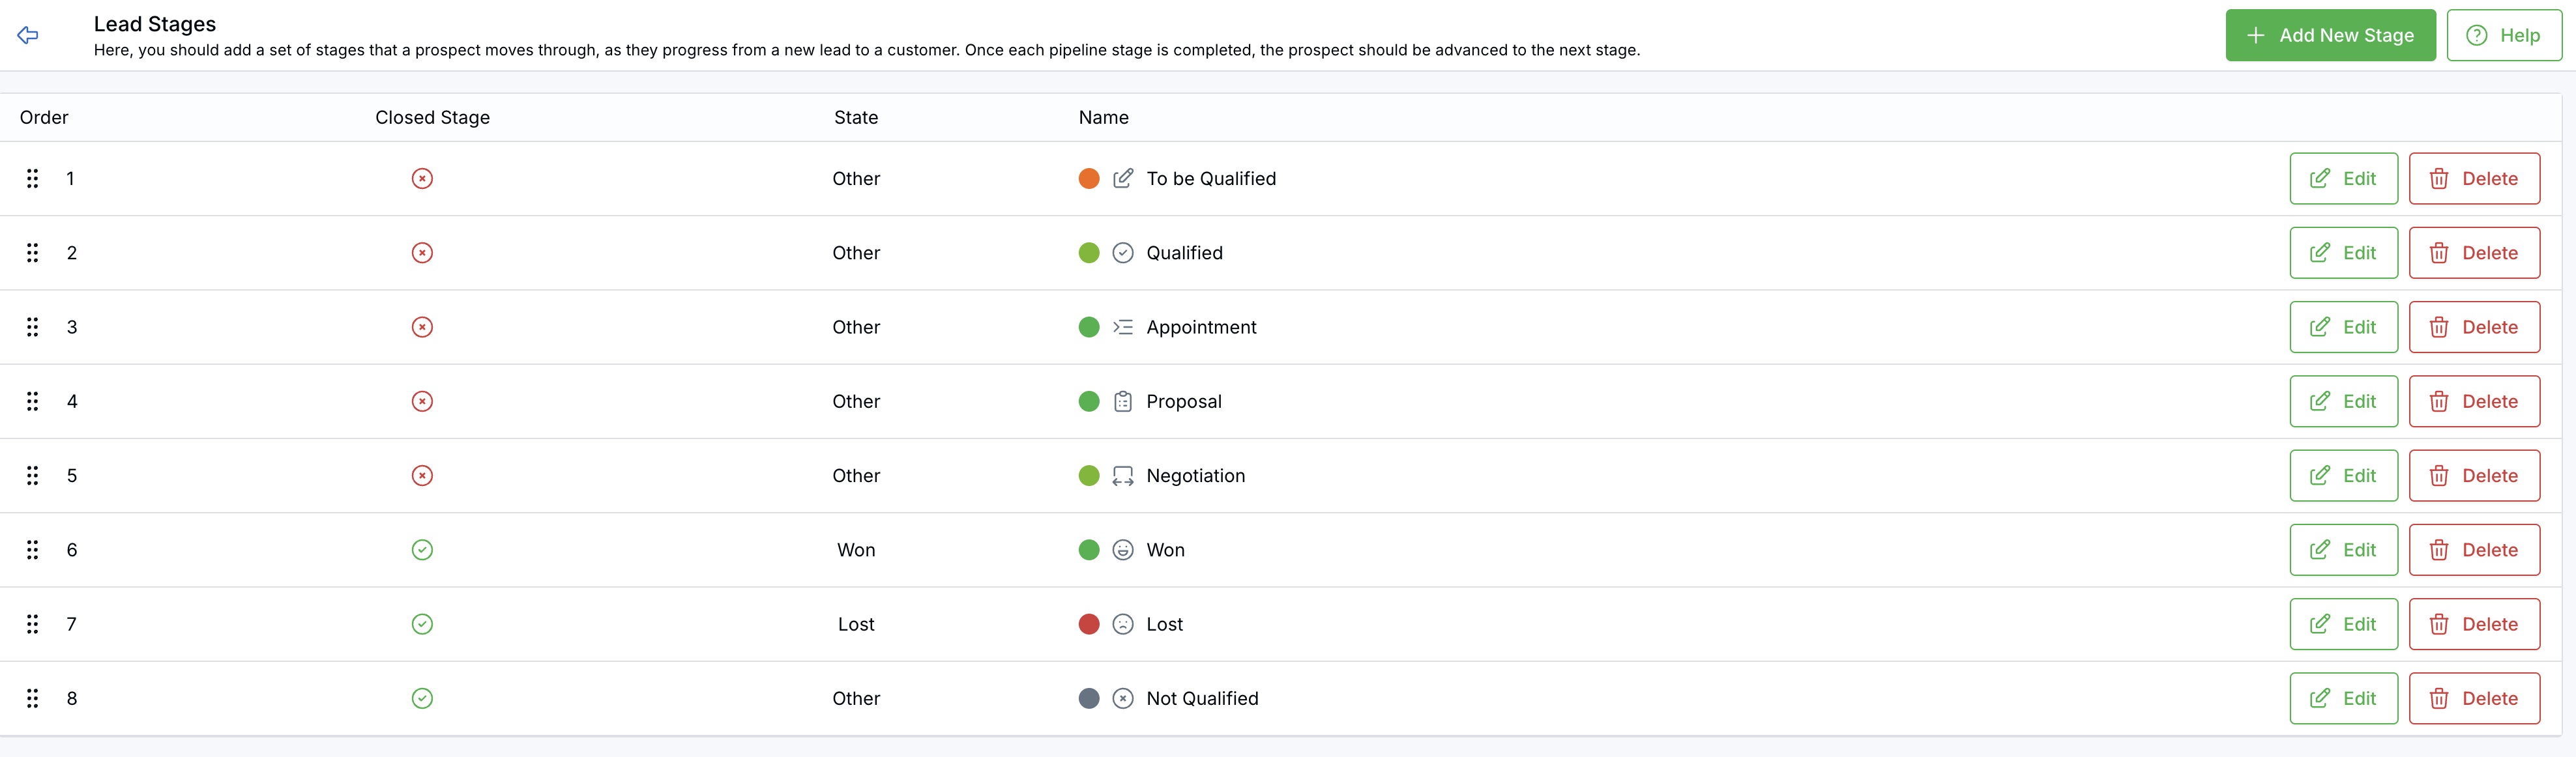
By default, the stages which are mentioned above are displayed in the LeadCenter.AI Management System. It allows you to add a new stage according to your requirements to the existing stages.
To add a new stage, do the following:
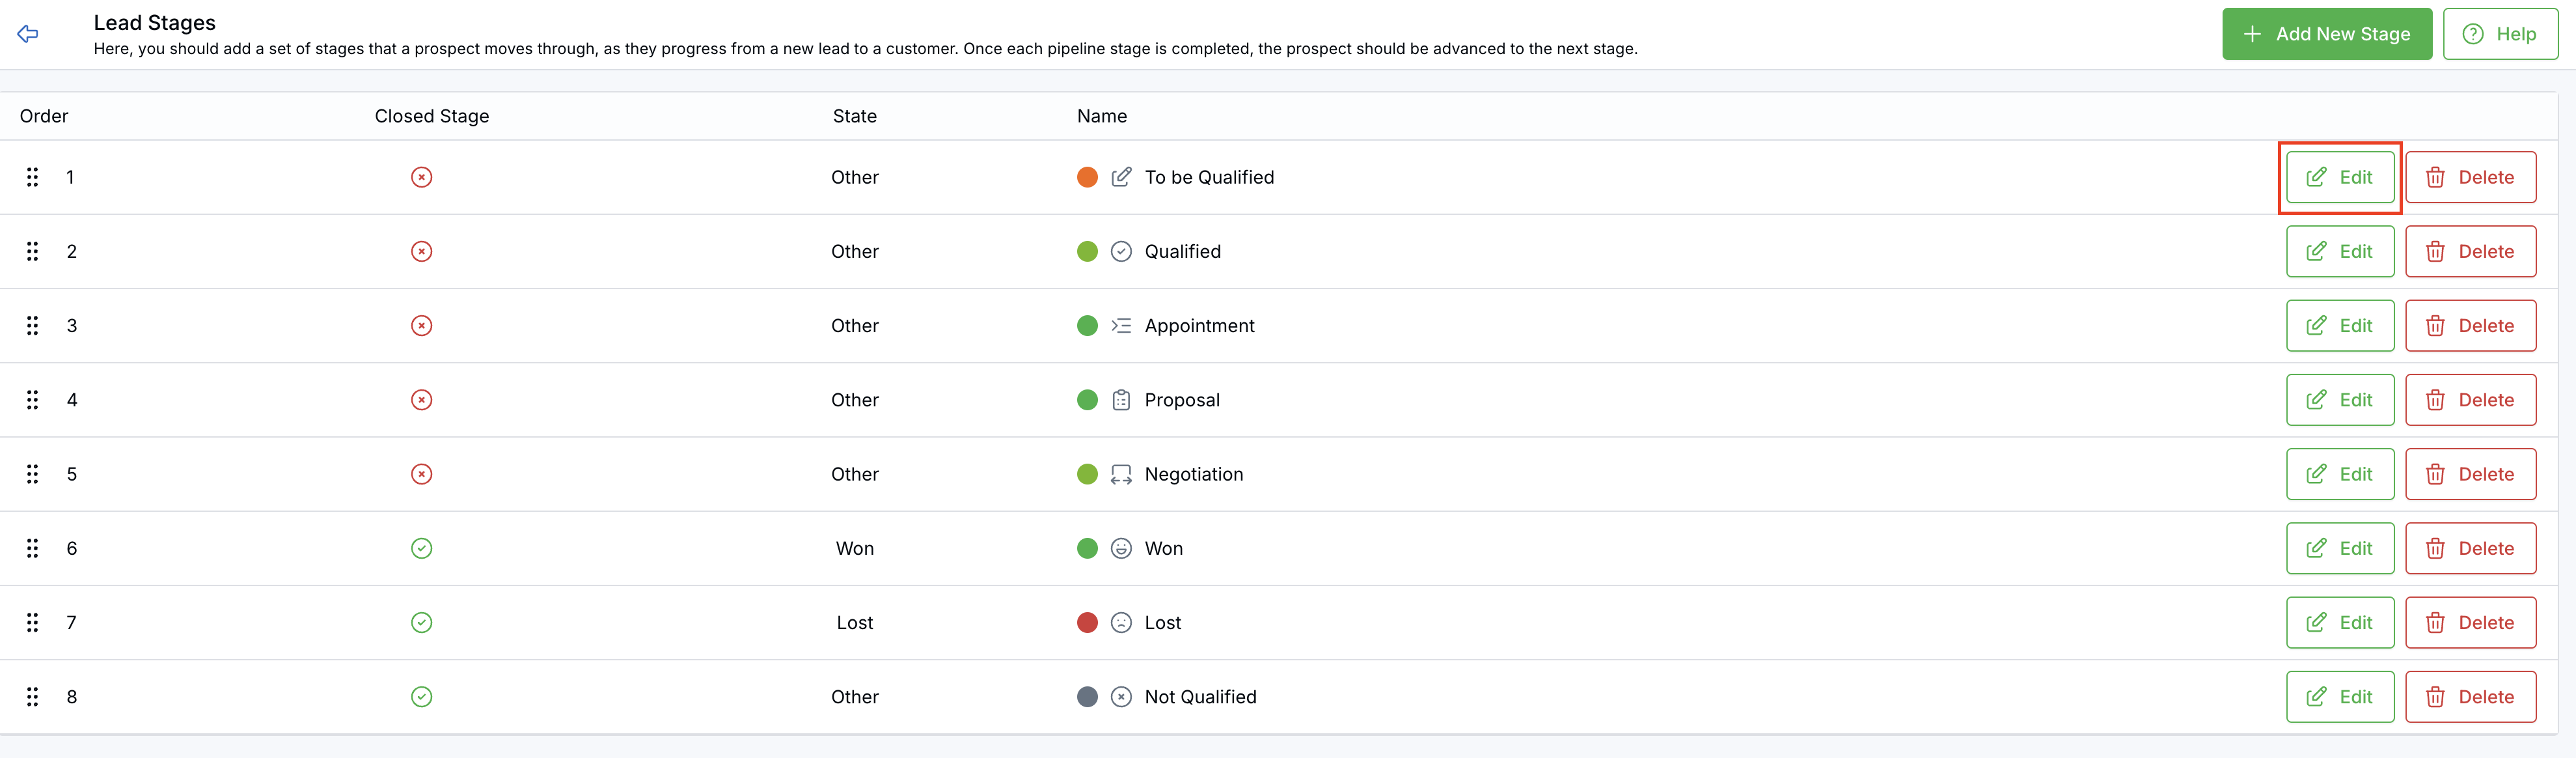
To modify a stage, do the following;
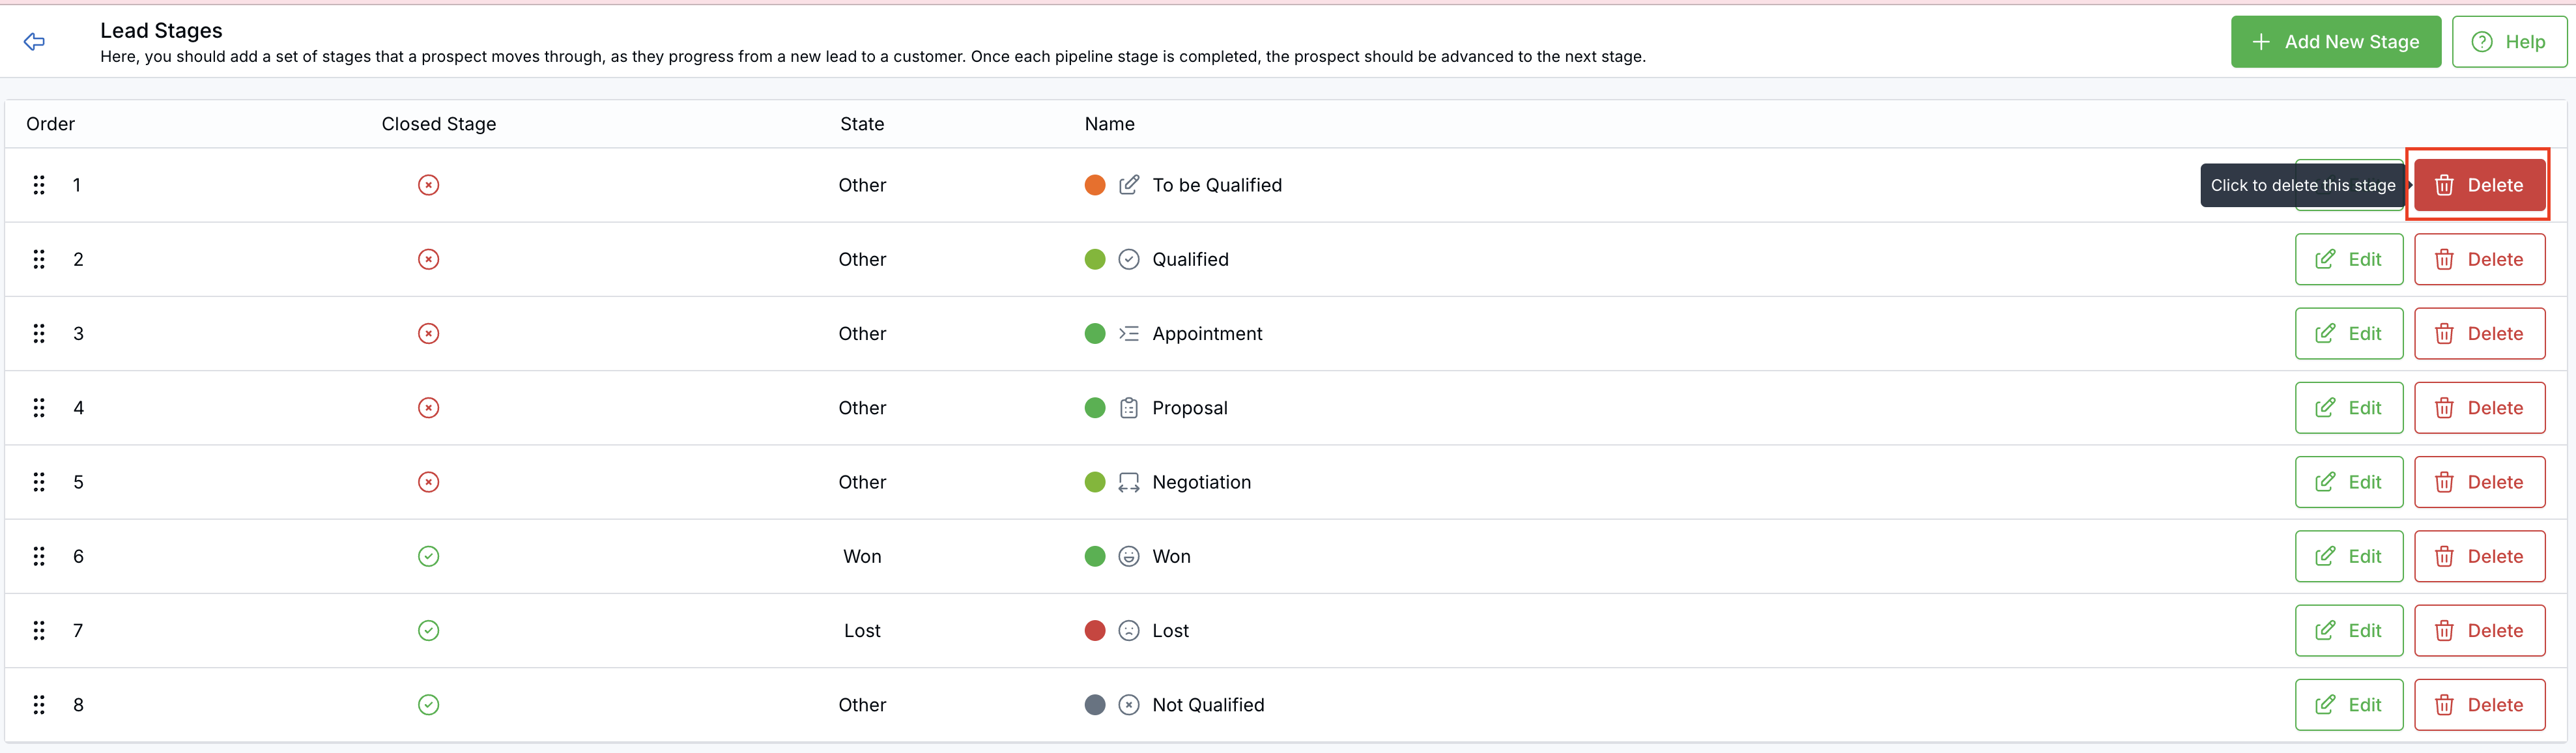
To delete a stage, do the following;
This section describes setting the category for leads.
A lead category helps you to identify the customer's interests and the services they want. You can add a new category from the Categories page and specify a category for the lead.
To add a new category, do the following;
To edit a category, do the following:
To delete a category, do the following:
Before we try to understand what lead management is, we should firstly know what leads are. A business lead is someone who is interested in the product or service that you are selling. Therefore lead management is basically the process of acquiring those leads, interacting with them, tracking them and thereby turning them into potential customer who buys your products.
In a lead management process a set of definitive steps are taken by organizations to engage with leads until they become customers. It includes:
The Lead management system ensures to keeps all your leads, from all various sources in one place, by tracking their activities, and interests. This enables marketing and sales teams to work together on the leads by never missing out any interactions. On the other hand CRM (Customer Relationship Management) systems do the same thing as lead management along with managing other things. They not only manage the complete customer lifecycle from acquiring to conversion, but beyond as well, by retaining the existing customer, find opportunities to up-sell wherever possible.
Therefore our LeadCenter.AI lead management software such as LeadCenter.AI CRM helps to automate the processes of lead management.
Let us understand the different stages in a lead management process in a bit more detail:
The first most important stage is the first stage of identifying and acquiring the business leads. Based on the demographic and behavioral attributes along with the demonstrated interest of the lead, the sales and marketing team can agree upon the buying readiness of the business lead.
After acquiring the leads, the lead tracking software starts tracking the activities and behavior of that lead. The lead management software automates the process of tracking a lead by populating data about the profile’s job title, location, social media profiles etc. It also their online activities like —pages visited, links clicked, resources downloaded and email engagement.
The next step after acquiring leads is to qualify and generate the leads. This can be done by ranking the leads based on their interest in the product or service that you sell, lead’s buying history and their engagement with the company.
You can then generate those qualified leads by creating awareness for your products or services through advertisement, promotional events, PR campaigns, and various B2B and B2C marketing strategies and advertising campaigns.
Scoring Lead:Scoring leads is the carpe diem moment where you seize or in layman terms score your customer. At this stage, the leads are checked to identify if they are worth pursuing which makes them sales-ready leads. Some CRM or Lead Management software gives a score to each lead based on certain key indicators. For example; there are three leads with different job titles, a business owner, a quality expert and an intern, the score for the business owner will definitely be higher than the other two. So the quality score makes it evident that the business owner needs to be scored first. Although we cannot completely ignore the other two leads. But in a way quality and scoring saves time and helps to set the priorities properly to score the lead.
Some leads may not buy your product or service at the moment, but that can very easily change in the future. They are your leads whom you can lead into the nurturing cycle, and later pass it along to sales whenever they become sales-ready.
It is also the process of consistently engaging them across multiple channels by sharing content which interests them. This can be done through email campaigns, SMS or social media platform.
Benefits of using a lead management system
Since in the generation process, we would have gathered enough information, it becomes easy to manage the leads. Otherwise to keep tabs on your leads is a struggle in itself. Also losing a quality lead in the shuffle can be really annoying. This is where the lead management software becomes very valuable as it closely tracks your who are closer to conversion thereby making a better use of your time and money.
Personalizing customer interactions involves providing the customer a center stage and sending them tailor-made content based on their behaviors and attributes. These data were previously gathered by the lead management software right from the outset during the lead generation process. The discussions made with your leads can be stored for future reference, thereby enabling you to personalize customer interactions.
Transparency is very important in lead managementprocess. It is required to ensure a cleaner and healthier work culture in your company. The CRM software is automated software helps to assign the leads to the sales persons in a transparent manner. This helps to overlook the issue of managing workload at the workplace as well as personalization.
Nurturing the potential leads that are likely to convert is a significant process now or in the future that becomes easier to handle with lead management software. Leads that are nurtured or educated by email marketing or campaigning are have more possibility to convert and may end up buying, than those leads that are not nurtured.
Any type of automated process which here refers to the lead management software helps in saving a lot of time. It helps you to automate routine tasks thereby leaving you with more time to pursue the new leads and convert them into an actual business.
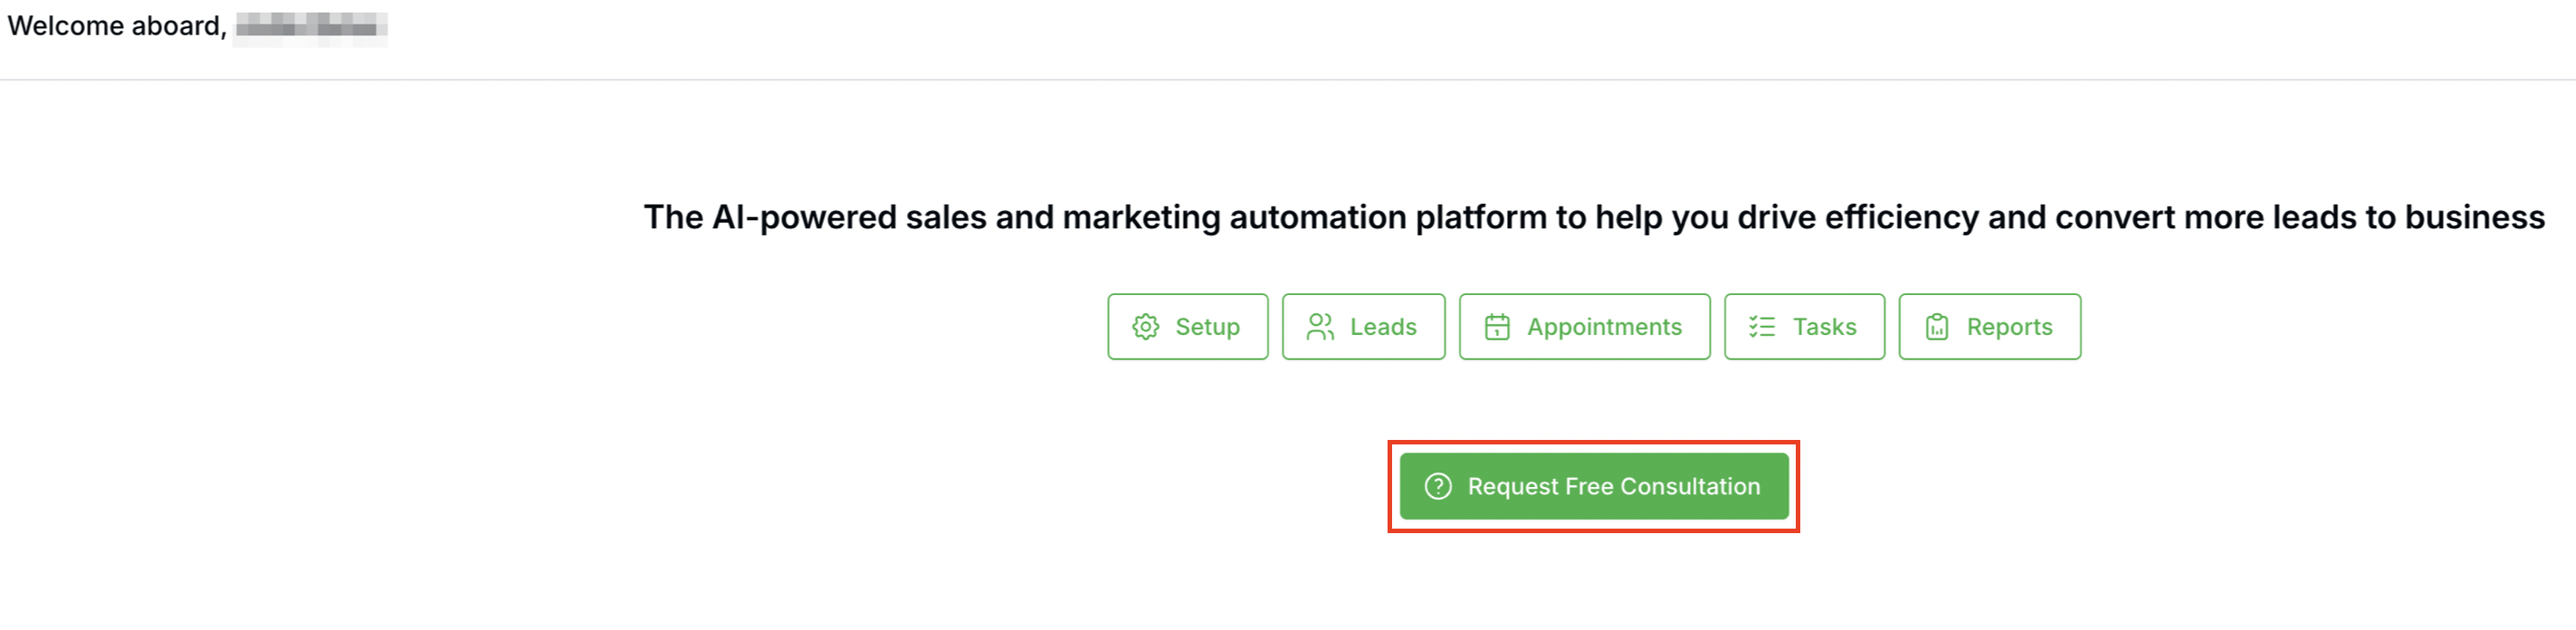
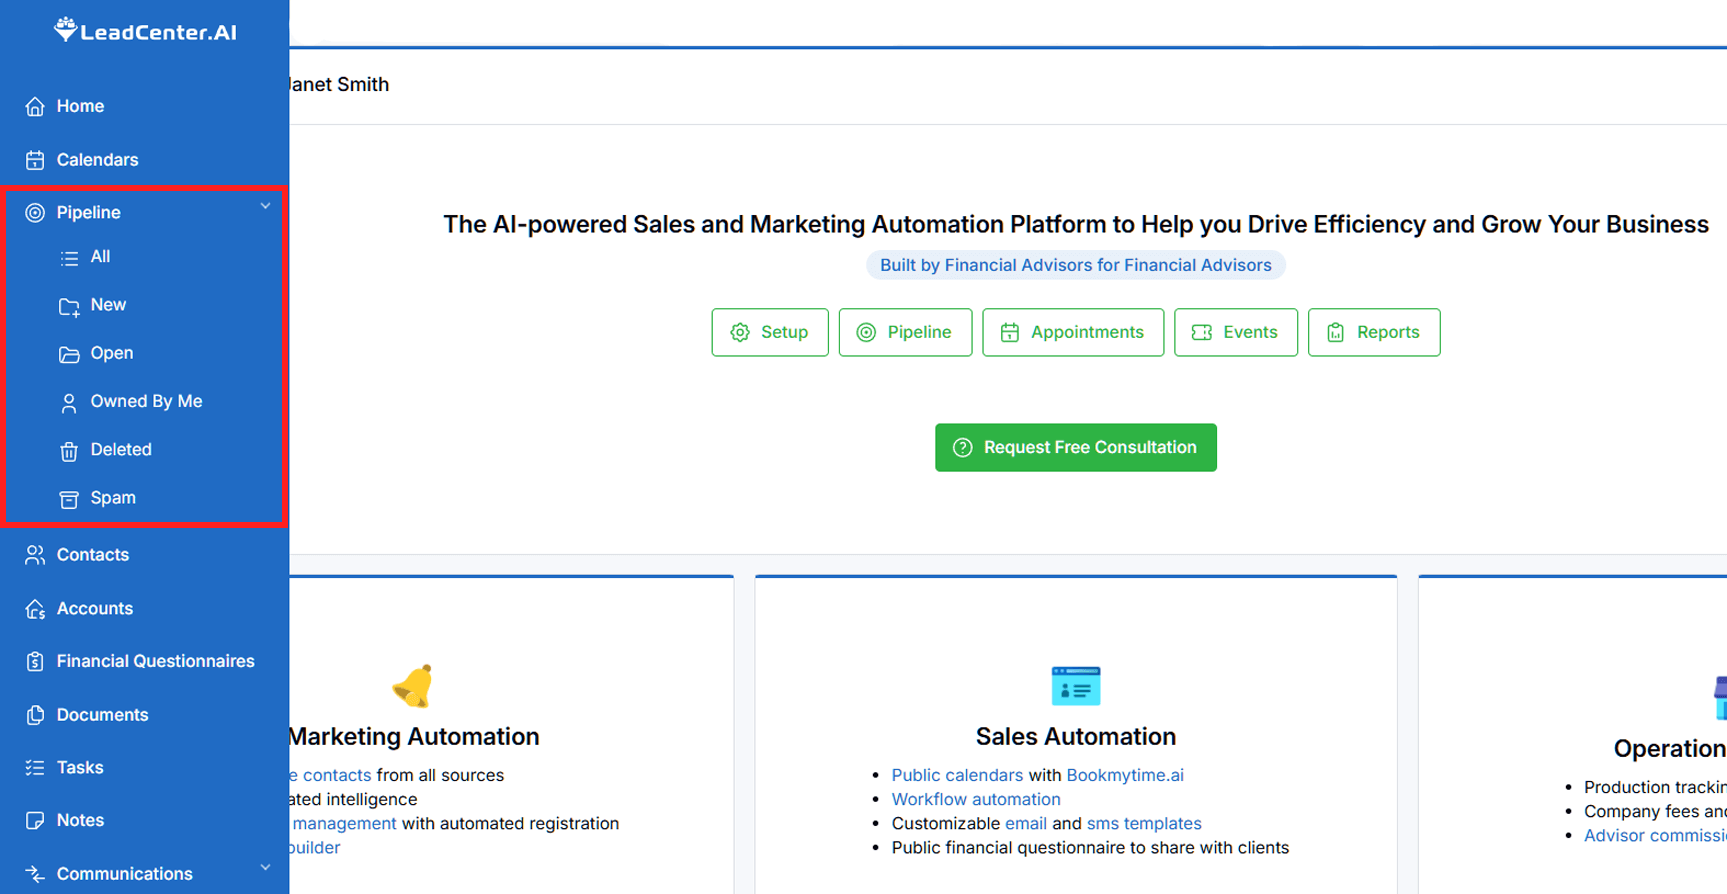
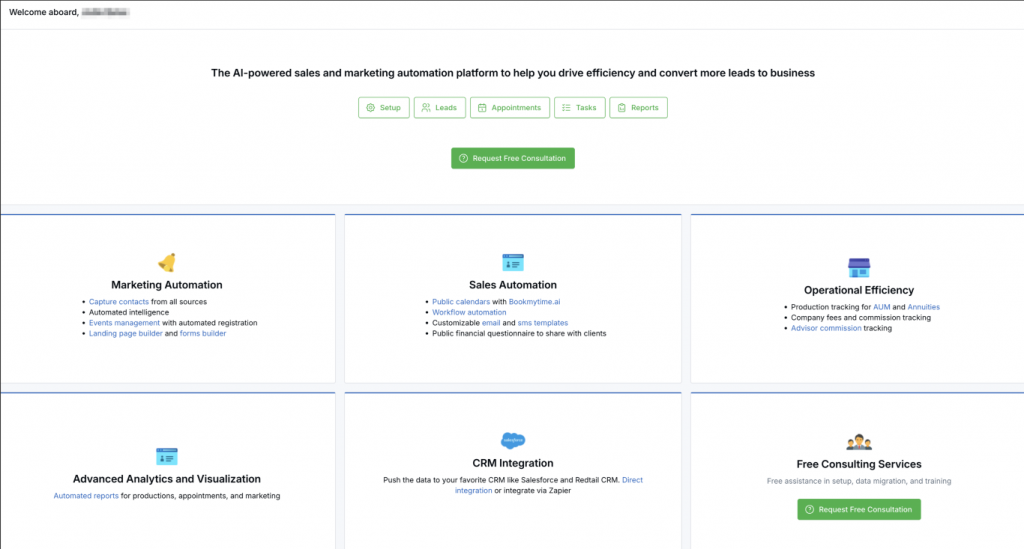
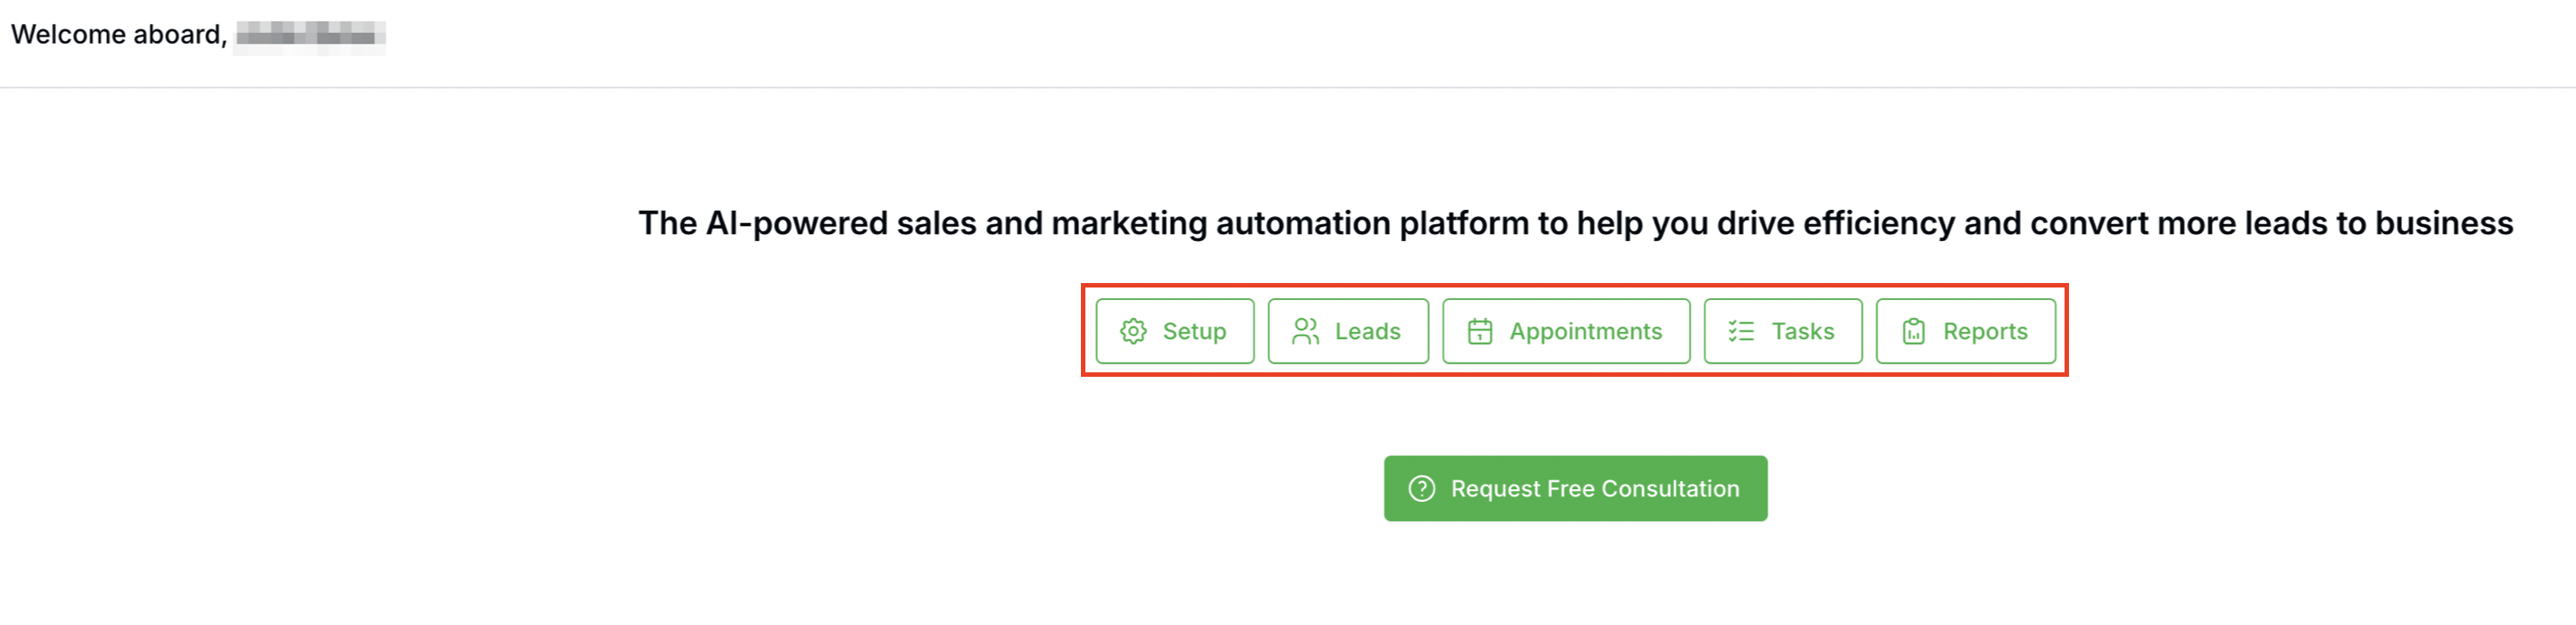
The LeadCenter.AI Home page provides shortcuts to launch the tools required to automate lead capturing and intelligence.
To launch the tools click on the button.
The LeadCenter.AI Analytics section gives us insight into lead analytics like the number of leads generated per day, week, or month.
It also displays the Leads by Source, Stage, and Medium in a pie chart diagram. For more information about Analytics, see Lead Analytics.
The LeadCenter.AI Lead Management system allows you to set the leads, stages, and sources. You can also manage leads from the Store Manager, and send Emails and Messages to leads. For more information about managing leads, see Introduction to Lead Management System (CRM).
The LeadCenter.AI Tasks section allows the user to create and manage tasks. For more information about creating and managing tasks, see Managing Tasks.
LeadCenter.AI Setup is the LeadCenter.AI Settings section, where you can configure your settings. It allows you to ;
For assistance, send an email to support@leadcenter.ai. or click on the Request Free Consultation button.